Experiencing a check engine light in your 1993 Toyota Camry can be concerning, especially when you’re looking for diagnostic solutions. While the term “OBD2” is commonly associated with modern vehicle diagnostics, the 1993 Camry actually utilizes an earlier system known as OBD-I. Don’t worry, accessing these codes at home is simpler than you might think, often requiring nothing more than a paperclip.
To retrieve the diagnostic trouble codes from your 1993 Camry’s OBD-I system, follow these straightforward steps:
-
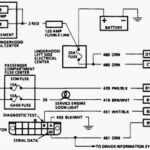
Locate the Diagnostic Box: Open your Camry’s hood and find the small black diagnostic box. It’s typically situated in the engine bay near the left-hand side strut tower. You’ll see the word ‘Diagnosis’ clearly marked on its cover.
-
Prepare Your Paperclip: Take a standard paperclip or a small piece of wire. Straighten it out, as you’ll need to insert it into specific ports within the diagnostic box.
-
Identify TE1 and E1 Ports: Open the cover of the diagnostic box. On the underside of the cover, you’ll find labels indicating the different ports. We are interested in the ports labeled ‘TE1’ and ‘E1’.
-
Connect TE1 and E1: Carefully insert one end of your paperclip into the TE1 port and the other end into the E1 port. Ensure you have a secure connection in both ports.
-
Turn the Ignition ON (Engine OFF): Go inside your Camry and turn the ignition key to the ‘ON’ position. Crucially, do not start the engine.
-
Observe the Check Engine Light: If your paperclip connections are correct, the check engine light on your dashboard will begin to flash. Pay close attention to the pattern of flashes.
-
Interpret the Flash Codes: The check engine light will flash a sequence of codes. A code is represented by a series of flashes, a short pause, and then another series of flashes. For example, code 35 would be three flashes, a short pause, and then five flashes. After each code, there will be a longer pause before the code repeats or the next code is displayed.
-
Record All Codes: It’s possible to have more than one fault code stored. Carefully note down all the codes that are flashed. If a code repeats after a long pause, it means that’s the only fault, or the sequence will continue with a different code if multiple issues exist.
Once you have retrieved the flash codes, you can interpret them using the following list of common OBD-I codes for the 1993 Toyota Camry:
- 12: RPM signal (no RPM signal to ECU within several seconds after engine is cranked)
- 13: RPM signal (no RPM signal to ECU with engine speed above 1,500rpm)
- 14: Ignition signal (no ignition signal to ECU)
- 16: ECU control signal
- 21: Main oxygen sensor
- 22: Coolant temperature sensor
- 24: Intake air temperature sensor
- 25: Oxygen sensor or circuit (lean)
- 26: Oxygen sensor or circuit (rich)
- 27: Sub-oxygen sensor
- 31: MAP sensor
- 41: Throttle position sensor
- 42: Vehicle speed sensor
- 43: Starter signal
- 51: Switch condition signal
- 52: Knock sensor signal
- 53: EGR system
By using this simple paperclip method, you can effectively diagnose the check engine light on your 1993 Camry and gain valuable insights into potential issues. This DIY approach to OBD-I diagnostics can save you time and provide a starting point for addressing any necessary repairs. Remember to consult a repair manual or a professional mechanic for detailed troubleshooting and repair procedures once you have your diagnostic codes.