If you’re trying to diagnose a Check Engine Light or other issues with your 2000 Mazda MPV, you’ll need to locate the OBD2 port. This port is your gateway to accessing your vehicle’s computer system for diagnostic information. Finding the OBD2 port is the first step in using an OBD2 scanner to read trouble codes and understand what might be going wrong with your minivan.
The On-Board Diagnostics II (OBD2) system became standard on vehicles in the United States in 1996, including the 2000 Mazda MPV. This standardized system helps mechanics and car owners alike diagnose vehicle problems efficiently.
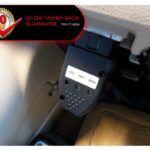
Typically, the OBD2 port in a 2000 Mazda MPV is relatively easy to find. You should look for it in the driver’s side footwell area. Specifically, it is usually located underneath the dashboard on the driver’s side. You might need to crouch down and look up under the dash, often near the steering column.
[Imagine a picture here showing the general location of an OBD2 port under a dashboard]
Once you’ve located the port, you can connect your OBD2 scanner. If you are experiencing issues connecting your scanner or are getting an error message, here are a few troubleshooting steps you can consider:
-
Verify Scanner Compatibility: Ensure that your OBD2 scanner is compatible with the 2000 Mazda MPV. Older Mazda vehicles, like the Millenia mentioned in some discussions, might require a scanner that supports the SAE J1850 PWM protocol. Check your scanner’s manual to confirm compatibility.
-
Check for a Blown Fuse (Though Unlikely Dedicated OBD2 Fuse): While the original forum post mentioned checking for an OBD2 fuse, it’s important to note that there isn’t always a dedicated fuse specifically labeled “OBD2 port” or “diagnostic port”. However, it’s still a good idea to check your vehicle’s fuse box diagram for fuses related to the Engine Control Unit (ECU) or the general diagnostic system. A blown fuse in a related circuit could potentially affect the OBD2 port’s functionality. Your fuse box is usually located either under the dashboard, in the engine compartment, or on the side of the dashboard (accessible when the driver’s side door is open). Consult your owner’s manual for the exact location and fuse diagram.
-
Reset the Vehicle’s Computer: Sometimes, a simple reset of the vehicle’s computer can resolve communication issues. To do this:
- Turn off your Mazda MPV and remove the key from the ignition.
- Disconnect the negative battery cable. This is usually a black cable and is marked with a minus (-) sign. Use a wrench to loosen the nut and carefully remove the cable.
- Wait for 30 seconds. This allows the vehicle’s computer to fully discharge.
- Reconnect the negative battery cable and tighten the nut.
- Pump the brake pedal several times (around 5-10 times). This is another step sometimes recommended to help reset the system.
After resetting, try connecting your OBD2 scanner again to see if the error persists. Keep in mind that resetting the computer might also clear any stored diagnostic trouble codes, including the P1000 code (incomplete diagnostic cycle) mentioned in some discussions. If you need to get your vehicle inspected, you might need to drive it for a while to allow the system to complete its diagnostic cycles.
-
Consider ECU Issues (If Errors Persist): If you’ve tried the above steps and are still getting errors when connecting your OBD2 scanner, there is a possibility of a problem with the vehicle’s Engine Control Unit (ECU) itself. However, this is less common than scanner incompatibility or minor electrical glitches. Before assuming an ECU issue, double-check your scanner, the connection to the OBD2 port, and any other potential simple causes.
[Imagine a picture of a person connecting an OBD2 scanner to a port under the dashboard]
By following these steps, you should be able to locate the OBD2 port on your 2000 Mazda MPV and troubleshoot common issues that might prevent you from connecting with a scanner. Remember to always consult your vehicle’s repair manual or a professional mechanic for specific diagnostic and repair procedures.