Experiencing check engine lights and performance issues with your 2004 Toyota Tundra? Often, the first step in diagnosing these problems is to locate your OBD2 port and read the trouble codes. For your 2004 Toyota Tundra, the OBD2 plug-in location is typically under the dashboard on the driver’s side. Once you’ve connected an OBD2 scanner and retrieved the codes, you might find yourself facing issues related to the Secondary Air Injection System (SAIS). This article provides a DIY guide, inspired by real user experiences, to help you understand, diagnose, and potentially fix common SAIS problems in your 2004 Tundra.
Understanding the Secondary Air Injection System (SAIS) in Your 2004 Tundra
The Secondary Air Injection System (SAIS) is an emissions control system designed to reduce harmful pollutants during cold starts. For the first few minutes after you start your 2004 Toyota Tundra, especially when the engine is cold, the SAIS pumps fresh air into the exhaust system. This additional air helps to heat up the catalytic converters faster, enabling them to operate efficiently and reduce emissions sooner.
However, the SAIS can be prone to failures, leading to check engine lights and, in some cases, reduced engine performance or limp mode. Common trouble codes associated with the SAIS include P1441, P1442, P1443, P1444, P1445, P2440, P2441, P2442, P2443, P2444, P2445, P2446, and P2447. These codes often indicate issues with the air switching valves, air pump, or related components of the SAIS.
Diagnosing SAIS Issues Using Your 2004 Tundra OBD2 Port
When your check engine light illuminates, the first step is to use an OBD2 scanner connected to your 2004 Tundra’s OBD2 port. This port, as mentioned, is usually located beneath the dashboard on the driver’s side. Plug in your scanner and retrieve the diagnostic trouble codes (DTCs). If you encounter codes within the P144x or P244x range, it’s highly likely that you are experiencing a problem with your Tundra’s Secondary Air Injection System.
Common symptoms of a failing SAIS can include:
- Check Engine Light: This is the most obvious sign.
- Limp Mode: In some cases, the engine may enter limp mode, restricting RPMs and speed to protect the engine and emissions system.
- Reduced Engine Power: You might notice a lack of power, especially during acceleration.
- Noisy Air Pump: You may hear unusual noises from the air pump area during a cold start, although sometimes a failing pump can also be silent.
DIY Repair Guide for 2004 Tundra SAIS Issues
Based on user experiences and common repair procedures, here’s a step-by-step DIY guide to address SAIS problems in your 2004 Toyota Tundra. This guide is for informational purposes and should be performed by individuals with mechanical knowledge and experience. Always prioritize safety and consult professional resources if needed.
Disclaimer: Modifying emission control systems may be illegal in your region. This guide is for informational purposes only and should be undertaken with awareness of local regulations.
Steps for SAIS Repair:
-
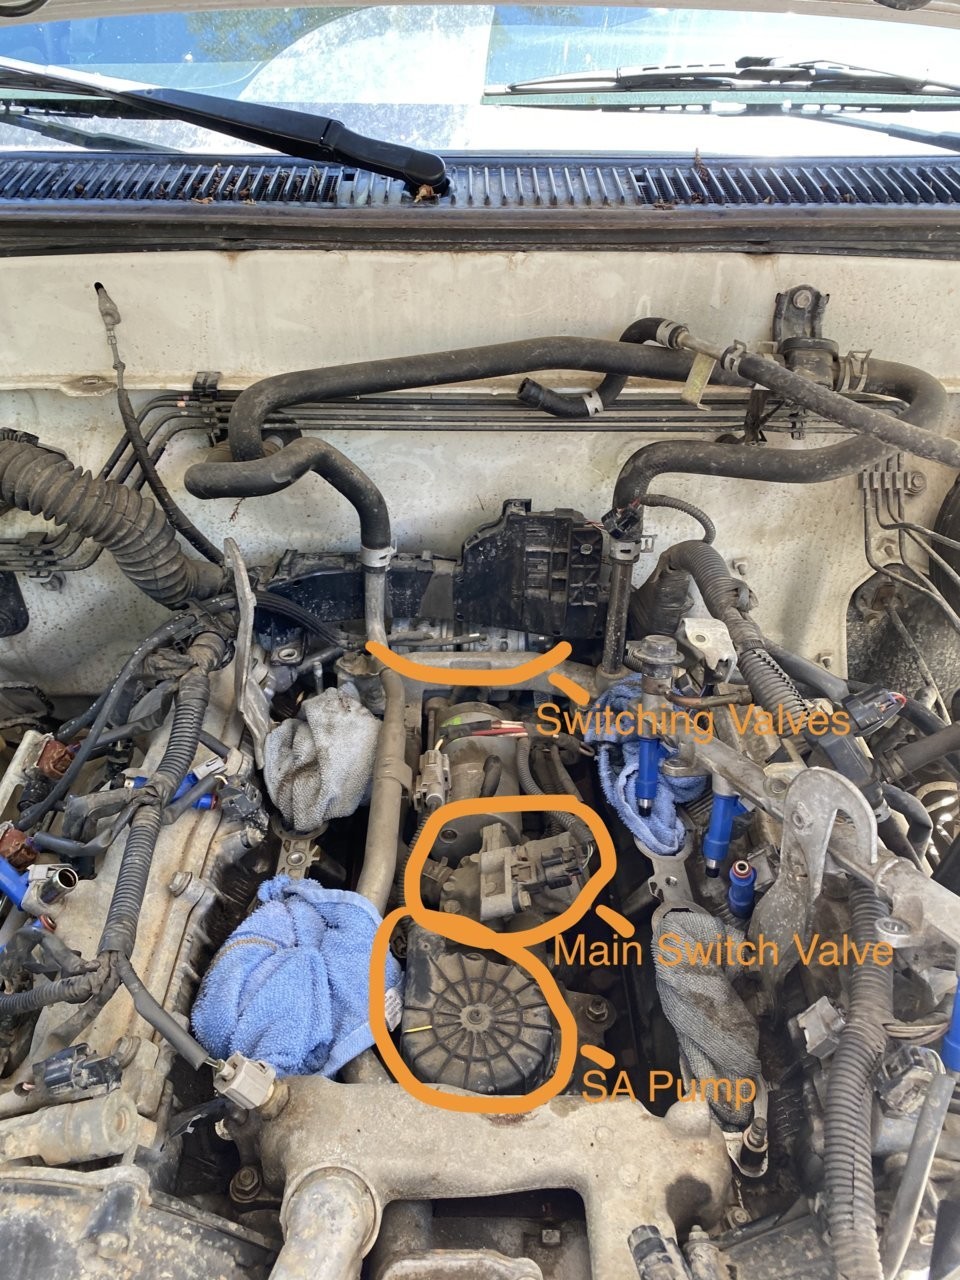
Accessing the SAIS Components: The SAIS components, including the air switching valves and air pump, are located under the intake manifold. Therefore, accessing them requires removing the intake manifold.
-
Intake Manifold Removal:
- Preparation: Disconnect the negative battery terminal. Gather necessary tools, including sockets, wrenches, and potentially a torque wrench.
- Disconnect Components: Carefully disconnect all hoses, vacuum lines, electrical connectors, and the throttle body connected to the intake manifold. Labeling components can be helpful for reassembly.
- Remove Intake Manifold Bolts: Locate and remove all bolts securing the intake manifold to the engine block. These can be in hard-to-reach places.
- Lift off the Intake Manifold: Once all bolts are removed, carefully lift the intake manifold off the engine. Be mindful of any remaining connections and remove the manifold in a way that allows access to the SAIS components underneath.
 empty valley copy.jpg
 -
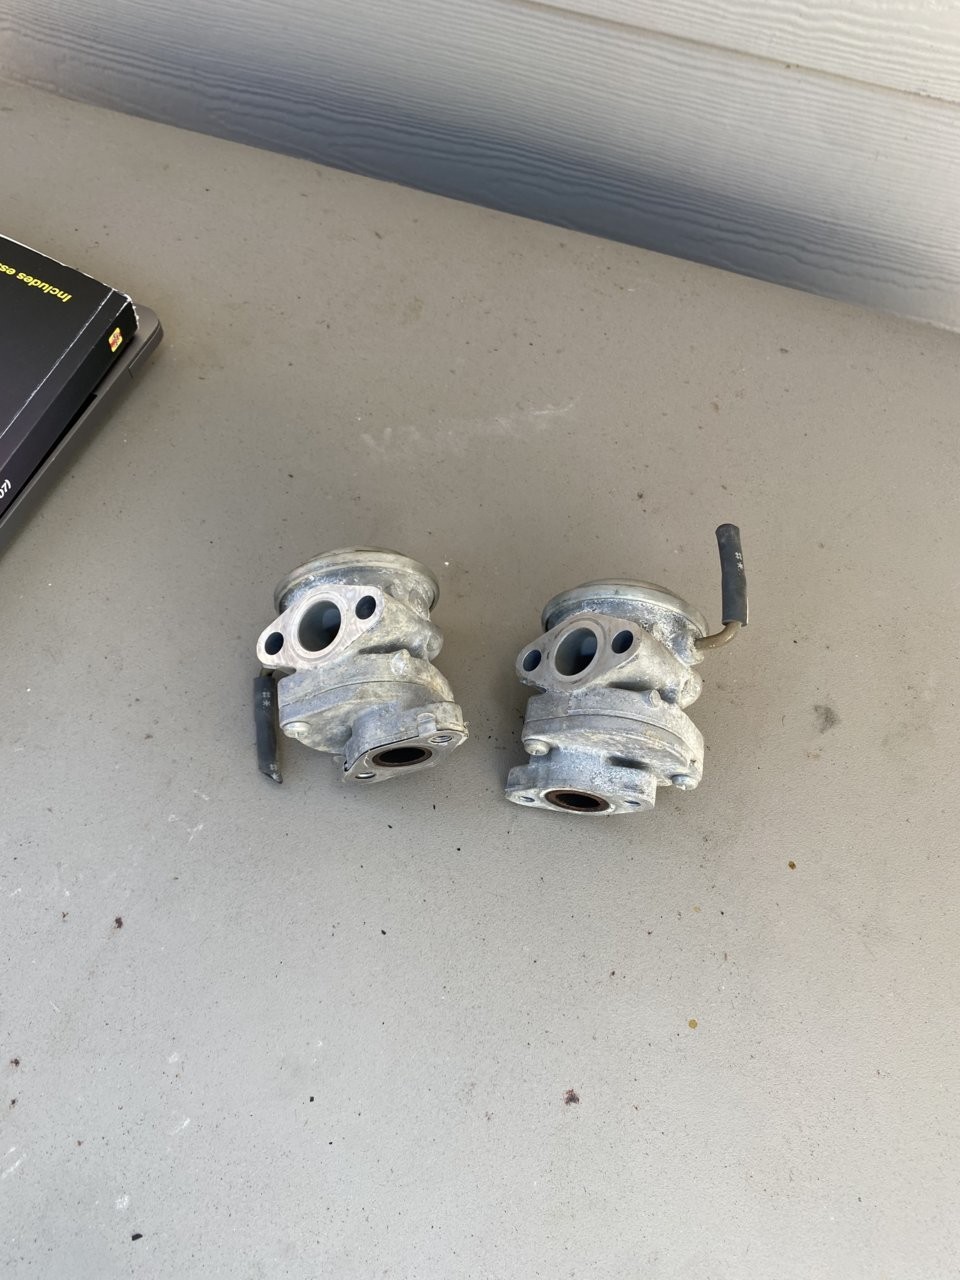
Replacing Air Switching Valves:
- Locate Valves: The air switching valves are typically mounted on or near the cylinder heads, beneath where the intake manifold was located.
- Disconnect and Remove: Disconnect any vacuum lines and electrical connectors attached to the valves. Remove the bolts securing the valves. These bolts can be difficult to access due to their location near the firewall and other engine components.
- Install New Valves: Install the new air switching valves, ensuring new gaskets or seals are used. Torque the bolts to the manufacturer’s specifications. Reconnect vacuum lines and electrical connectors.
 switching valve.jpg
 -
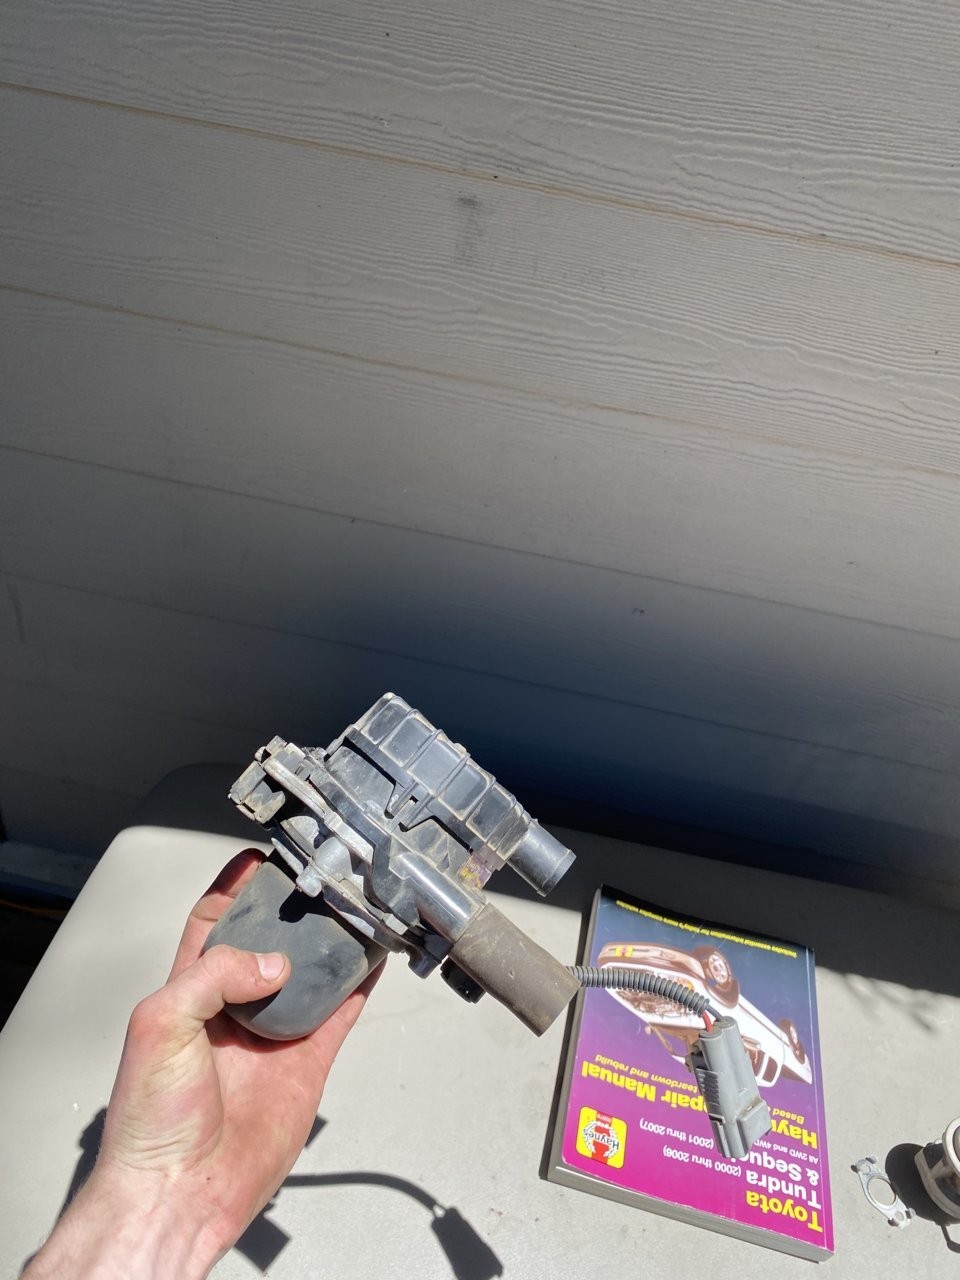
Replacing the Air Pump and Main Switching Valve:
- Locate Air Pump: The air pump is usually located at the front of the engine bay, often mounted to a bracket.
- Remove Air Pump Assembly: Disconnect the electrical connector and hoses connected to the air pump and main switching valve assembly. Remove the bolts securing the pump bracket. You may be able to remove just the pump and main valve from the bracket to simplify the process.
- Install New Pump and Valve: Install the new air pump and main switching valve. Reconnect hoses and electrical connectors. Ensure secure mounting.
 SA pump.jpg
 -
Intake Manifold Reinstallation:
- Clean Surfaces: Ensure the intake manifold and engine block mating surfaces are clean and free of old gasket material.
- Install New Gaskets: Use new intake manifold gaskets.
- Reinstall Manifold: Carefully position the intake manifold back onto the engine block, aligning bolt holes.
- Tighten Bolts: Install and tighten the intake manifold bolts in the correct sequence and to the specified torque.
- Reconnect Components: Reconnect all hoses, vacuum lines, electrical connectors, and the throttle body that were disconnected during removal. Double-check all connections.
-
Final Steps:
- Refill Coolant: If coolant hoses were disconnected from the throttle body, refill the coolant system and bleed any air pockets.
- Reconnect Battery: Reconnect the negative battery terminal.
- Clear Codes: Use your OBD2 scanner to clear the stored trouble codes.
- Test Drive: Start the engine and monitor for any leaks or unusual noises. Take the vehicle for a test drive to ensure the issue is resolved and the check engine light remains off.
 spoiled bitch.jpg
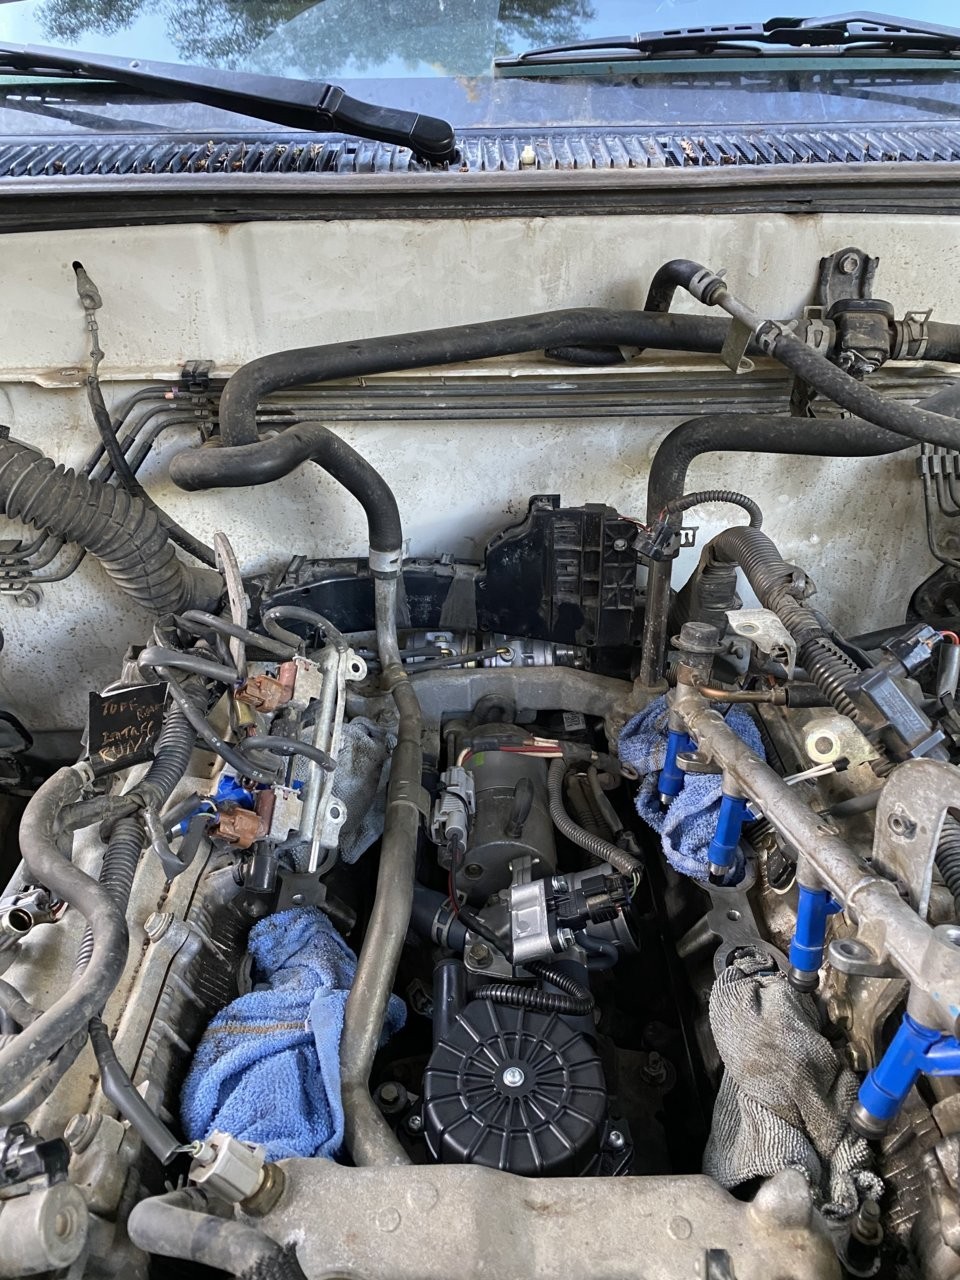 SAIS replaced.jpg
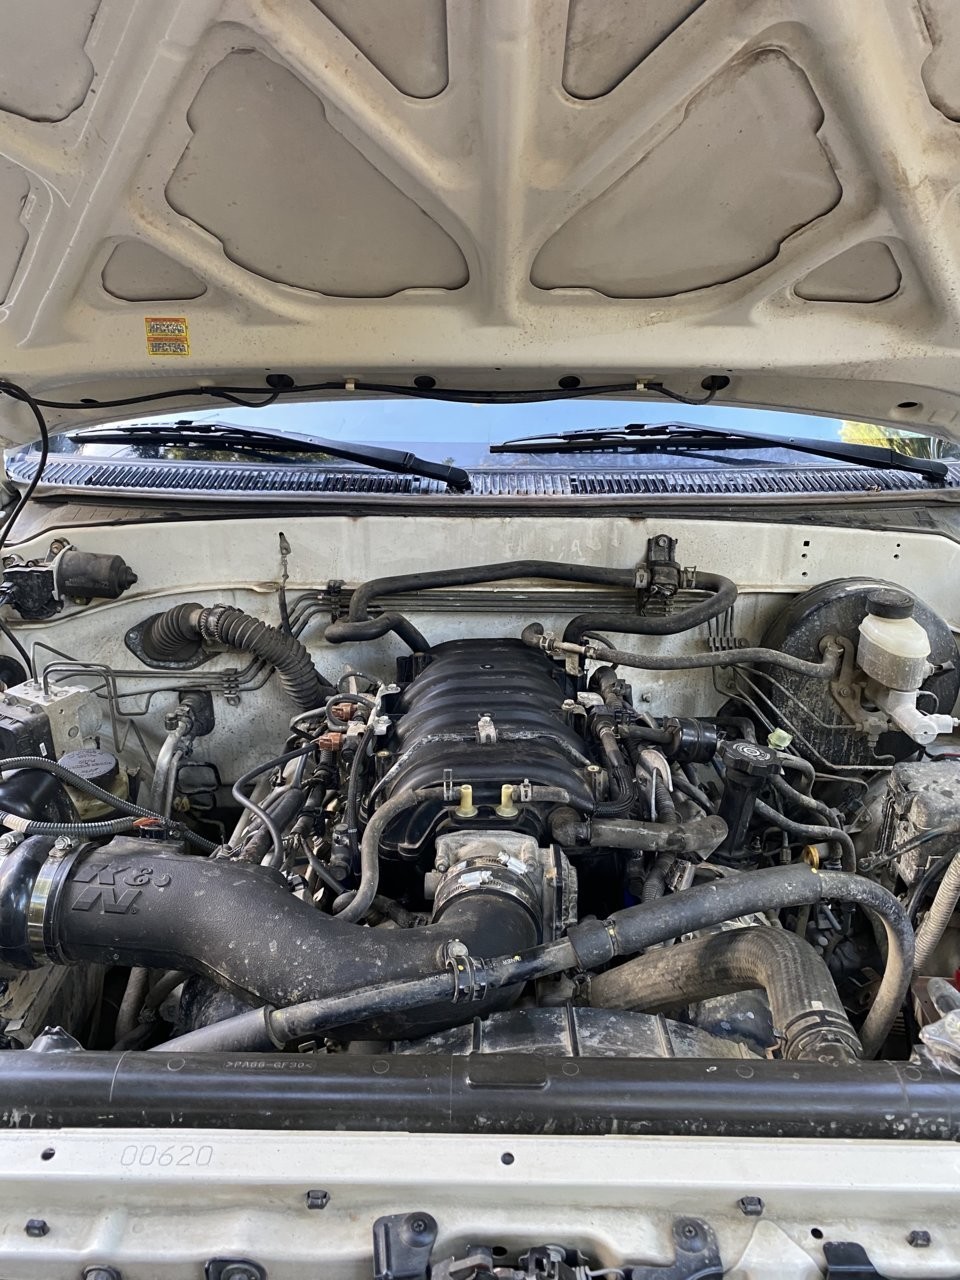 Intake Manifold on.jpg
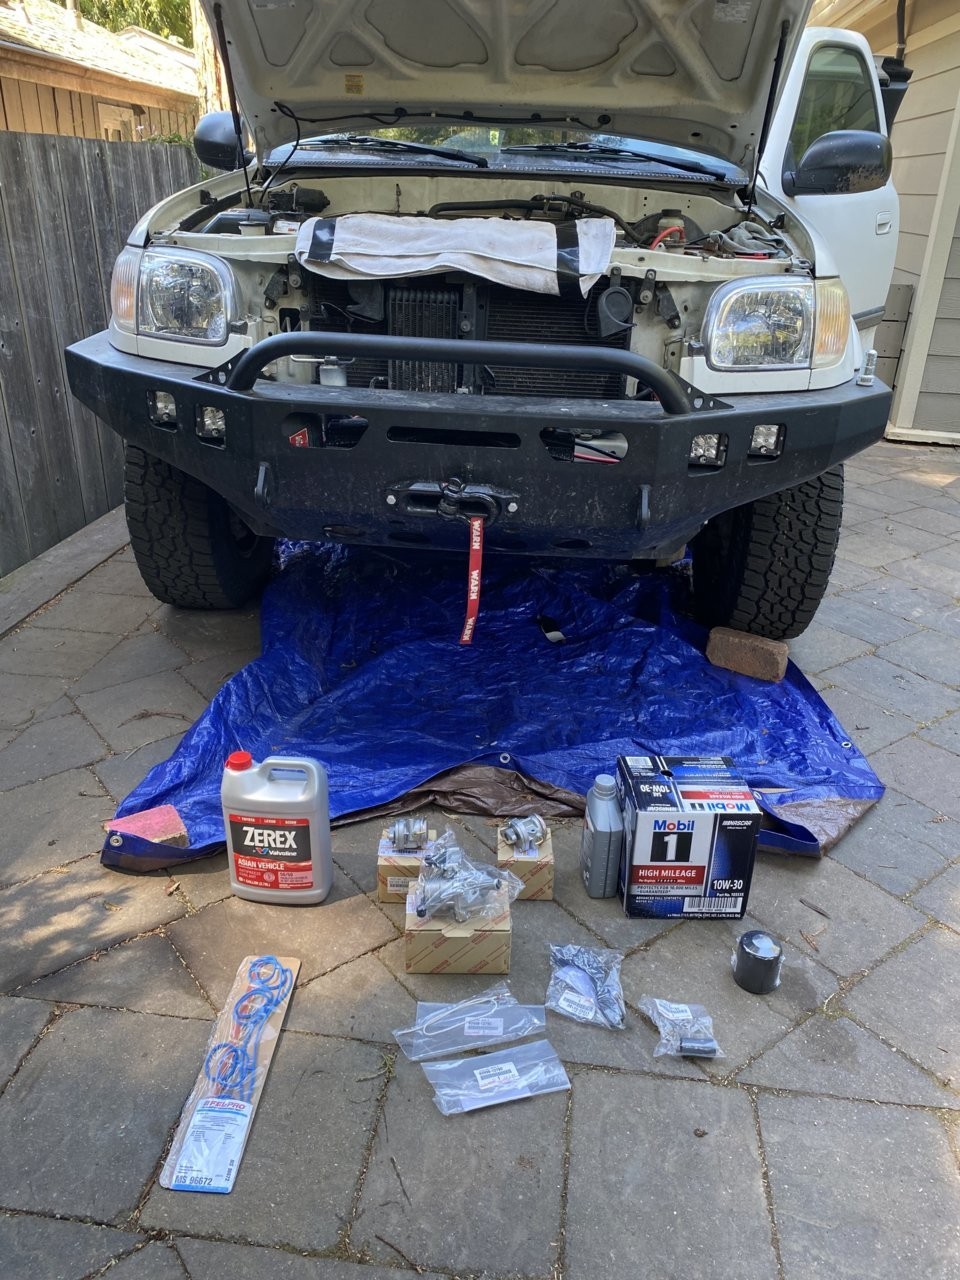
Parts and Tools Needed
- New Air Switching Valves (check part numbers for your 2004 Tundra model)
- New Air Pump (consider compatible aftermarket or OEM options)
- New Main Switching Valve
- Intake Manifold Gaskets
- Throttle Body Gasket (if removed)
- Coolant
- OBD2 Scanner
- Socket Set
- Wrench Set
- Torque Wrench
- Screwdrivers
- Pliers
- Vacuum Line and Hose Removal Tools (optional)
- Brake Cleaner (for cleaning intake manifold and throttle body)
- Brush
Conclusion
Repairing the Secondary Air Injection System on your 2004 Toyota Tundra can be a challenging but achievable DIY task. By understanding the system, correctly diagnosing the issue using your OBD2 port, and following a step-by-step repair guide, you can potentially save significant costs compared to dealership repairs. Remember to always prioritize safety, double-check your work, and consult professional resources if you are unsure about any step of the process. Regular maintenance and prompt attention to check engine lights can help ensure the longevity and performance of your 2004 Toyota Tundra’s emissions system.