The Honda CRX, especially the 1989 model, remains a beloved platform for car enthusiasts. Its lightweight chassis and nimble handling make it an excellent candidate for engine swaps. Many owners look to enhance their CRX’s performance by installing more modern engines, often leading to the question: Can you perform an OBD1 swap in an 89 CRX and then go even further by using an OBD2 engine? The answer is yes, and this guide will walk you through the essentials of undertaking an 89 Honda Crx Complete Obd1 Swap With An Obd2 Engine, ensuring your project is a success.
Understanding the Basics: OBD Systems and Engine Swaps
Before diving into the specifics of swapping an OBD2 engine into your OBD1 (or technically OBD0 originally) 1989 Honda CRX, it’s crucial to understand the On-Board Diagnostics (OBD) systems. OBD systems are standardized electronic systems that provide self-diagnostic and reporting capabilities for a vehicle.
- OBD0: Predominantly found in vehicles manufactured before the mid-1990s, including the 1989 CRX. OBD0 systems are less sophisticated, offering basic diagnostic information.
- OBD1: An improvement over OBD0, OBD1 systems offer more detailed diagnostic data and were common in the early to mid-1990s Hondas.
- OBD2: Became standard in 1996 and is still in use today. OBD2 is significantly more advanced, providing comprehensive diagnostics and emissions information.
When considering an engine swap, especially across different OBD generations, compatibility and wiring are primary concerns. Swapping to an OBD1 system in an 89 CRX is often a stepping stone to accommodate more powerful OBD1 engines. However, directly installing an OBD2 engine adds another layer of complexity.
Why Choose an OBD2 Engine for Your 89 CRX OBD1 Swap?
While it might seem more straightforward to stick with an OBD1 engine after performing an OBD1 swap on your 89 CRX, there are compelling reasons to consider an OBD2 engine:
- Engine Availability and Variety: OBD2 engines, particularly B-series and K-series from later Honda models, are widely available and offer a broad spectrum of performance options.
- Modern Technology: OBD2 engines often incorporate more advanced engine management systems, potentially offering better fuel efficiency and power output compared to older OBD1 counterparts.
- Future-Proofing: While challenging, converting to OBD2 engine management can make future upgrades and diagnostics easier, as OBD2 is the current standard.
Essential Components for an 89 CRX OBD1 Swap with OBD2 Engine
To successfully install an OBD2 engine into your 89 CRX, which has undergone an OBD1 conversion, you’ll need to consider several key components:
-
OBD2 Engine: Select your OBD2 engine. Popular choices include B18C-R, B16B-R, or newer K-series engines. Ensure it fits physically within the CRX engine bay (B-series are generally easier fits).
-
OBD1 Conversion Harness: Since you’re starting with an 89 CRX (originally OBD0), an OBD1 conversion is typically the first step. This involves a wiring harness adapter to allow an OBD1 ECU to work with the CRX’s wiring.
-
OBD2 to OBD1 ECU Adapter Harness (or standalone ECU): This is crucial for managing an OBD2 engine with your OBD1 system. You have a couple of options here:
- OBD2 to OBD1 Jumper Harness: These harnesses adapt the OBD2 engine wiring to be compatible with an OBD1 ECU. While potentially more affordable, they might limit the full potential of the OBD2 engine and could be less straightforward to set up for all OBD2 engine features.
- Standalone Programmable ECU: A more advanced (and often preferred) approach is to use a standalone programmable ECU designed to manage OBD2 engines in older chassis. This offers full control over engine parameters, allows you to bypass OBD limitations, and can be tuned for optimal performance. Examples include Hondata, AEM, or Haltech ECUs.
-
OBD1 ECU: If you are using an OBD2 to OBD1 jumper harness, you will need a compatible OBD1 ECU for the engine you are swapping in (or a tunable OBD1 ECU).
-
Engine Mounts: Ensure you have the correct engine mounts for installing your chosen OBD2 engine into the CRX chassis. Engine mount kits are available for common swaps.
-
Transmission and Axles: Select a transmission compatible with your OBD2 engine and the CRX chassis. You may need custom axles to match the transmission and CRX hubs. Refer to engine swap guides for specific engine/chassis combinations. The original article provides some guidance on transmission requirements depending on the engine series.
-
Shift Linkage: You might need to adapt or replace the shift linkage to work with the new transmission.
-
Cooling System: Ensure your CRX’s radiator and cooling system are adequate for the new engine, especially if it’s a higher-performance OBD2 engine. Upgrades might be necessary.
-
Fuel System: Verify that your fuel pump and fuel lines can supply enough fuel for the OBD2 engine. Upgrades might be required for high-performance engines.
-
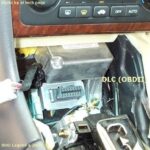
Wiring and Sensors: Meticulous wiring is key. You will need to integrate the OBD2 engine’s sensors and wiring into the CRX’s electrical system, adapting to the OBD1 or standalone ECU setup you choose. The provided wiring information in the original article, while for later Civic models, gives an idea of the sensor considerations (VTEC, Knock Sensor, etc.).
Image: ECU pinout diagram for 92-95 Honda Civic and 94+ Acura Integra, illustrating the complexity of ECU wiring which is a critical aspect of engine swaps.
Step-by-Step Overview (Conceptual)
While a detailed step-by-step guide is beyond this article’s scope, here’s a conceptual overview of the process:
-
OBD1 Swap Foundation: If not already done, perform the initial OBD1 swap on your 89 CRX. This usually involves installing an OBD1 distributor, ECU, and potentially modifying some wiring.
-
Engine Removal: Remove the original CRX engine and transmission.
-
Engine Bay Preparation: Clean and prepare the engine bay. Address any rust or maintenance issues.
-
Engine and Transmission Installation: Install the OBD2 engine and compatible transmission using appropriate engine mounts.
-
Wiring and ECU Management: This is the most complex step.
- If using an OBD2 to OBD1 jumper harness, carefully connect the harness, ensuring all sensors and actuators are correctly wired to the OBD1 ECU.
- If using a standalone ECU, install and wire it according to the manufacturer’s instructions, connecting it to all necessary engine sensors and the CRX’s electrical system. This will likely involve more custom wiring but provides greater control.
-
Cooling and Fuel System Hookup: Connect the cooling system and fuel lines to the new engine.
-
Drivetrain Connection: Install axles and connect the shift linkage.
-
Initial Startup and Diagnostics: Before the first start, double-check all connections, fluid levels, and wiring. Start the engine and monitor for any issues. Use an OBD1 scanner initially (or the standalone ECU’s diagnostic capabilities) to check for error codes.
-
Tuning and Refinement: If using a standalone ECU, professional tuning is highly recommended to optimize performance and ensure reliability. Even with an OBD2 to OBD1 harness, some tuning adjustments might be beneficial.
Challenges and Considerations
- Wiring Complexity: Wiring is the most challenging aspect of this swap, especially when dealing with OBD conversions and standalone ECUs. Patience, meticulousness, and potentially professional wiring help are essential.
- OBD2 Sensor Integration: OBD2 engines often have more sensors than older systems. Ensuring all necessary sensors are functional and correctly integrated is critical for engine management and performance.
- Tuning: Proper tuning is crucial to get the OBD2 engine running correctly in the older CRX chassis and to maximize performance.
- Cost: This type of swap can be expensive, especially with standalone ECUs, custom parts, and potential professional labor costs.
Conclusion
Performing an 89 Honda CRX complete OBD1 swap with an OBD2 engine is an ambitious but rewarding project. It combines the classic appeal of the CRX with the performance potential of modern Honda engines. While it requires careful planning, meticulous execution, and a solid understanding of automotive electronics, the result can be a significantly enhanced and uniquely customized CRX. For those considering this swap, thorough research, access to reliable wiring diagrams, and potentially professional assistance are highly recommended to ensure a successful and high-performing outcome.