So, you’re contemplating an OBD1 conversion for your BMW 325i, specifically a ’94 model, and navigating the OBD1 vs OBD2 landscape? You’re in the right place. Many enthusiasts consider this modification for performance gains and a more direct engine management system. Let’s dive into what an OBD1 conversion entails, particularly for a 94 325i, and clarify whether it’s the right move for you. It’s more than just swapping parts; it’s a detailed process requiring careful attention to electronics and mechanics.
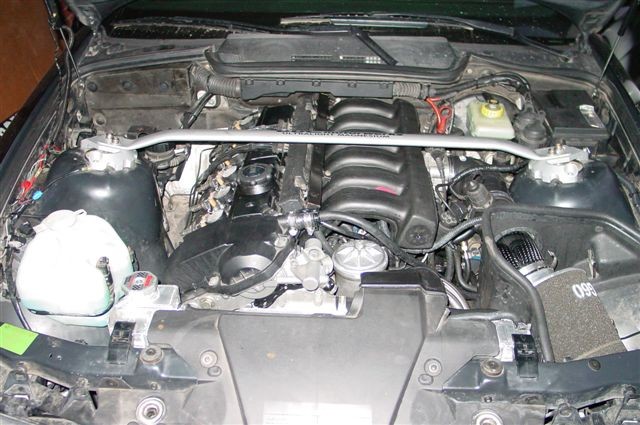
Before we get started, let’s visualize what an OBD2 setup might look like before such a conversion, similar to the starting point for many BMW owners.
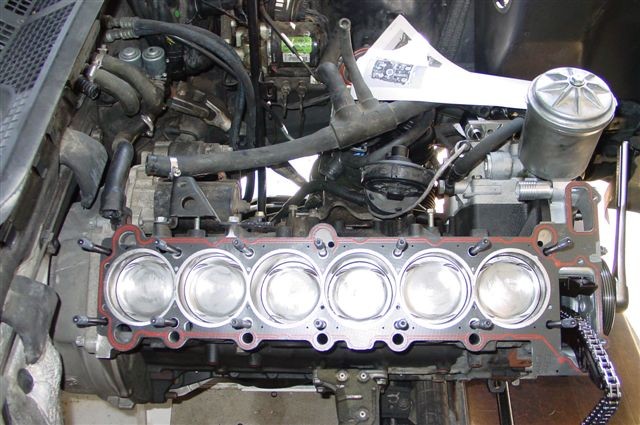
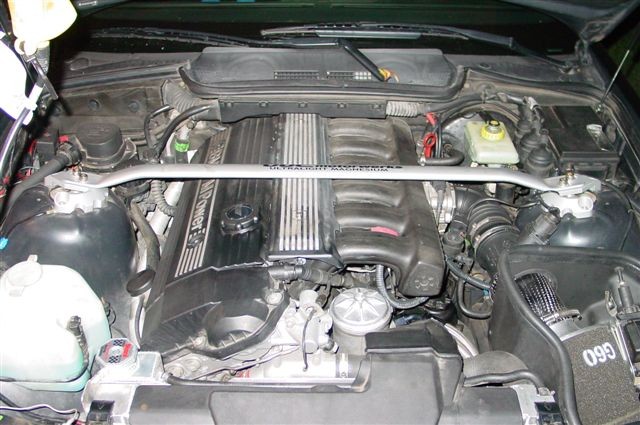 OBD2 S52 Engine Before Conversion
For this guide, we’ll focus on converting an OBD2 system, similar to a ’99 M3 with OBD2 management and EWS (BMW anti-theft), to OBD1. The core components you’ll need are typically sourced from a ’94 325i OBD1 system. A popular ECU choice is the red-label 413, known for its non-EWS origins, making it ideal for conversions. Performance chips, like those from Active Autowerkes, are often used to optimize the system post-conversion.
To successfully execute this conversion on your 94 325i, or similar models, gather these essential OBD1 components:
- OBD1 Engine Harness: The backbone of your new engine management system.
- OBD1 ECU (413 “red label”): Favored for its non-EWS compatibility, simplifying the process.
- OBD1 Performance Chip: To tune the engine’s parameters with the new OBD1 system.
- OBD1 Intake Manifold: A key component for potential performance improvements.
- OBD1 Fuel Rail: Necessary for the OBD1 fuel delivery system.
- OBD1 Crank Position Sensor: Different in location and type compared to OBD2.
- OBD1 Cam Position Sensor: To ensure compatibility with the OBD1 engine management.
- OBD1 Knock Sensors (x2): For engine safety and performance under OBD1 management.
- OBD1 Oxygen Sensor: OBD1 systems typically use a single pre-catalyst sensor.
- OBD1 HFM (Hot Film Mass Air Meter): To measure intake airflow for the OBD1 ECU.
- OBD1 Main Engine Coolant Hose: Due to differences in the cooling system layout.
- OBD1 Throttle Boot: To connect the OBD1 throttle body and intake components.
- OBD1 Throttle Body (Optional): While OBD2 can be adapted, OBD1 ensures direct fit.
- OBD1 Valve Cover and Coil Packs (Optional): Primarily for aesthetic and wiring routing considerations.
While the component list might seem straightforward, the OBD1 conversion for your 94 325i involves numerous intricate steps. Let’s delve into the specifics of each stage, addressing potential challenges and solutions.
1. Valve Cover and Coil Packs: OBD1 vs OBD2 Considerations
The OBD2 valve cover isn’t designed for OBD1 coil pack wiring. OBD2 wiring enters from the passenger side, whereas OBD1 enters from the driver’s side. You have two main options here. You can retain your OBD2 valve cover and coil packs, modifying the valve cover to accommodate the wiring. Alternatively, switching to an OBD1 valve cover necessitates using OBD1 coil packs. Both coil types are compatible with the OBD1 harness, so the choice is yours, often depending on aesthetic preference or ease of modification. In this example, the decision was made to keep the OBD2 valve cover and modify it slightly to route the wiring, a common approach for those wanting to maintain certain engine aesthetics.
Here’s a visual comparison to understand the difference in coil pack setups:
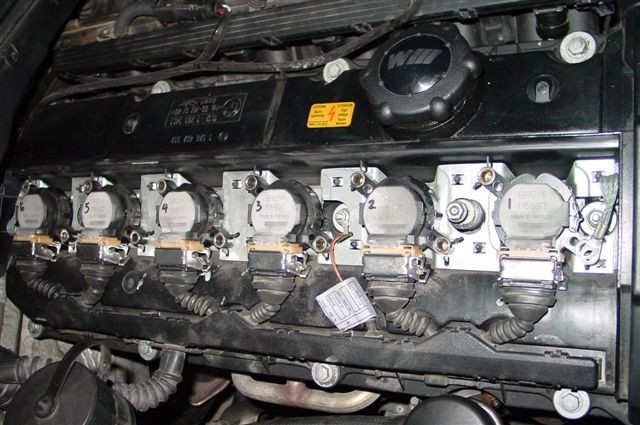 OBD2 Coil Pack Setup Detail
OBD2 coil pack arrangement, showing the wiring entry points.
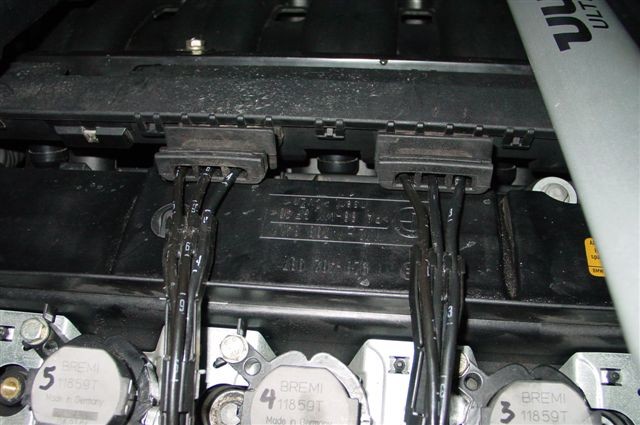 OBD1 Coil Pack Setup Detail
OBD1 coil pack configuration, highlighting the different wiring layout.
2. VANOS Solenoid Wiring Adaptation
The OBD2 VANOS (Variable Valve Timing) solenoid wire connector is shorter than its OBD1 counterpart. To address this, you can either replace your OBD2 solenoid with an OBD1 version, or, more commonly, extend the OBD2 wiring. A convenient solution is using BMW part # 12-52-2-274-971, a transmission harness originally intended for backup lights. This harness has identical connectors, making it perfect for extending the VANOS solenoid wiring without cutting and splicing wires.
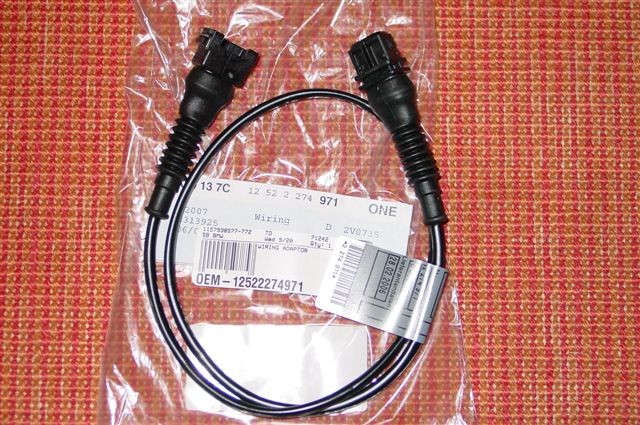 BMW Transmission Harness for VANOS Extension
A BMW transmission harness, part number 12-52-2-274-971, utilized to extend the OBD2 VANOS solenoid wiring for OBD1 compatibility.
3. Coolant Pipe and Timing Cover Variations
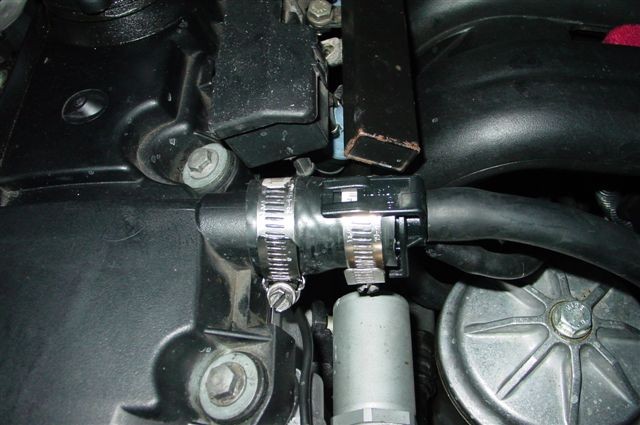
A notable difference lies in the main coolant pipe connecting to the timing cover. OBD2 models use a fixed metal pipe with sealant, while OBD1 employs a rubber hose connected to an aluminum neck on the timing cover. You have a couple of choices here. You can replace the OBD2 timing cover with an OBD1 version, which is a more involved process. Alternatively, a coolant pipe adapter is available from aftermarket BMW parts suppliers like Bimmerworld or Turner Motorsport. This adapter fits into the OBD2 timing cover and is secured with JB Weld, allowing for a clamp-on connection for the OBD1 coolant hose. This adapter approach is often preferred for its simplicity and cost-effectiveness compared to a full timing cover swap.
 Coolant Pipe Adapter Location on Engine Block
The coolant pipe adapter (aluminum pipe, lower center), installed on the OBD2 timing cover, facilitating the connection of the OBD1 coolant hose.
4. Intake Manifold: The Source of Performance Gains
The OBD1 (M50) intake manifold is frequently cited as a primary reason for OBD1 conversions, especially for 94 325i models and similar engines. It’s known for superior airflow compared to OBD2 (M52/S52) manifolds. Using the OBD1 manifold is crucial for realizing the performance benefits of this conversion. The OBD1 manifold includes an air temperature sensor and a vacuum port for the fuel pressure regulator. Importantly, the M50 intake manifold is a direct bolt-on to M52/S52 cylinder heads, simplifying this part of the conversion.
5. Throttle Body Compatibility and Adapters
You can use your existing OBD2 throttle body, but it requires an adapter for proper gasket sealing. The OBD1 throttle body has a flat mating surface, while OBD2 is recessed. Solutions include using an adapter plate, which provides mating surfaces for both gasket types, or an extended gasket designed to bridge the gap. Of course, opting for an OBD1 throttle body eliminates the need for any adapters, ensuring a direct, straightforward fit.
6. Coolant Temperature Sender Configuration
OBD2 systems use a single coolant temperature sender, whereas OBD1 uses two. For the conversion, you can splice the OBD1 harness wiring to use your OBD2 sender. A cleaner, plug-and-play solution is a coolant temperature sender wiring adapter, available from suppliers like Turner Motorsport. This adapter simplifies the wiring and maintains a more professional installation.
7. Crank Position Sensor: Location and Type
The OBD2 crank position sensor is located on the engine block, while OBD1 is on the timing cover. You must switch to an OBD1 crank position sensor for this conversion. Simply leave the OBD2 sensor in place to plug the hole; it will no longer be functional in the OBD1 system.
8. Fuel Line Modifications for OBD1 Fuel Rail
The fuel delivery system differs significantly between OBD1 and OBD2. OBD2 fuel rails have both lines at the rear, and the regulator is under the car. OBD1 has the supply line at the front and return at the back, with the regulator on the fuel rail itself. Using the OBD1 fuel rail mandates fuel line modifications. You’ll need to remove the OBD2 regulator and run new fuel lines to the OBD1 rail. Bridge the gap left by the OBD2 regulator with new fuel line, connecting the fuel filter feed to the front of the OBD1 rail and the return line accordingly. Don’t forget to connect the OBD1 fuel pressure regulator vacuum line to the intake manifold vacuum port.
9. PCV System and Crankcase Ventilation
The Positive Crankcase Ventilation (PCV) system also varies between OBD1 and OBD2. If retaining the OBD2 valve cover, you can try to adapt the OBD2 PCV system, potentially needing to relocate the breather valve. With an OBD1 valve cover, use the OBD1 breather valve, connecting its vacuum line to the ICV/intake manifold plug and the oil drain line to the dipstick. A catch can setup is another option. In this example, a hybrid approach was used, connecting the OBD2 valve cover to the OBD1 breather valve via a hose and joining the oil drain line to the dipstick.
 Hybrid PCV System Setup for OBD1 Conversion
A custom PCV setup, combining OBD2 valve cover with OBD1 breather valve and connections.
10. Idle Control Valve (ICV) and Connections
The good news is that the OBD1 and OBD2 Idle Control Valves (ICVs) are identical and interchangeable. You can reuse your OBD2 ICV. You’ll need to source the correct connector and hoses to connect the ICV to the OBD1 intake manifold and throttle boot vacuum port.
11. Fuel Tank Breather Valve Adaptation
Similarly, the OBD2 fuel tank breather valve can be reused. You will need fittings to adapt the vacuum hose connection to the OBD1 throttle boot vacuum port. Standard hardware store fittings can often be adapted to make these connections.
12. Oxygen Sensors, Secondary Air Pump, and Emissions
OBD2 systems incorporate a secondary air pump, an emissions control system absent in OBD1. This system is entirely removed during an OBD1 conversion. You’ll also eliminate the four OBD2 oxygen sensors (two pre-cat, two post-cat). OBD1 systems use only a single pre-catalyst oxygen sensor. Remember to plug the O2 sensor ports in the exhaust with M18 bolts, readily available at auto parts stores.
13. Oil Pan and Dipstick: No Changes Needed
Contrary to some misconceptions, you can retain your OBD2 oil pan and dipstick. No OBD1 oil pan or dipstick is necessary for this conversion; the OBD2 components are fully compatible.
14. EWS (Immobilizer) System Considerations
The presence of BMW’s EWS (immobilizer) varies across E36 models. Using an ECU from a non-EWS vehicle, like the red-label 413, is recommended. However, ignition issues might still arise. A simple modification to the main engine harness can bypass EWS. Locate wire #66 on the ECU connector (typically solid green or black/violet) and cut it. Insulate both ends with electrical tape. This bypasses the EWS system, especially crucial when using a non-EWS ECU in a car originally equipped with EWS.
15. Power Distribution and Grounding – Careful Reconnection
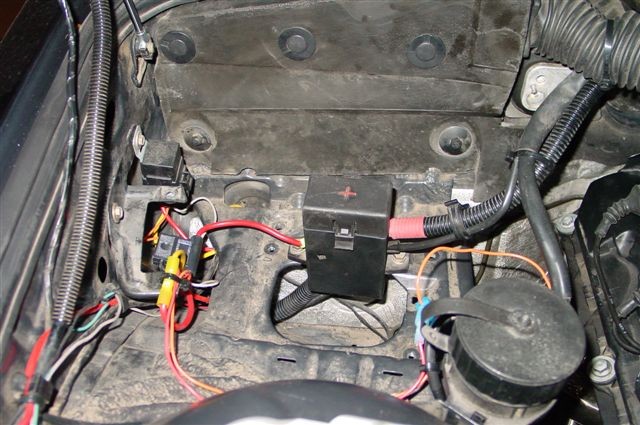
Before disconnecting anything, meticulously label or photograph power and ground connections. Always disconnect the negative battery terminal before working on electrical systems. The OBD2 power distribution box, typically near the ECU compartment, will need slight relocation to reach the OBD1 harness power connections. Removing the secondary air pump provides space to remount the distribution box closer to the firewall. Ensure correct reconnection: RED wires are power, BROWN or BLACK are grounds. Double-check by peeling back wiring sheath if unsure. There will be power feeds to the starter and fuse box, and a ground connection near the OBD diagnostic port. A small ground wire from the spark plug rail should be grounded to the engine hoist loop bolt on the VANOS unit.
 Relocated Power Terminal for OBD1 Harness
The relocated OBD2 power distribution terminal, adapted to connect with the OBD1 engine harness.
16. General Wiring – Label Everything!
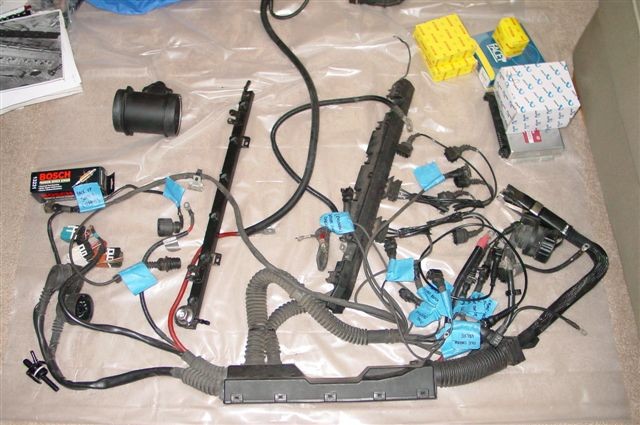
Stress this enough: LABEL ALL CONNECTORS before disconnecting the OBD2 harness and installing the OBD1 harness. Use Bentley wiring schematics as your guide. As you unplug each connector on the OBD2 harness, label it with painter’s tape and a marker, indicating its destination. This is critical as connectors can look similar, and the engine bay becomes a maze of wires during the swap. Taking pictures of power and ground connections during disassembly is also invaluable. Pay special attention to starter wiring – even with few wires, confusion is easy.
 Labeled OBD1 Engine Harness for Installation
An OBD1 engine harness meticulously labeled, ready for installation, ensuring correct connections.
Conclusion: OBD1 Conversion – A Performance Path for Your 94 325i
Converting your 94 325i or similar BMW from OBD2 to OBD1 is a significant undertaking, but as detailed, entirely achievable. It’s definitely more than a simple “electronics swap,” requiring careful planning, component sourcing, and meticulous execution, particularly with wiring and fuel systems. The potential benefits, especially in performance gains and a simplified, more tunable engine management system, are often considered worth the effort by BMW enthusiasts.
The final configuration after a successful OBD1 conversion might look like this:
 OBD1 S52 Engine After Conversion
The completed OBD1 S52 engine conversion, showcasing the new engine management setup.
Remember, thorough research, patience, and attention to detail are your best allies in this project. If you have questions, don’t hesitate to seek advice from experienced individuals or online BMW communities. Happy wrenching, and enjoy the potential performance boost of your OBD1 converted BMW!
