Swapping engines in your 1992-2000 Honda Civic can significantly boost its performance and breathe new life into a classic ride. For owners of the 1995 Honda Civic EX, understanding the intricacies of wiring, especially concerning OBD2 systems, is crucial for a successful swap. This comprehensive guide, tailored for the English-speaking DIY mechanic, will walk you through the necessary wiring adjustments for various engine swaps in your 1995 Civic EX, ensuring a smooth and efficient upgrade.
Understanding OBD Systems and Your 1995 Honda Civic EX
Before diving into the wiring specifics, it’s important to clarify the On-Board Diagnostics (OBD) system in your 1995 Honda Civic EX. Despite the “OBD2” keyword often associated with this era, the 1995 Honda Civic EX is actually OBD1. This distinction is vital because OBD1 and OBD2 systems have different wiring configurations and diagnostic protocols. While this guide focuses on the 1995 Civic EX and the keyword “1995 Honda Civic Ex Obd2”, we will address both OBD1 and OBD2 engine swap scenarios to provide the most helpful information for enthusiasts exploring engine upgrades for this model year.
This guide aims to be your ultimate resource for navigating the wiring complexities of engine swaps, whether you’re upgrading within the OBD1 realm or considering integrating OBD2 components. We’ll cover various engine and ECU combinations, focusing on practical, step-by-step instructions to make your engine swap project a success.
Swapping an OBD1 Engine/ECU into Your 1995 OBD1 Civic EX
For many 1995 Honda Civic EX owners, sticking with an OBD1 engine and ECU setup is a straightforward and popular choice. The good news is that for 1992-1995 Civics, the Vehicle Speed Control (VTEC) wiring is already pre-run on the shock tower to ECU harness. This means using a 1992-1995 EX/Si engine harness simplifies VTEC connections, making them essentially plug and play.
D16Z6/D15B(JDM)*/Mini Me with P28 ECU
The D16Z6 (from 92-95 Civic Si) and JDM D15B VTEC engines are common and potent upgrades for non-VTEC Civic models. When pairing these engines with a P28 ECU (a popular, programmable OBD1 ECU), the wiring process is relatively simple.
* JDM D15B Note: If your Japanese Domestic Market (JDM) D15B engine lacks a VTEC pressure switch, you’ll need to install one. This is easily remedied by unscrewing the bolt where the switch should be and threading in a VTEC pressure switch from any 1990-2001 Honda Civic, Integra, or Accord.
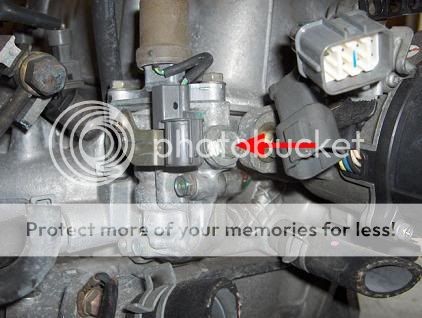 JDM VTEC solenoid
Specific Wiring for Different 1995 Civic EX Trims:
- DX/LX (D15B7): If your 1995 Civic EX started as a DX or LX model (non-VTEC D15B7 engine), you’ll need to wire up both the VTEC solenoid and the VTEC pressure switch to the P28 ECU. All other connections should be plug and play. Refer to Figure 1 for OBD1 ECU wiring details.
- CX (D15B8): Similar to the DX/LX, CX models (D15B8 engine) require wiring for the VTEC solenoid and pressure switch to the P28 ECU (Figure 1). Crucially, if your CX model is not already equipped with a 4-wire Oxygen (O2) sensor setup, you will also need to wire the three additional O2 sensor connections to the ECU, as detailed in Figure 1.
- VX (D15Z1): For VX models (D15Z1 engine), VTEC wiring follows the same procedure as above. If you plan to utilize a knock sensor and Intake Air Bypass (IAB) wiring (though often unnecessary with a chipped P28 ECU), consult Figure 1. VX models may also have a 7-wire O2 sensor. If so, you’ll need to convert it to a 4-wire configuration using readily available diagrams such as http://www.hybridautomotive.com/tech/o2/.
B16A3/B17A/B18C1/B18C (OBD1 JDM) with Chipped P28/P30/P61/P72 ECU
Upgrading to a B-series VTEC engine like the B16A3 (Del Sol Si), B17A (Integra GSR), B18C1 (Integra GSR), or JDM OBD1 B18C (Integra Type R) offers a significant performance leap. These swaps typically utilize chipped OBD1 ECUs such as P28, P30 (Civic Si/CRX Si), P61 (Integra GSR), or P72 (Integra Type R).
Wiring Considerations Based on Original 1995 Civic EX Trim:
- EX/Si (D16Z6): If your 1995 Civic EX was originally an EX or Si (D16Z6 engine), VTEC wiring remains plug and play. Wiring for the knock sensor and IAB (Figure 1) is optional and often skipped when using a chipped P28 ECU, as these features may not be fully utilized or necessary with aftermarket tuning. All other wiring connections should be plug and play.
- DX/LX (D15B7): Similar to D-series swaps, DX/LX models will require wiring for VTEC. Knock sensor and IAB wiring (Figure 1) can be omitted if using a P28 ECU. The rest of the wiring should be plug and play.
- CX (D15B8): CX models again need VTEC wiring. Knock sensor and IAB wiring (Figure 1) are optional with a chipped P28. If your CX has a 1-wire O2 sensor, you’ll need to upgrade to a 4-wire sensor by wiring the additional connections as shown in Figure 1. All other wiring should be plug and play.
- VX (D15Z1): Reuse the existing VTEC solenoid and pressure switch wiring for a plug-and-play VTEC connection. If your VX model has a 7-wire O2 sensor, convert it to a 4-wire setup (http://www.hybridautomotive.com/tech/o2/).
B18A (OBD1)/B18B in DX/CX/VX/EX using P74/P75 ECU or Chipped OBD1 ECUs
For those opting for non-VTEC B-series engines like the OBD1 B18A (Integra RS/LS) or B18B (Integra RS/LS), using a P74 (Integra RS/LS) or P75 (Civic EX/Si) ECU, or any chipped OBD1 ECU, simplifies the swap process.
Trim-Specific Notes:
- LX/DX/EX (D15B7/D16Z6): These models are essentially plug and play with this swap.
- CX/VX (D15B8/D15Z1): Also plug and play. For 1-wire O2 sensor CX models, wire in the three additional wires for a 4-wire O2 sensor (Figure 1). If your VX has a 7-wire O2 sensor, convert it to 4-wire (http://www.hybridautomotive.com/tech/o2/).
Integrating an OBD2 Engine with an OBD1 ECU in Your 1995 OBD1 Civic EX
Swapping in a newer OBD2 engine while retaining an OBD1 ECU is a common approach to manage costs and ECU tuning options. For your 1995 Civic EX, this often involves adapting the OBD2 engine’s wiring to be compatible with your OBD1 vehicle harness and ECU.
D16Y8 with P28 ECU
The D16Y8 (96-00 Civic EX) VTEC engine is a popular OBD2 upgrade. When using a P28 OBD1 ECU, consider these points:
- EX/Si/VX (D16Z6/D15Z1): Mostly plug and play, including VTEC. The knock sensor on the D16Y8 will not be used with the P28 ECU. The distributor from your original EX/Si/VX (D16Z6/D15Z1) may not directly bolt onto the D16Y8 head perfectly. While usable, not all mounting points will align. To use the D16Y8 distributor, you’ll need an OBD2A or OBD2B to OBD1 adapter harness. The Intake Air Temperature (IAT) sensor is not located on the D16Y8 intake manifold. You’ll need to relocate your IAT sensor into the intake arm (Figure 3) or use the Z6/Z1 manifold, which bolts directly to the Y8 head. Reuse your original Z6/Z1 injectors as the D16Y8 injectors have different connectors. For VX models, use EX/SI/DX injectors for similar flow rates to the D16Y8 injectors. Also, reuse your original Z6/Z1 alternator as the D16Y8 alternator uses a different plug style. The Crankshaft Speed Fluctuation (CKF) sensor near the crank on the D16Y8 will not be used; simply secure it out of the way. For VX models, convert the 5-wire O2 sensor to a 4-wire sensor (http://www.hybridautomotive.com/tech/o2/).
Figure 3: Relocating the OBD1 IAT sensor to the intake arm.
- LX/DX/CX (D15B7/D15B8): Mostly plug and play. You will need to wire up the VTEC solenoid and pressure switch (Figure 1). Reuse your original DX/CX distributor, as it will bolt up. To use the D16Y8 distributor, an OBD2A or OBD2B to OBD1 adapter harness is required. Relocate the IAT sensor to the intake arm (Figure 3) or use the CX/DX manifold, which fits the Y8 head. You can use your original DX injectors (same flow rate). For CX models, consider upgrading to EX/SI/DX injectors for better flow, similar to D16Y8 injectors. Reuse your original CX/DX alternator due to plug differences. The D16Y8 CKF sensor is not used; secure it out of the way.
B16A2/B18C1 (OBD2)/B18C5 with Chipped P28/P30/P72
Upgrading to OBD2 B-series VTEC engines like the B16A2 (99-00 Civic Si), OBD2 B18C1 (96-01 Integra GSR), or B18C5 (97-01 Integra Type R) with chipped OBD1 ECUs (P28, P30, P72) requires similar adaptations.
- EX/SI/VX (D16Z6/D15Z1): Mostly plug and play, including VTEC. The knock sensor will not be used with a P28 ECU, but will function with other chipped ECUs if wired. To use the OBD2 A2/C1/C5 distributor, you’ll need an OBD2A or OBD2B to OBD1 adapter harness. Relocate the IAT sensor to the intake arm (see image in Figure 3). Reuse your original Z6 injectors, as OBD2 injectors have different connectors. For VX models, use EX/SI/DX injectors for similar flow rates to OBD2 B-series injectors. Use an OBD1 B-series alternator for plug-and-play compatibility. The CKF sensor on the OBD2 B-series engine is not used; secure it out of the way. For VX models, convert the 5-wire O2 sensor to 4-wire (http://www.hybridautomotive.com/tech/o2/).
- DX/CX (D15B7/D15B8): Mostly plug and play. Wire up VTEC as shown in Figure 1. The knock sensor is not used with P28 but can be wired for other chipped ECUs. Use an OBD2A or OBD2B to OBD1 adapter harness for the OBD2 distributor. Relocate the IAT sensor to the intake arm (see image in Figure 3). Reuse your original DX injectors. For CX models, upgrade to EX/SI/DX injectors for suitable flow rates. Use an OBD1 B-series alternator. The CKF sensor is not used. For 1-wire O2 CX models, convert to 4-wire using Figure 1.
B18B/B20B/Z (OBD2) with P75 ECU
Using OBD2 non-VTEC B-series engines like the B18B (96-01 Integra RS/LS), B20B (CRV), or B20Z (CRV) with a P75 ECU offers another straightforward swap option.
- EX/SI/VX/DX/CX (D16Z6/D15Z1/D15B7/D15B8): Mostly plug and play. For the distributor, use an OBD1 B18 distributor for plug-and-play or an OBD2 LS distributor with an adapter harness. Use an OBD1 B-series alternator for plug-and-play. For EX/SI/DX models, reuse your original injectors. For VX/CX, use EX/DX/SI injectors. The CKF sensor is not used. For 1-wire O2 CX models, convert to 4-wire (Figure 1). For VX 7-wire O2 sensors, convert to 4-wire (http://www.hybridautomotive.com/tech/o2/).
OBD0 Engine into Your 1995 OBD1 Civic EX with OBD1 ECU
If you’re considering using an older OBD0 engine with an OBD1 ECU in your 1995 Civic EX, here’s what to consider:
B18A (OBD0) with P75 OBD1 ECU
Using an OBD0 B18A (88-91 Integra) engine with a P75 OBD1 ECU is relatively straightforward.
- EX/SI/DX/CX/VX (D16Z6/D15Z1/D15B7/D15B8): Mostly plug and play. The OBD0 and OBD1 alternators use the same plugs. Reuse your original EX/SI/DX injectors; for CX/VX, use EX/SI/DX injectors. The fan switch location differs on OBD0 engines (back of the block). Rewire the fan switch from the thermostat housing to the back of the block. Wiring order doesn’t matter; use connectors from a junkyard or another suitable wiring method. For VX 7-wire O2 sensors (http://www.hybridautomotive.com/tech/o2/) and CX 1-wire O2 sensors, convert to 4-wire using Figure 1.
Figure 4: Comparison of OBD0 and OBD1 fan switch locations.
Conclusion: Wiring Success for Your 1995 Honda Civic EX Engine Swap
Successfully navigating the wiring for your 1995 Honda Civic EX engine swap hinges on understanding your starting point (OBD1), the engine and ECU you choose, and the specific trim level of your Civic. This guide provides a detailed roadmap for various scenarios, focusing on clarity and practical advice. Remember to always double-check wiring diagrams (Figures 1, 6, 7) and utilize reliable resources like hybridautomotive.com and eastcoasthondas.com for specific adaptations.
By carefully following these guidelines and taking your time with the wiring process, you can confidently perform your engine swap and enjoy the enhanced performance of your 1995 Honda Civic EX. Always prioritize safety and accuracy when working with automotive wiring, and consult professional resources if you encounter challenges. Happy swapping!