Modern Vespa scooters with fuel injection offer improved performance and efficiency, but diagnosing issues can sometimes feel like navigating uncharted territory. Unlike older carburetor models, these engines are governed by sophisticated Engine Control Units (ECUs), making traditional troubleshooting methods less effective. Finding clear guidance for diagnosing injected Vespa engines can be challenging, but fortunately, tools and techniques used for other Italian motorcycles like Ducati and Moto Guzzi can be adapted for Piaggio’s injected scooters. This guide will walk you through setting up your own diagnostic system using readily available and affordable tools, centered around a 16 Pin Obd2 Cable With Ftdi Chipset, and free software.
Understanding Your Vespa’s ECU and Diagnostics
The heart of your modern Vespa’s engine management system is the ECU, often a Magneti Marelli MIU series unit. This electronic brain controls various engine parameters, from fuel injection and ignition timing to sensor readings. When something goes wrong, the ECU often stores fault codes, which can be invaluable for pinpointing the problem. While professional diagnostic tools exist, they can be expensive. This guide focuses on a DIY approach, leveraging free software and inexpensive hardware to access your Vespa’s ECU data. By connecting to your ECU, you can read fault codes, monitor live engine parameters, and gain a deeper understanding of your scooter’s health, all from the comfort of your garage.
Essential Tools: 16 Pin OBD2 Cable with FTDI Chipset and More
To perform DIY diagnostics on your injected Vespa, you’ll need a few key components. These are all relatively inexpensive and easily obtainable online. Here’s what you’ll need to gather:
-
Laptop with Windows: The diagnostic software we’ll be using is compatible with Windows XP and later versions. Older laptops will work perfectly fine, meaning you likely have a suitable device already available.
-
VAG KKL Cable with FTDI Chipset: This is a crucial piece of hardware and the focus of our guide. A VAG KKL cable acts as the interface between your laptop and your Vespa’s ECU. It’s essential to choose a cable that utilizes an FTDI chipset. While cheaper cables with CH340 chipsets are available, they are often unreliable and can cause communication issues. A 16 pin OBD2 cable with a genuine FTDI chipset ensures stable and reliable data transfer, which is paramount for accurate diagnostics and to prevent potential ECU damage.
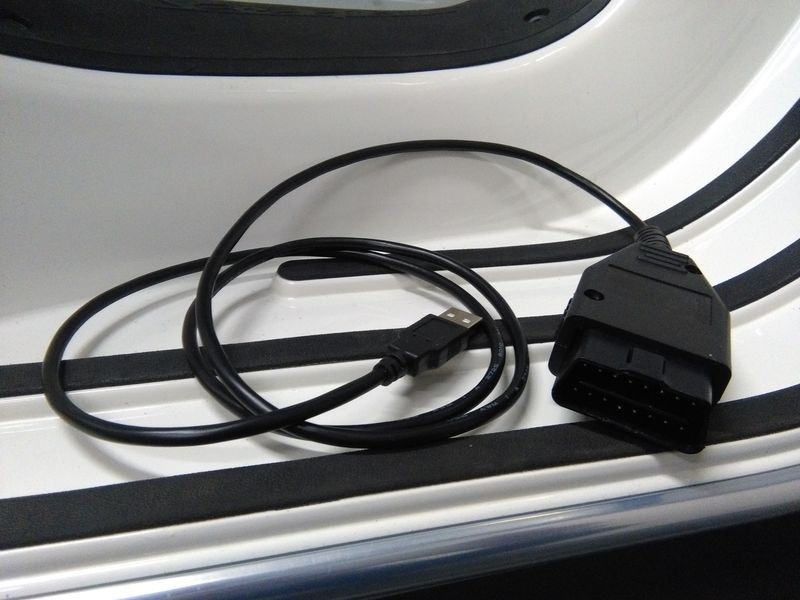 VAG KKL cable with FTDI chipset for Vespa diagnostics
You can typically find these cables on online marketplaces by searching for “VAG KKL cable FTDI”. Look for listings that explicitly mention “FTDI chipset” to ensure compatibility and reliability.
-
Fiat OBD Cable: This cable adapts the standard OBD2 connector of the VAG KKL cable to the specific diagnostic connector found on your Vespa. It usually comes with crocodile clips for connecting to your scooter’s battery.
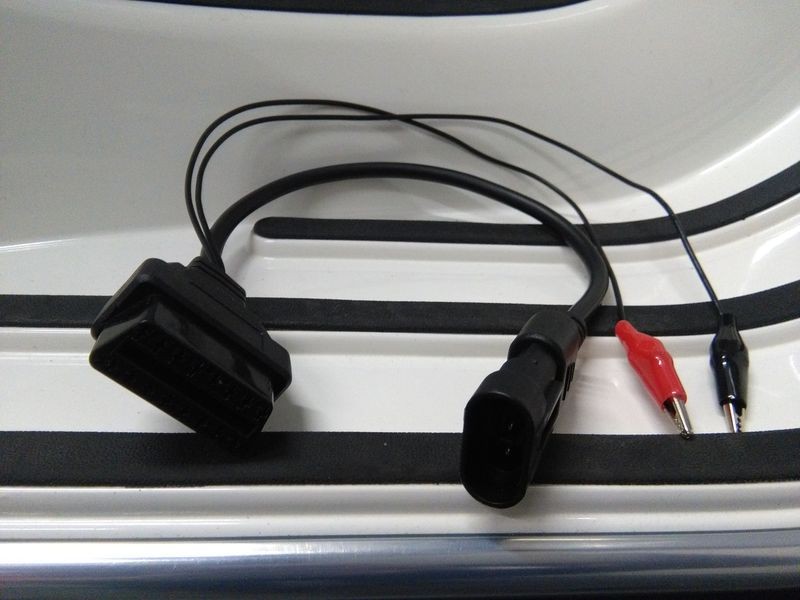 Fiat OBD cable with crocodile clips for Vespa ECU connection
When purchasing a Fiat OBD cable, pay close attention to the wiring. Incorrect wiring can damage your ECU. We’ll cover how to verify the wiring later in this guide.
-
Multimeter: A multimeter is a handy tool for verifying the wiring of your Fiat OBD cable and for general electrical troubleshooting.
With these tools in hand, you’ll be well-equipped to start diagnosing your Vespa’s ECU.
Step-by-Step Guide to Vespa ECU Diagnostics
Once you have gathered all the necessary hardware, it’s time to set up your diagnostic system. Follow these steps carefully:
Software Installation (IAWdiag & JPDiag)
We will be using two free software programs that are compatible with Magneti Marelli MIU ECUs found in many injected Vespas:
- IAWdiag: This software is a popular choice for diagnosing Italian motorcycles and scooters with Magneti Marelli ECUs. You can download it from: http://www.von-der-salierburg.de/download/GuzziDiag/
- JPDiag: JPDiag is another excellent option with similar functionality. It can be downloaded from: http://jpdiag.akress.com
Download and install your preferred software on your Windows laptop. For this tutorial, we will primarily focus on IAWdiag, but the general principles apply to JPDiag as well.
Driver Installation (FTDI Drivers)
Before connecting your 16 pin OBD2 cable with FTDI chipset to your laptop, you need to install the correct FTDI drivers. Do not use the drivers that may come with the cable on a CD or download link, as these are often outdated or incorrect. Always download the latest drivers directly from the official FTDI website:
- FTDI VCP Drivers: http://www.ftdichip.com/Drivers/VCP.htm
- Direct Driver Download Links: https://ftdichip.com/drivers/d2xx-drivers/
Choose the drivers appropriate for your Windows operating system (XP, Vista, 7, 8, 10, or later). Install the drivers and then connect your VAG KKL cable to your laptop’s USB port. Windows should recognize the new hardware and install the drivers automatically.
Cable Connection and Testing
Before connecting to your Vespa’s ECU, it’s crucial to test your cables and verify the wiring of the Fiat OBD cable.
Verifying Fiat OBD Cable Wiring
Incorrect wiring of the Fiat OBD cable is a common issue and can damage your ECU. Use your multimeter to check the wiring against the following diagram:
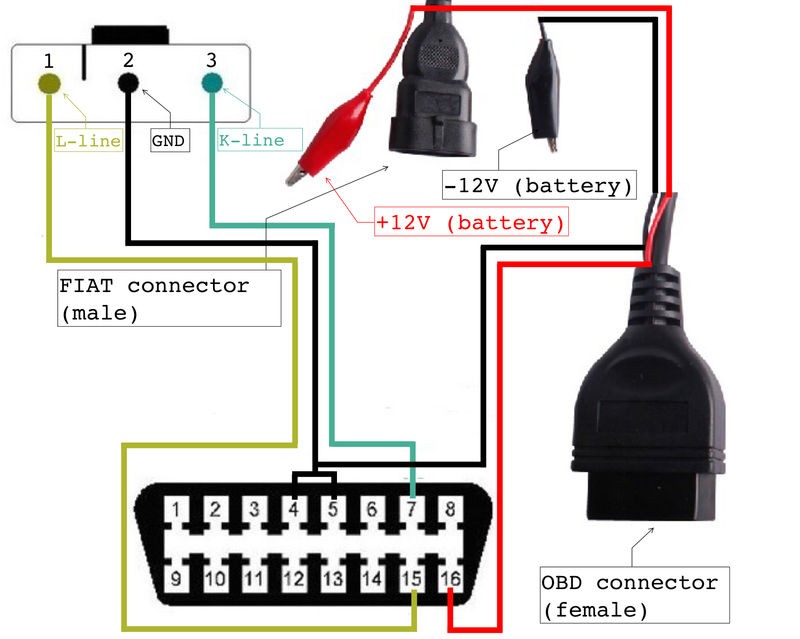 Fiat OBD cable wiring diagram for Vespa diagnostics
- OBD Plug (female):
- Pin 5: GND (Ground)
- Pin 7: K-line (Diagnostic Communication Line)
- Pin 16: 12V+ (Power)
- FIAT Plug (male):
- Pin 2: GND (Ground)
- Pin 3: K-line (Diagnostic Communication Line)
Use your multimeter in continuity mode to check that the corresponding pins are connected correctly. If the wiring is incorrect, do not connect the cable to your Vespa’s ECU until you have corrected it. You may need to rewire the Fiat OBD plug.
Testing the VAG KKL Cable with FTDI Chipset
Before connecting to your Vespa, test your 16 pin OBD2 cable with FTDI chipset to ensure it’s functioning correctly. Use the cable test program provided in the original article or a similar VAG KKL cable tester.
-
Download Cable Test Program: https://www.dropbox.com/scl/fi/677ur0f66llxrmoohahod/cable_testc.exe?rlkey=iaa0401sb5n1o3zrnz94b7yq8&st=z9h75k15&dl=0
-
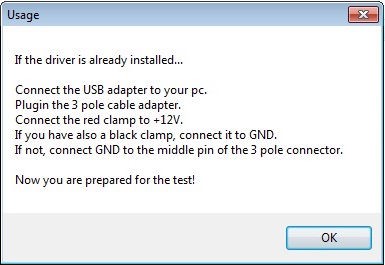
Connect to Battery (Without ECU): Connect the crocodile clips of your Fiat OBD cable to a 12V battery (or your Vespa’s battery – red clamp to positive terminal first, then black clamp to negative terminal). Do not connect the diagnostic plug to your Vespa at this stage.
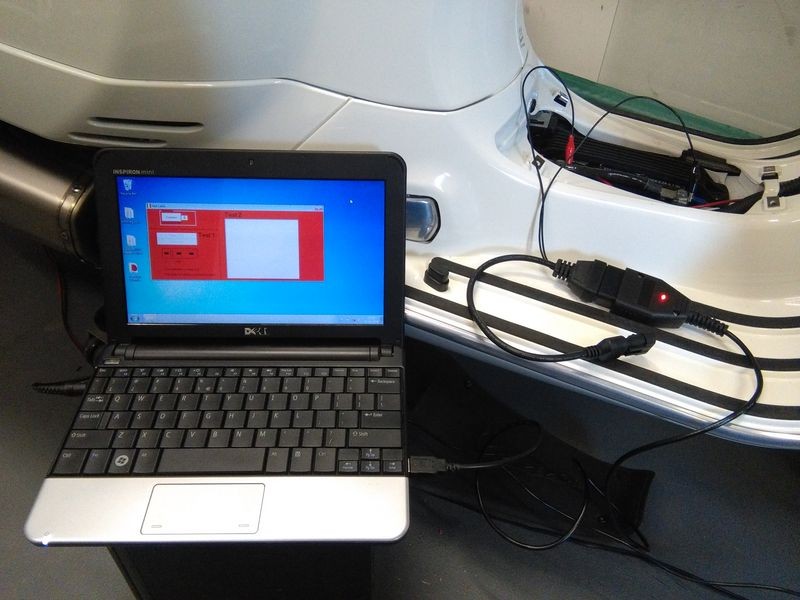 Connecting Fiat OBD cable to battery for cable testing
 -
Run Adapter Test Program: Launch the downloaded
cable_testc.exeprogram. -
Select COM Port: Determine the COM port assigned to your VAG KKL cable. You can find this in Windows Device Manager under “Ports (COM & LPT)”. Enter the COM port number in the program.
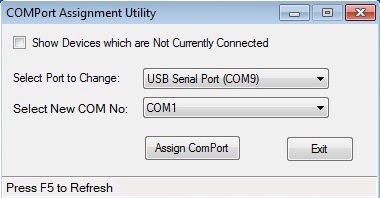 Finding COM port for VAG KKL cable in Device Manager
 -
Run Tests: Click “connect” in the test program. The program will perform two tests. Both “Test 1” and “Test 2” should be successful.
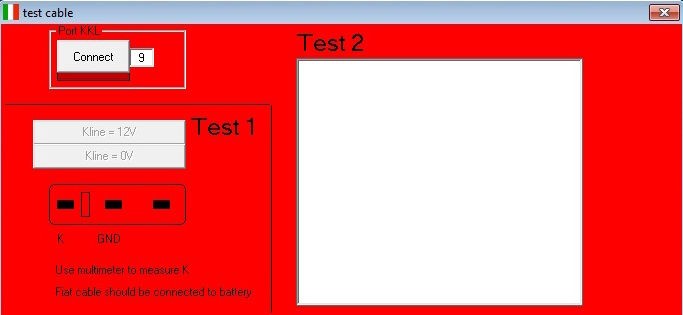 Successful Test 1 result of VAG KKL cable test
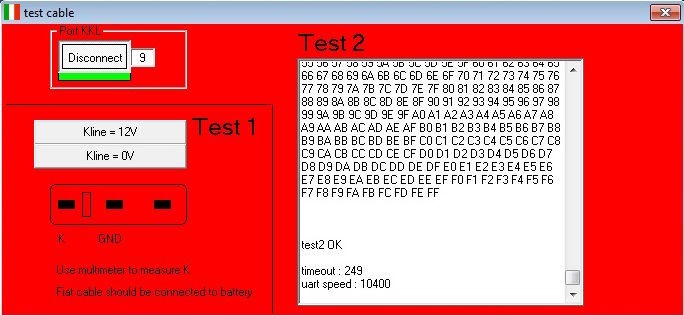 Successful Test 2 result of VAG KKL cable test
If both tests pass, your 16 pin OBD2 cable with FTDI chipset is working correctly. If either test fails, re-check your FTDI driver installation and the cable itself. If issues persist, you may have a faulty cable, especially if it does not have a genuine FTDI chipset.
You can also use another adapter test program for verification: http://www.von-der-salierburg.de/download/GuzziDiag/AdapterTest_V1.01.zip
 Adapter Test V1.01 program interface
 Successful test result in Adapter Test V1.01 program
Connecting to Your Vespa ECU with IAWdiag/JPDiag
Once you have verified your cables and installed the software, you can connect to your Vespa’s ECU.
-
Locate Diagnostic Connector: Find the diagnostic connector on your Vespa. Refer to your Vespa’s service manual if you are unsure of its location.
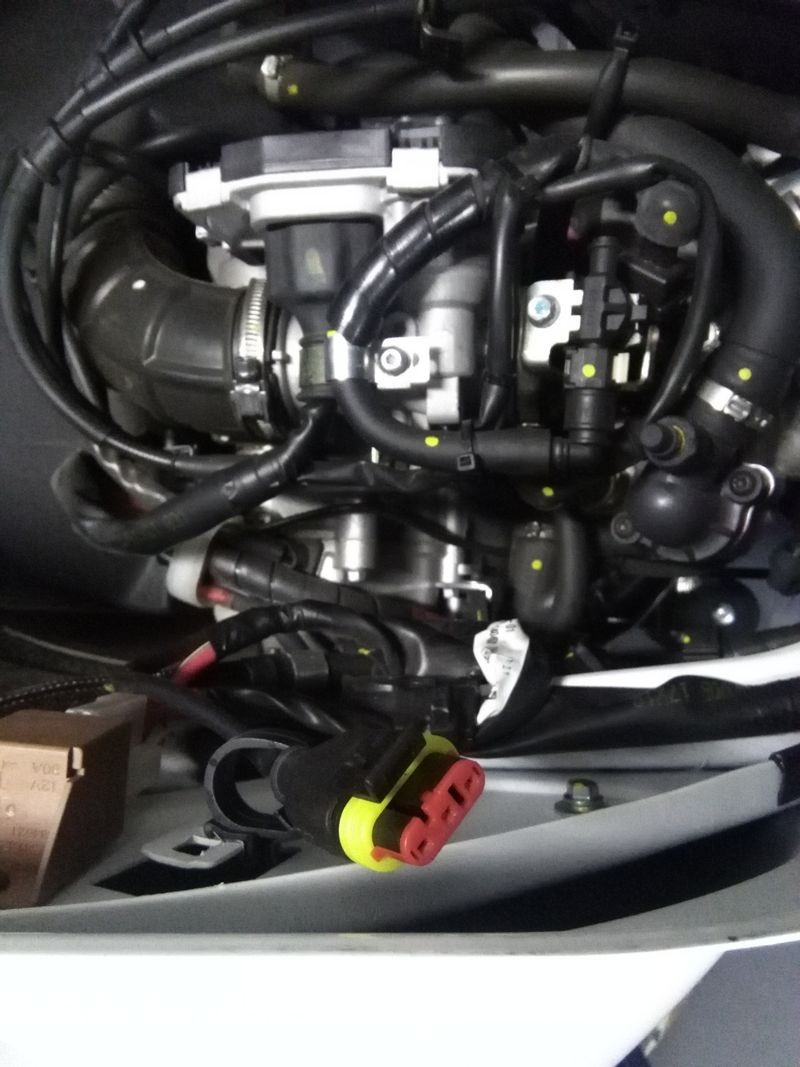 Vespa diagnostic connector location
 -
Connect Cables: Connect the Fiat OBD plug to your Vespa’s diagnostic connector. Connect the crocodile clips to your Vespa’s battery (red first, then black). Connect the VAG KKL cable to the Fiat OBD cable and your laptop.
-
Start IAWdiag/JPDiag: Launch the IAWdiag or JPDiag software.
-
Software Setup: In IAWdiag, go to “Settings” and configure the following:
- Language: Choose your preferred language.
- COM Port: Select the COM port assigned to your VAG KKL cable.
- ECU Type: Choose the ECU type that matches your Vespa. You can usually find the ECU type on a sticker on the ECU itself.
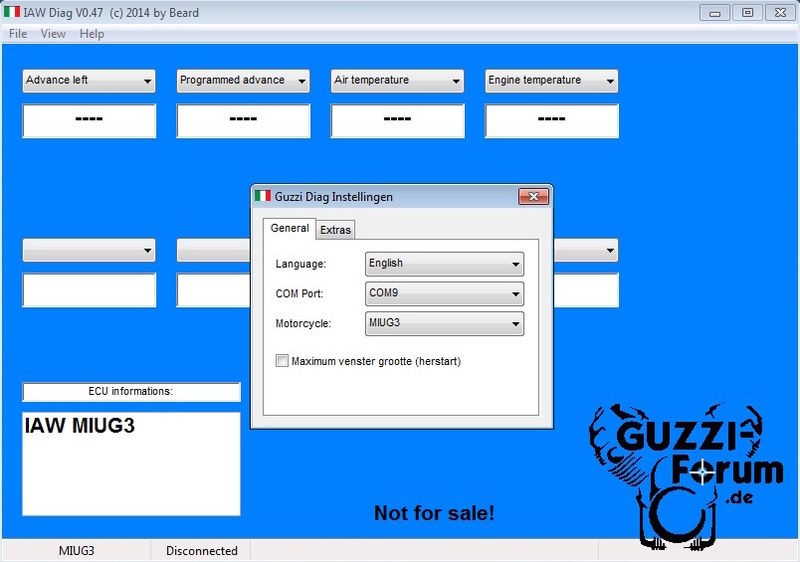 IAWdiag software setup screen for Vespa ECU connection
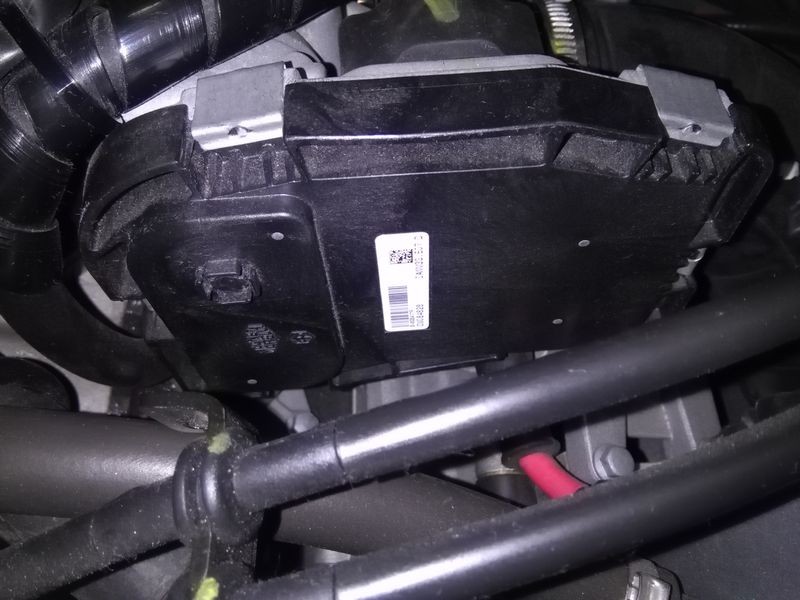 ECU type sticker location on Vespa ECU
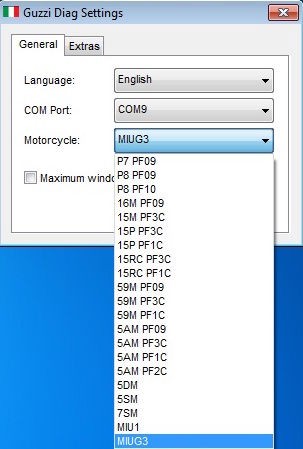 List of compatible ECU options in IAWdiag software
 -
Connect to ECU: In IAWdiag, go to “File” and click “Connect”. Follow any on-screen instructions.
 IAWdiag connection setup screens
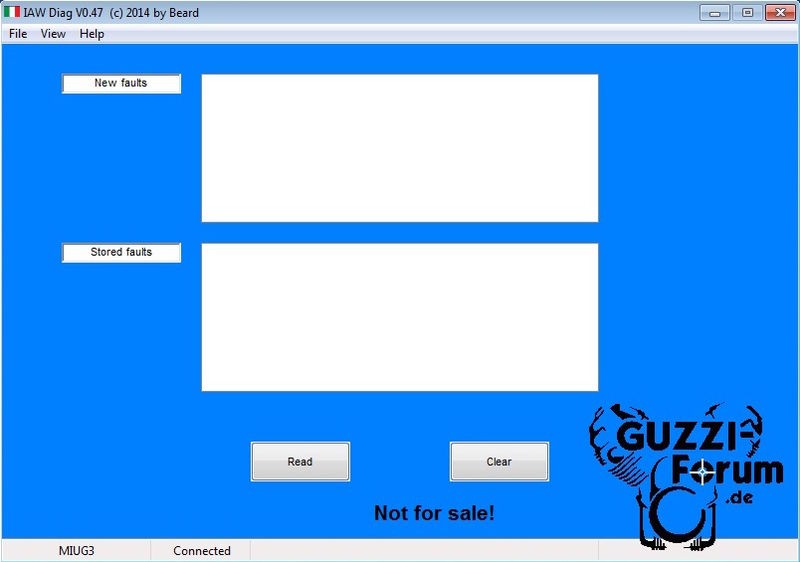 IAWdiag connection setup screens
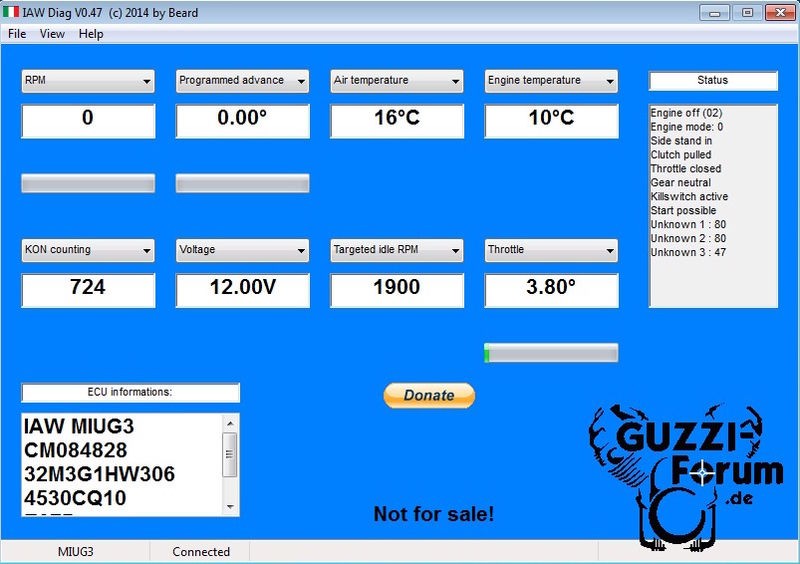
Once successfully connected, you should see ECU data displayed in the software.
Basic Diagnostics and Monitoring
With a successful connection, you can now use IAWdiag or JPDiag to:
- Read Fault Codes: Identify any stored fault codes that can indicate problems.
- Monitor Live Parameters: Observe real-time data from various sensors, such as engine temperature, RPM, throttle position, and more. This is invaluable for diagnosing intermittent issues or monitoring engine performance.
- Perform Static Tests: Some software versions may allow you to perform static tests on components.
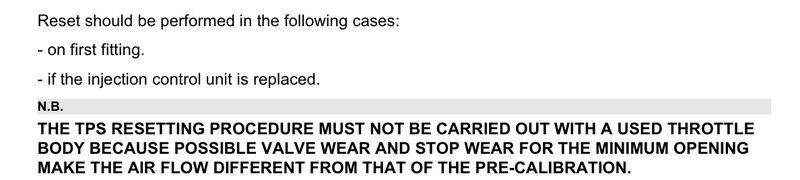
Important Caution: Do not perform a TPS (Throttle Position Sensor) reset unless you are absolutely certain it is necessary and you understand the procedure. Vespa ECUs are typically pre-calibrated at the factory, and incorrect TPS reset can cause running issues.
 TPS reset warning in IAWdiag software
When finished, disconnect from the ECU in the software (“File” -> “Disconnect” in IAWdiag) and then disconnect the cables from your Vespa and laptop.
Advanced Options: ECU Mapping
For advanced users, the software and 16 pin OBD2 cable with FTDI chipset setup can potentially be used for ECU mapping (reprogramming). Programs like IAWMIU3GReader, IAWMIU3GWriter, and IAWMIU3GEEPROMTool (available from the same download site as IAWdiag) can read and write ECU maps. Software like TunerPro can be used to analyze and modify these maps.
However, ECU mapping is a complex and advanced topic that requires in-depth knowledge of engine management systems. Incorrect mapping can severely damage your engine. ECU mapping is beyond the scope of this guide and should only be attempted by experienced users with a thorough understanding of the risks involved.
Conclusion
Diagnosing your modern Vespa’s ECU is no longer a mystery. By utilizing a 16 pin OBD2 cable with FTDI chipset, a Fiat OBD cable, and free software like IAWdiag or JPDiag, you can gain valuable insights into your scooter’s engine health and troubleshoot issues effectively. This DIY approach saves money and empowers you to understand your Vespa on a deeper level. Remember to always use a reliable 16 pin OBD2 cable with FTDI chipset for stable communication and to prevent potential ECU damage. With the right tools and knowledge, maintaining your injected Vespa becomes more accessible and rewarding.