Modern vehicles are complex machines, but diagnosing common issues has become significantly easier thanks to On-Board Diagnostics II (OBD2) systems. An OBD2 code reader is an invaluable tool for any car owner, allowing you to understand what’s happening under the hood without immediately resorting to a mechanic. Learning How To Use An Obd2 Code Reader can save you time, money, and give you a better understanding of your vehicle’s health. This guide will walk you through the process of using an OBD2 scanner effectively.
1. Locating the OBD2 Port – Your Car’s Diagnostic Hub
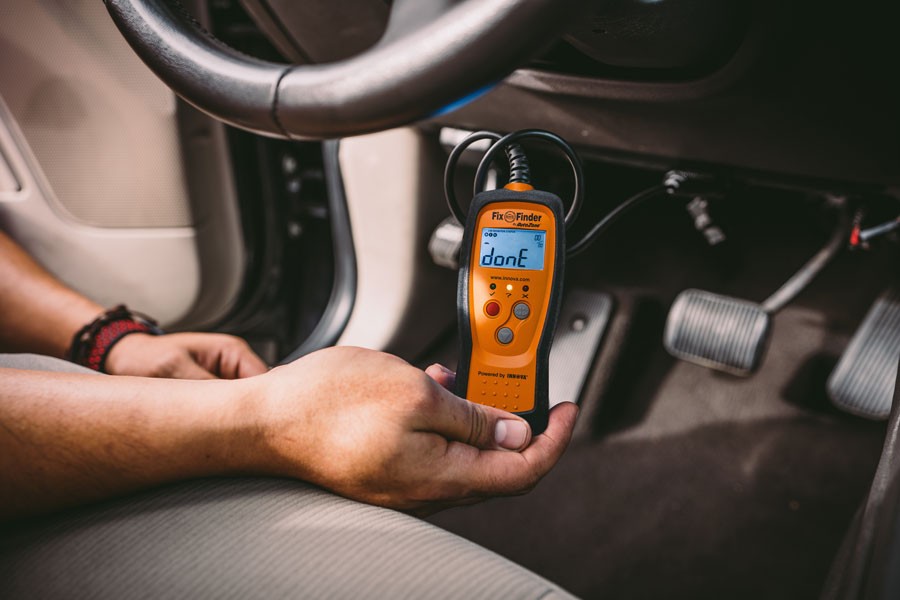
The first step in using an OBD2 scanner is finding the diagnostic port in your vehicle. For the vast majority of cars and light trucks manufactured since 1996, the OBD2 port is standardized for easy access. You’ll typically find it located under the dashboard on the driver’s side. In most cases, it’s easily visible and accessible right beneath the steering column.
Look for a 16-pin connector that is trapezoidal in shape. While the driver’s side under the dash is the most common location, there are a few exceptions. In some vehicle models, the OBD2 port might be found:
- Inside the center console: Check inside the storage compartment of your center console.
- Under the passenger side dashboard: Though less frequent, it can sometimes be located on the passenger side.
The OBD2 port is designed for straightforward connection. Its unique trapezoidal shape ensures that the scanner plug only fits in one orientation, making it simple to connect without needing to force anything.
2. Connecting Your OBD2 Scanner: A Simple Plug-In Process
Connecting an OBD2 scanner is remarkably easy. Follow these steps to establish a connection and prepare for diagnostics:
- Turn off the ignition: Ensure your vehicle’s ignition is completely turned off before you begin. This is a safety precaution and helps ensure a stable connection.
- Locate the OBD2 port: As described above, find the OBD2 port in your vehicle.
- Connect the scanner: Take your OBD2 scanner and align its plug with the OBD2 port. The trapezoidal shapes should match up. Gently but firmly push the scanner plug into the port. You might feel a slight resistance as it connects, and a little wiggle can help ensure it’s fully seated.
- Turn the ignition to the “ON” position: Turn your key in the ignition to the “ON” position. This position powers up your car’s electrical systems, including the OBD2 port, but do not start the engine.
- Wait for the scanner to power up: In most cases, the OBD2 port provides power to the scanner. Wait a few moments for your OBD2 scanner to power on and complete its boot sequence. The scanner’s screen should light up, indicating it’s ready to use.
Depending on the complexity of your OBD2 scanner, it might prompt you for additional information at this stage. This could include your vehicle’s Vehicle Identification Number (VIN), engine size, or it might ask you to confirm whether the engine is running or not for certain tests. Follow the on-screen instructions provided by your scanner.
3. Navigating the OBD2 Scanner Menu: Key Options Explained
Once your OBD2 scanner has booted up, you’ll be presented with a menu on its display. The options available will vary depending on whether you have a basic code reader or a more advanced diagnostic scan tool. However, most OBD2 scanners will include some or all of the following key menu options:
-
Read Codes (or Diagnostic Trouble Codes – DTCs): This is the primary function for most users. Selecting “Read Codes” will instruct the scanner to communicate with your vehicle’s computer and retrieve any stored Diagnostic Trouble Codes (DTCs). These codes are essentially error messages generated by your car’s computer when it detects a problem. The scanner will display the DTC number (e.g., P0301) and may also provide a brief text description of the fault. If there are multiple codes, the scanner will typically scroll through them.
-
Erase Codes (or Clear Codes): After you’ve addressed the issue indicated by a DTC, you can use the “Erase Codes” function to clear the codes from your vehicle’s computer memory. When you select this option, the scanner will usually ask for confirmation before proceeding, to prevent accidental code clearing. Important Note: Erasing codes without fixing the underlying problem will only temporarily turn off the check engine light. The light will likely reappear if the issue persists and the code will be stored again.
-
Live Data (or Data Stream): More advanced OBD2 scanners offer a “Live Data” or “Data Stream” feature. This allows you to view real-time data from your vehicle’s sensors as the engine is running. You can scroll through a list of parameters such as engine temperature, RPM, oxygen sensor readings, and more. Live data is incredibly useful for diagnosing intermittent problems or monitoring sensor performance to see if readings are within normal operating ranges. It can also help pinpoint sensors that are not responding or providing erratic values.
-
Freeze Frame Data: “Freeze Frame” is a snapshot of sensor data recorded by the vehicle’s computer at the exact moment a DTC was set. This information can be invaluable for diagnosis as it provides context about the conditions present when the fault occurred. Freeze frame data typically includes parameters like engine speed, engine load, fuel trim, and coolant temperature at the time of the fault.
-
Vehicle Info (or Vehicle Information): This option provides access to basic information about your vehicle, such as the VIN and other build specifications stored in the car’s computer.
-
I/M Readiness (or Inspection/Maintenance Readiness): “I/M Readiness” stands for Inspection and Maintenance Readiness. This function checks the status of various emissions-related systems in your vehicle to determine if they are ready for an emissions or smog test. It can show if there are any incomplete or failed tests that might prevent your vehicle from passing an emissions inspection.
Navigating the OBD2 scanner menu is usually done using buttons on the device. Most scanners have arrow buttons for scrolling through menu options and a select or “OK” button to choose an option. A “back” or “escape” button is also typically included to return to the previous menu. Even Bluetooth or Wi-Fi OBD2 scanners that connect to smartphones usually have some basic button controls on the adapter itself.
4. Decoding OBD2 Codes: Understanding the Language of Car Problems
 OBD-II scanner displaying trouble codes on its screen
When you select “Read Codes” on your OBD2 scanner, it will display a series of codes. Each code is a five-character alphanumeric string, such as P0301. Understanding the structure of these codes is key to interpreting the diagnostic information.
The first character of an OBD2 code is always a letter, indicating the vehicle system where the fault has occurred:
- P – Powertrain: Codes starting with “P” relate to the powertrain system, which includes the engine, transmission, fuel system, and emissions controls. Powertrain codes are the most common type of DTCs.
- B – Body: “B” codes indicate issues within the body control systems. This can include problems with airbags, power windows, interior lighting, and other comfort and convenience features.
- C – Chassis: “C” codes refer to chassis-related systems, such as the anti-lock braking system (ABS), traction control, suspension, and power steering.
- U – Network or Communication: “U” codes point to communication or network-related problems within the vehicle’s computer systems. These codes often indicate issues with the Controller Area Network (CAN bus) or other communication protocols.
The second character in the code is a digit that further classifies the code:
- 0 – Generic (SAE Standard): If the second character is “0”, it signifies a generic OBD2 code. These codes are standardized by the Society of Automotive Engineers (SAE) and are common across all vehicle manufacturers.
- 1 – Manufacturer-Specific (Enhanced): A “1” as the second character indicates a manufacturer-specific or enhanced code. These codes are defined by the specific car manufacturer and may provide more detailed information than generic codes.
The third digit provides even more specific information about the subsystem within the broader system category. For example, for “P” (Powertrain) codes:
- 1 – Fuel and Air Metering
- 2 – Fuel and Air Metering (Injector Circuit)
- 3 – Ignition System or Misfire
- 4 – Auxiliary Emission Controls
- 5 – Vehicle Speed Control or Idle Control System
- 7, 8, 9 – Transmission
- A, B, C – Hybrid Propulsion Systems
The last two digits (fourth and fifth characters) are even more granular, pinpointing the specific component or circuit that is experiencing the fault. There are hundreds of possible combinations for these last digits, each with a corresponding description.
Let’s revisit our example code, P0301. Breaking it down:
- P: Powertrain system.
- 0: Generic code.
- 3: Ignition system or misfire.
- 01: Specifically indicates Cylinder #1.
Therefore, the code P0301 translates to “Cylinder 1 Misfire Detected”. This is just one example, but understanding the code structure allows you to start deciphering the meaning of any DTC your OBD2 scanner retrieves. Remember that a code is a starting point for diagnosis, not necessarily the definitive answer. Further investigation and testing are often needed to pinpoint the root cause of the problem.
5. Benefits of Using an OBD2 Scanner: Save Time and Money
Investing in an OBD2 scanner and learning how to use an OBD2 code reader offers several advantages that can save you both time and money on car repairs:
- Early Problem Detection: An OBD2 scanner empowers you to identify potential issues early on, often before they escalate into major and costly repairs. If your “Check Engine” light illuminates or you notice performance problems, a quick scan can provide valuable clues about the source of the issue.
- Informed Decisions Before Shop Visits: By reading the DTCs yourself, you can go to a mechanic with a better understanding of what might be wrong with your car. This can help you have more informed conversations with service advisors, prevent unnecessary repairs, and ensure you’re getting accurate diagnoses.
- Smog Check Readiness: Using the I/M Readiness function, you can check if your vehicle is likely to pass an emissions test before you take it in for an official smog check. This can prevent failing the test and having to pay for re-tests after repairs.
- DIY Repair Possibilities: For some simpler issues, an OBD2 scanner can guide you to perform the repair yourself. For instance, if you get a code like P0138 (Oxygen Sensor High Voltage), indicating a faulty oxygen sensor, you might be able to replace the sensor yourself and clear the code, saving on labor costs at a repair shop.
For example, if your OBD2 scan reveals a code like P0138 indicating a high voltage issue with the bank 1 sensor 2 oxygen sensor, you can research this code, understand that it often points to a failing oxygen sensor, purchase a replacement sensor, install it yourself, and then use your OBD2 scanner to clear the code. This DIY approach can lead to significant savings compared to taking your car to a shop for diagnosis and repair.
You can purchase OBD2 scanners at most auto parts stores like AutoZone, or online retailers. Many auto parts stores also offer loan-a-tool programs where you can borrow a scanner for free, making diagnostics even more accessible.
Conclusion
Learning how to use an OBD2 code reader is a valuable skill for any car owner. It provides a window into your vehicle’s computer systems, allowing you to understand potential problems, make informed decisions about maintenance and repair, and potentially save money in the long run. Whether you are a seasoned DIYer or just want to be more informed about your car’s health, an OBD2 scanner is a tool worth having. By following these steps, you can confidently use an OBD2 scanner to diagnose car problems and keep your vehicle running smoothly.