The On-Board Diagnostics II (OBD2) port is a crucial interface in modern vehicles, acting as the gateway to your car’s computer. Understanding the Obd2 Pin Layout is essential for anyone involved in automotive diagnostics and repair, from professional mechanics to DIY enthusiasts. This article will delve into the intricacies of the OBD2 pin layout, explaining each pin’s function and its significance in troubleshooting vehicle issues.
Understanding the Basics of OBD2
Before diving into the pin layout, it’s important to grasp the fundamental role of OBD2. Mandated in the United States in 1996 and subsequently adopted worldwide, OBD2 is a standardized system that allows access to vehicle subsystem information for diagnostics and monitoring. This standardization ensures that regardless of the vehicle manufacturer, a universal diagnostic tool can communicate with the car’s computer systems.
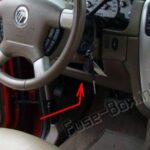
The OBD2 port, also known as the Data Link Connector (DLC), is typically located within two feet of the steering wheel, making it easily accessible. This port serves as the physical connection point for diagnostic scanners, code readers, and other automotive tools. The information retrieved through this port is invaluable for identifying problems, monitoring performance, and ensuring your vehicle runs efficiently.
The Detailed OBD2 Pin Layout Explained
The OBD2 connector is a 16-pin, D-shaped female connector. While it has 16 pins, not all of them are universally used, and their functions can vary slightly depending on the vehicle manufacturer and communication protocols. However, a core set of pins are standard across most OBD2 compliant vehicles. Let’s break down the function of each pin in a typical obd2 pin layout:
-
Pin 1: Manufacturer Discretion – This pin is often vehicle manufacturer-specific. It can be used for various purposes, including manufacturer-defined diagnostics or programming. Its function is not standardized and varies widely across different makes and models.
-
Pin 2: SAE J1850 PWM & VPW (Bus+) – This pin is used for the SAE J1850 communication protocol, which was common in Ford and General Motors vehicles. J1850 uses two variations: Pulse Width Modulation (PWM) and Variable Pulse Width (VPW). If your vehicle uses J1850, this pin will carry the positive (+) communication signal.
-
Pin 3: Manufacturer Discretion – Similar to Pin 1, Pin 3 is also typically manufacturer-discretionary. It can be assigned different functions depending on the vehicle manufacturer’s diagnostic needs.
-
Pin 4: Chassis Ground – This pin provides a ground connection for the vehicle’s chassis. It is crucial for ensuring a stable and reliable electrical connection for diagnostic tools.
-
Pin 5: Signal Ground – Pin 5 is the signal ground, providing a ground reference for the communication signals. This ground is essential for the accurate transmission and reception of data between the diagnostic tool and the vehicle’s ECU (Engine Control Unit).
-
Pin 6: CAN High (J-2284) – This pin is part of the Controller Area Network (CAN) bus, specifically the high signal line. CAN bus communication is the most prevalent protocol in modern vehicles due to its robustness and high-speed data transfer capabilities. Pin 6 and Pin 14 (CAN Low) work together for CAN communication.
-
Pin 7: ISO 9141-2 K-Line & ISO 14230-4 K-Line – This pin is used for the ISO 9141-2 and ISO 14230-4 (KWP2000) communication protocols. These are older ISO standards but are still found in many vehicles, particularly European and Asian models. It’s the K-line responsible for bidirectional serial communication.
-
Pin 8: Manufacturer Discretion – Another manufacturer-discretionary pin, Pin 8 can have various uses depending on the vehicle manufacturer’s implementation.
-
Pin 9: Manufacturer Discretion – Yet another pin left to the manufacturer’s discretion, highlighting the variability within the OBD2 standard beyond the core functionalities.
-
Pin 10: SAE J1850 PWM (Bus-) – This pin is the negative (-) signal line for the SAE J1850 PWM protocol. It works in conjunction with Pin 2 when the vehicle uses J1850 PWM communication.
-
Pin 11: Manufacturer Discretion – Continuing the trend, Pin 11 is also manufacturer-specific and its function is not universally defined.
-
Pin 12: Manufacturer Discretion – Pin 12 is another manufacturer-defined pin, further emphasizing the need to consult vehicle-specific wiring diagrams when dealing with non-standard pins.
-
Pin 13: Manufacturer Discretion – And again, Pin 13 is a manufacturer-discretionary pin, underscoring the importance of referencing vehicle-specific documentation.
-
Pin 14: CAN Low (J-2284) – This pin is the low signal line for the CAN bus communication. Working alongside Pin 6 (CAN High), it completes the differential CAN bus signal transmission.
-
Pin 15: ISO 9141-2 L-Line & ISO 14230-4 L-Line – This pin is the L-line associated with the ISO 9141-2 and ISO 14230-4 protocols. While the K-line (Pin 7) is more commonly used, the L-line can be used for wake-up or specific diagnostic functions in some implementations.
-
Pin 16: Battery Power (+12V to +24V) – Pin 16 provides battery voltage to the OBD2 port, typically 12V for passenger vehicles and 24V for some heavy-duty vehicles. This power supply is essential for powering diagnostic tools that are plugged into the OBD2 port.
Alt text: OBD2 port pin layout diagram showing pin numbers 1 through 16 and descriptions for each pin, including power, ground, CAN bus, ISO 9141, and SAE J1850.
Why Understanding the OBD2 Pin Layout Matters
Knowing the obd2 pin layout is crucial for several reasons:
-
Troubleshooting Electrical Issues: If you suspect problems with your OBD2 port, such as no power to your diagnostic scanner or communication errors, understanding the pin layout helps you pinpoint potential wiring issues, blown fuses, or connector damage. As highlighted in the user’s experience, accidental damage to the OBD2 port can lead to electrical malfunctions.
-
DIY Diagnostics and Repair: For DIY car enthusiasts, understanding the pin layout is essential for safely and effectively using diagnostic tools. It allows for more informed troubleshooting and repairs, potentially saving money on mechanic visits.
-
Advanced Diagnostics and Customization: Professionals and advanced users who perform in-depth diagnostics, ECU programming, or custom modifications need a thorough understanding of the pin layout to ensure proper connections and avoid damaging vehicle electronics.
-
Developing Automotive Tools: Engineers and developers creating new automotive diagnostic tools or interfaces rely on the standardized obd2 pin layout to ensure compatibility and proper functionality across a wide range of vehicles.
Common Issues Related to OBD2 Port Problems
Damage to the OBD2 port or its wiring can manifest in various issues, including:
-
No Communication with Diagnostic Scanner: If the scanner fails to power on or cannot establish a connection with the vehicle’s computer, a problem with the power (Pin 16), ground (Pins 4 & 5), or communication lines (Pins 2, 6, 7, 10, 14, 15) could be the culprit.
-
Intermittent Connection Issues: Loose wiring or corrosion within the OBD2 port connector can lead to intermittent communication problems, resulting in unreliable diagnostic readings.
-
Blown Fuses: A short circuit in the OBD2 port wiring, as potentially experienced in the user’s story when sparks occurred, can blow fuses that protect related circuits, leading to malfunctions of other vehicle systems like dome lights, radios, or clocks.
-
Data Corruption: Faulty wiring or interference can corrupt data transmitted through the OBD2 port, leading to inaccurate diagnostic information.
Using the OBD2 Pin Layout for Troubleshooting
When troubleshooting OBD2 port related issues, follow these steps:
-
Visual Inspection: Carefully inspect the OBD2 port for any physical damage, bent pins, corrosion, or loose wiring.
-
Check Fuses: Consult your vehicle’s owner’s manual to identify fuses related to the OBD2 port and diagnostic systems. Check these fuses for any signs of being blown and replace them if necessary.
-
Voltage Check: Use a multimeter to check for voltage at Pin 16 (Battery Power) and continuity to ground at Pins 4 and 5 (Ground). This verifies that the port is receiving power and has proper ground connections.
-
Continuity Testing Communication Lines: If you suspect a broken wire in the communication lines, you can use a multimeter to perform continuity tests on Pins 2, 6, 7, 10, 14, and 15, tracing them back to the ECU or relevant modules. However, always consult vehicle-specific wiring diagrams and service manuals before performing electrical testing to avoid accidental shorts or damage to sensitive electronics.
-
Consult Wiring Diagrams: Vehicle-specific wiring diagrams are invaluable resources for understanding the exact obd2 pin layout and tracing circuits. These diagrams show the color-coding of wires and the routing of circuits, aiding in accurate diagnosis and repair.
Conclusion
Understanding the obd2 pin layout is a fundamental skill for anyone working with modern vehicles. Whether you are diagnosing a simple check engine light or tackling complex electrical issues, knowledge of the pin functions and communication protocols is essential. By using this guide and referencing vehicle-specific resources, you can effectively utilize the OBD2 port for accurate diagnostics and efficient vehicle maintenance. For more in-depth automotive diagnostic information and resources, visit cardiagnosticnearme.com.