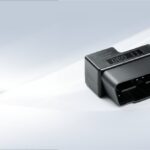
Maintaining your vehicle often involves tasks that might seem complex but are achievable at home with the right tools. Coding your fuel injectors after replacement is one such task. This guide will walk you through the process of injector coding using readily available OBD2 tools and software like AlfaOBD or MultiECUscan, allowing you to potentially save on garage expenses.
Step-by-Step Injector Coding Procedure
Before you begin, ensure you have the necessary equipment and information ready.
Preparation is Key
- Software and OBD2 Adapter: You will need either AlfaOBD or MultiECUscan software and a compatible OBD2 adapter (Bluetooth, USB, or WiFi).
- Accessing Injectors: With the engine OFF but the ignition KEY ON, safely access your fuel injectors. This usually involves removing the air filter box and engine cover to expose the injectors.
- Injector Codes: Carefully clean the top of each injector with a damp paper towel to reveal the injector codes. These codes are crucial for the coding process.
- Identify Injector Order: Note the cylinder order; typically, cylinder 1 is on the top left, and cylinder 4 is on the top right, with cylinders 2 and 3 in between.
- Record Codes: Take a picture or write down each injector code and clearly note which cylinder it belongs to (1, 2, 3, or 4). The correct code is usually a mix of letters and numbers located on the injector’s outer edge. Avoid using any codes near the center pipe, as these are typically reference codes.
Coding with AlfaOBD
- Connect OBD2 Adapter: Pair your OBD2 adapter with your phone or computer and configure the connection settings in AlfaOBD (baud rate, COM port, or IP address if using WiFi).
- Vehicle Selection: In AlfaOBD, select your vehicle model, engine type, and ECU type.
- Navigate to Active Diagnostics: Go to the “Active diagnostics” section within your ECU settings.
- Injector Classification: Choose the option related to “injector classification” or “injector coding” for cylinder 1.
- Enter Injector Code: Input the recorded code for injector 1 and start the process.
- Repeat for All Injectors: Repeat steps 4 and 5 for each injector (cylinders 2, 3, and 4), entering the corresponding codes.
- Clear Fault Codes: After coding all injectors, clear any fault codes present in the system.
- Reset and Verify: Turn off the car’s battery for about 10 seconds, then turn the key back to the “ON” position (without starting the engine).
The process using MultiECUscan is very similar to AlfaOBD, ensuring a consistent approach regardless of your chosen software.
By following these steps, you can successfully code your fuel injectors using an OBD2 tool, potentially resolving engine faults and ensuring optimal performance. Remember to always double-check your connections and code entries for accuracy.
