Experiencing a check engine light in your 1995 Ford F150 can be concerning, but diagnosing the issue yourself is more straightforward than you might think. While modern vehicles use OBD2 scanners, your classic 1995 F150 utilizes an earlier system. This guide will walk you through how to retrieve diagnostic trouble codes (DTCs) from your 1995 F150 without needing a scan tool, helping you understand what that illuminated check engine light is trying to tell you.
Understanding Your 1995 F150’s Diagnostic System
It’s important to clarify that while you might be searching for “1995 F150 Obd2” information, vehicles of this era, including the 1995 Ford F150, typically use an OBD1 or EEC-IV (Electronic Engine Control IV) diagnostic system. This predates the standardized OBD2 systems found in newer cars. Instead of a dedicated OBD2 port, the 1995 F150 uses a diagnostic connector under the hood, and codes are read by interpreting flashes of the check engine light. This method, while different from today’s digital scanners, is a reliable way to understand basic trouble codes.
Step-by-Step Guide to Reading Trouble Codes
To access the diagnostic codes on your 1995 F150, you’ll perform a Key On Engine Off (KOEO) test. Here’s how:
Locate the EEC Connector
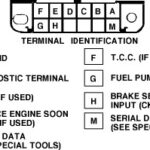
First, pop the hood of your F150. Locate the EEC test connector. It’s typically found on the driver’s side fender, near the firewall, within the engine compartment. You’re looking for a black, plastic connector, often clipped into a protective plastic housing and not connected to anything. Next to it, within the same protective housing, you’ll usually find a smaller, single gray connector. Unclip both of these connectors from the protective plastic piece to access them.
Prepare Your Jumper Wire
You’ll need a simple piece of wire, like a paper clip or a short length of electrical wire, to create a jumper connection between the connectors.
Initiate the KOEO Test and Read Codes
Now, orient the larger black connector so the row of four terminals is at the bottom and the row of two terminals is at the top. Insert one end of your jumper wire into the top right terminal (the rightmost terminal of the two-terminal row). Connect the other end of the wire to the single gray connector.
Turn your ignition key to the “ON” position – do not start the engine. Observe the check engine light. It will begin to flash a series of codes.
Understanding the Code Flashes
The codes are communicated through flashes of the check engine light. A code is represented by a series of short flashes and pauses. For example, code 212 would be indicated as follows:
- Two flashes (representing ‘2’), followed by a short pause.
- One flash (representing ‘1’), followed by a longer pause.
- Two flashes (representing ‘2’).
There will be a longer, 2-second pause between each digit of a code and a 4-second pause between complete codes. After all KOEO codes are displayed, there will be a 6-second pause, a single flash, and another 6-second pause, signaling the end of the KOEO test codes. Following the KOEO codes, “Continuous Codes” (if any are stored) will be displayed in the same flash pattern.
Clearing Codes
If you wish to clear the stored trouble codes after diagnosing and addressing the issue, simply unplug the jumper wire while the test is running.
Conclusion
Reading diagnostic codes on your 1995 Ford F150 without a scanner is a valuable skill for any owner. By understanding the flashing check engine light, you can gain insight into potential issues and take informed steps for repair. Remember to consult a repair manual or online resources specific to 1995 Ford F150 diagnostic codes to interpret the numerical codes you retrieve. While this method provides basic diagnostic information, for complex issues, consulting a professional mechanic is always recommended.
