Diagnosing car issues often starts with the OBD2 port, your gateway to vehicle diagnostics. For 2005 Acura TL owners, ensuring this port is functioning correctly is crucial for accurate readings from scanners and diagnostic tools. Let’s explore how to check your 2005 Acura TL’s OBD2 port for common issues.
Checking OBD2 Port Connectivity on a 2005 Acura TL
A faulty OBD2 port can prevent communication with diagnostic devices. Here’s a simple voltage and continuity test you can perform to assess its electrical integrity. You’ll need a multimeter and access to your Acura TL’s OBD2 port, typically located under the dashboard on the driver’s side.
First, test for ground continuity. Using your multimeter in continuity mode, check between Pin 4 and vehicle ground, and then Pin 5 and vehicle ground. A solid connection should be indicated in both cases. Next, measure the voltage between Pins 4 and 5. This should read less than 2V, ideally around 0.5mV. To verify power supply, check the voltage between Pin 16 and vehicle ground. This reading should be close to your battery voltage, approximately 12.2V. Further confirm power by testing voltage between Pins 4 & 16 and Pins 5 & 16; both should also be around 12.2V.
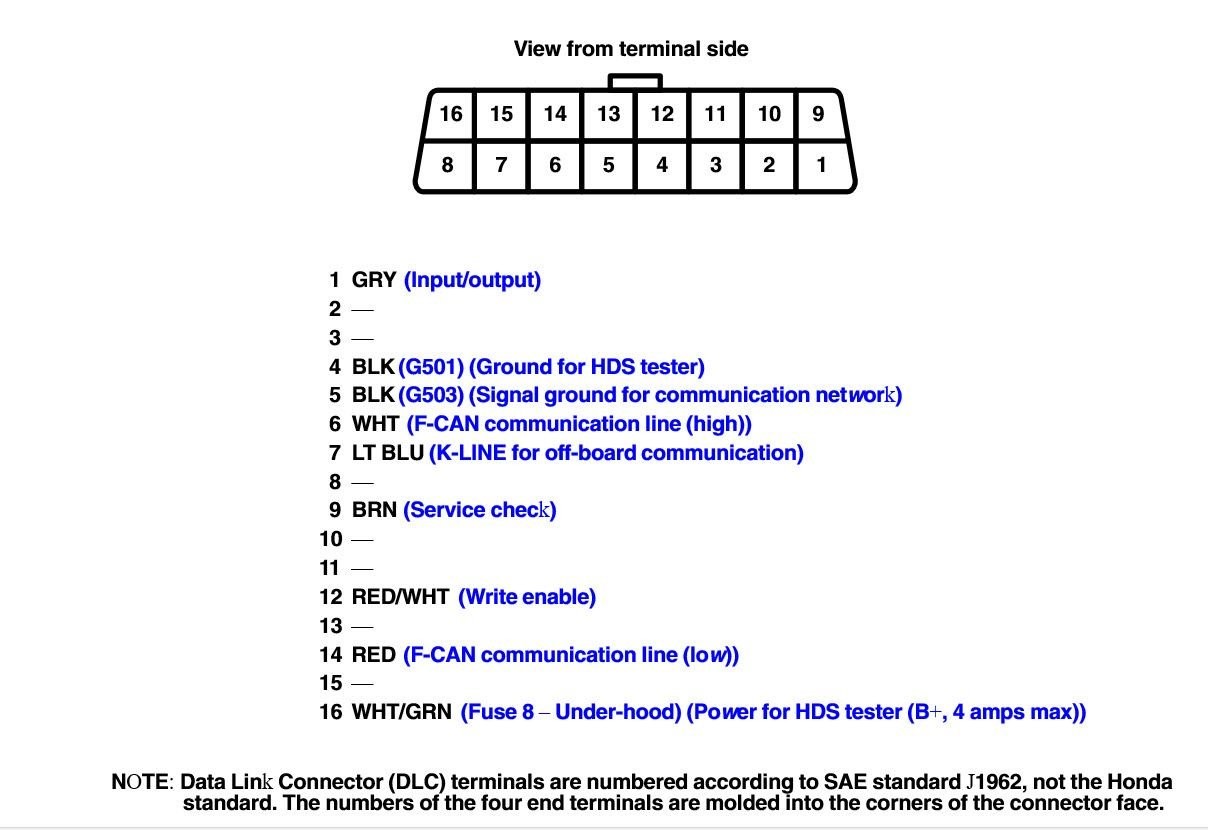 2005 Acura TL OBD2 Port Pinout Diagram: This diagram illustrates the layout of the OBD-II port in a 2005 Acura TL, highlighting pin assignments for diagnostic testing and scanner connectivity.
Interpreting Your OBD2 Port Test Results
If your electrical tests pass but you’re still experiencing connectivity problems with your diagnostic tools on your 2005 Acura TL, consider the physical condition of the OBD2 port as the next area for investigation. Has anyone else experienced similar physical connection issues with their 2005-2008 Acura TL OBD2 ports and found a solution?