Experiencing OBD2 communication issues with your 2011 Toyota Avalon Limited can be frustrating, especially when trying to diagnose car problems or get recall work done. Many Toyota Avalon owners have encountered situations where their OBD2 scanner fails to connect, leaving them in the dark about their vehicle’s health. This article delves into the potential causes and troubleshooting steps when your 2011 Toyota Avalon Limited is not communicating through the OBD2 connector, drawing insights from real-world experiences.
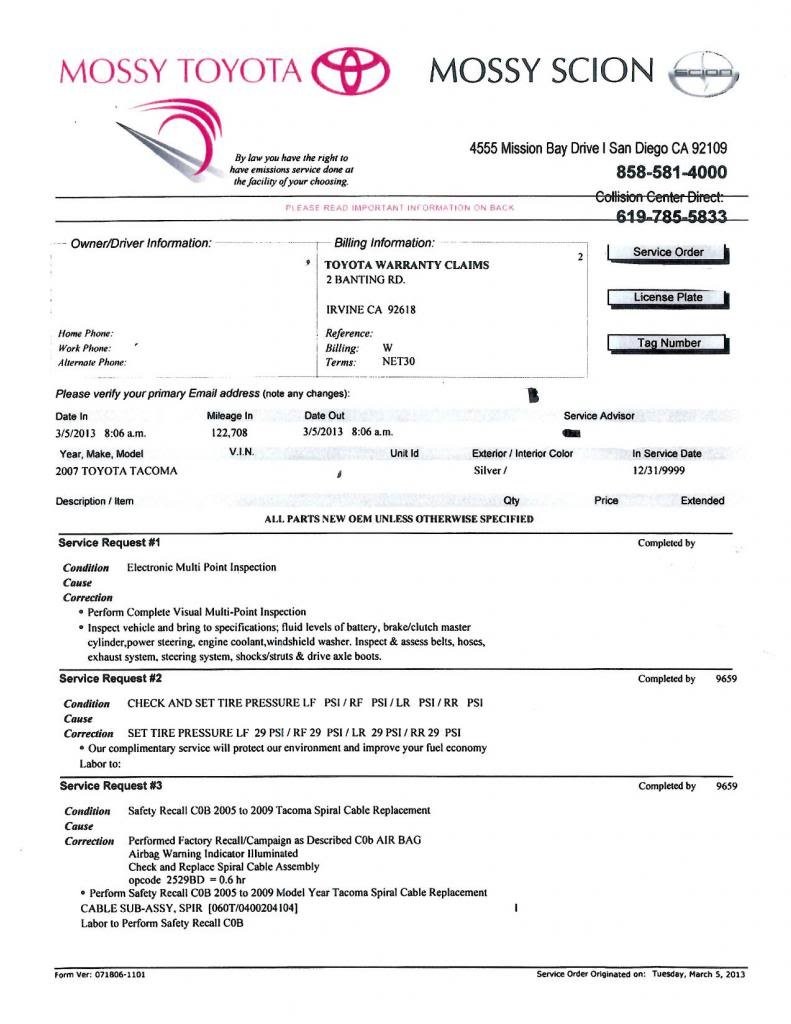
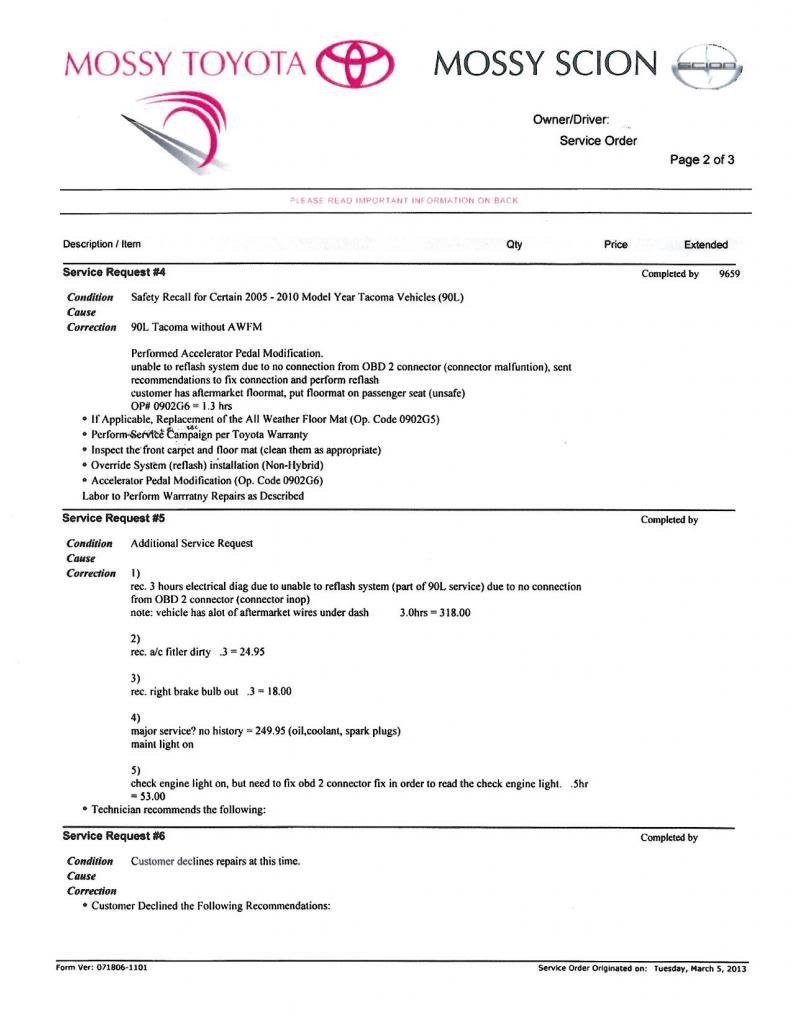
One common scenario arises when dealerships attempt to perform recalls or re-flashes and discover communication problems. As one Toyota owner reported, a dealership couldn’t complete a clock spring recall on their truck because they were “not able to communicate with the ECU” via the OBD2 port. This issue persisted even with different scanners, indicating a problem beyond a faulty scan tool.
Often, dealerships may suggest a quick fix for a fee, implying a simple solution. However, declining such offers in favor of DIY diagnostics is understandable, especially if you suspect the problem might be related to something straightforward like fuses. Checking fuses is a logical first step when dealing with electrical issues in your car, and the OBD2 port is no exception.
However, the issue might be more complex than a simple blown fuse. Another Toyota owner faced a similar OBD2 communication failure during a recall service at a different dealership. This time, the service advisor provided a more “technical answer,” pointing towards aftermarket wiring as a potential culprit. The advisor explained that aftermarket accessories, like stereo systems and amplifiers, could be drawing power from or interfering with the ECU’s communication lines, affecting the OBD2 port’s functionality.
The dealership tech noted “aftermarket wires in the dash” and suggested that these wires might be causing an incorrect amperage/ohms reading at the OBD2 port. They refused to re-flash the ECU, fearing damage if the communication crashed mid-process due to electrical interference. This highlights the importance of proper electrical systems in modern vehicles and how aftermarket modifications can sometimes lead to unexpected issues.
The owner in question had installed an aftermarket stereo system, speaker wires, and a powered subwoofer. The dealership’s advice was to unplug these aftermarket accessories to see if it resolves the OBD2 communication problem. This suggestion makes sense, as disconnecting potential sources of electrical interference can help isolate the issue.
To further diagnose the problem, understanding the OBD2 connector wiring is crucial. A wiring diagram can help you identify which pins should have power and ground, allowing you to test for voltage and continuity using a multimeter. This systematic approach can pinpoint whether the OBD2 port is receiving power and if the communication lines are intact.
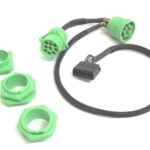
Referencing OBD2 connector diagrams specific to Toyota vehicles, like the examples below, can be invaluable. These diagrams detail pin assignments and expected voltage readings, guiding you through the testing process.
 OBD2 Connector Diagram Page 1
Alt text: OBD2 connector pinout diagram page 1, showing pin assignments and descriptions for automotive diagnostics.
 Toyota OBD2 Wiring Diagram Page 2
Alt text: Toyota OBD2 wiring diagram page 2, illustrating wire connections and voltage test points for troubleshooting OBDII communication issues.
Another point of confusion mentioned was the check engine light. The tech reported a check engine light, but the owner didn’t observe it on the dashboard, and it wasn’t detected during a smog check. This discrepancy could be due to a misinterpretation of the “Maintenance Required” light or a stored code that doesn’t illuminate the dashboard light continuously. OBD2 scanners are designed to read these stored codes, which further emphasizes the need to resolve the communication issue to access diagnostic information.
Troubleshooting Steps for OBD2 Communication Failure in a 2011 Toyota Avalon Limited:
- Check Fuses: Inspect the fuses related to the OBD2 port and ECU. Refer to your owner’s manual for fuse box diagrams and locations.
- Disconnect Aftermarket Accessories: Unplug your aftermarket stereo, amplifier, and any other non-factory electrical components connected to the car’s electrical system.
- Inspect OBD2 Connector: Visually inspect the OBD2 connector for any damage, corrosion, or bent pins.
- Test OBD2 Port Power and Ground: Use a multimeter and the OBD2 wiring diagram to test for proper power and ground at the connector pins. Pin 16 should have battery voltage, and pins 4 and 5 should be ground.
- Check Wiring: If you suspect aftermarket wiring interference, carefully inspect the wiring around the dashboard and stereo area for any loose connections, shorts, or improperly tapped wires.
- Consult Wiring Diagrams: Utilize OBD2 wiring diagrams specific to your 2011 Toyota Avalon Limited to understand the correct wiring and identify potential issues.
Conclusion:
Diagnosing an OBD2 communication problem in your 2011 Toyota Avalon Limited requires a systematic approach. Starting with simple checks like fuses and progressing to more detailed wiring inspections and voltage tests is crucial. If aftermarket accessories are present, temporarily disconnecting them is a vital step in isolating potential electrical interference. By following these troubleshooting steps and utilizing wiring diagrams, you can effectively diagnose and potentially resolve the OBD2 communication issue, allowing you to access your vehicle’s diagnostic data and proceed with necessary repairs or recall services. If the problem persists, seeking professional diagnostic help from a trusted mechanic is recommended to ensure accurate diagnosis and repair.