Maintaining a pristine car interior goes beyond aesthetics; it’s about creating a healthy and enjoyable driving environment. DIY Car Upholstery Cleaning is a vital part of vehicle upkeep, enhancing your car’s look and ensuring a hygienic space for every journey. More than just surface-level tidiness, it’s about deep cleaning and comfort. Whether you’re a seasoned detailer or new to car care, this expert guide provides the top 10 car upholstery cleaning tips and tricks to elevate your car’s interior. We will guide you through selecting and effectively using the right seat cleaner for your vehicle, covering everything from stubborn stain removal to the care of both cloth and vinyl seats. For every car owner aiming for a fresh, showroom-worthy interior, this guide is your essential resource.
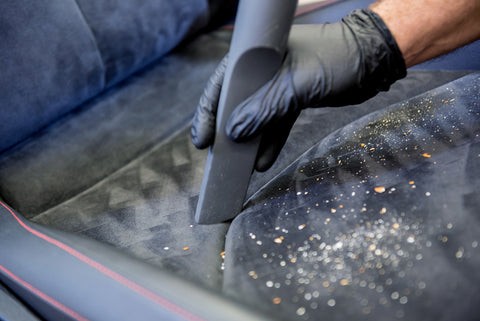
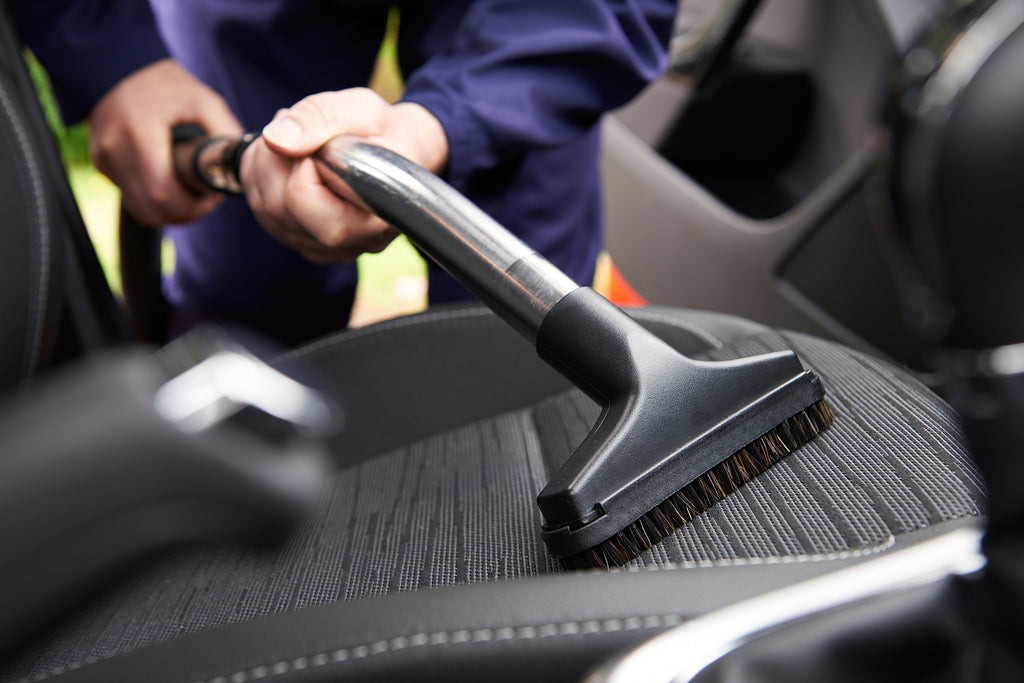
1. Begin with a Meticulous Vacuuming Session
A thorough vacuuming is the foundational step in effective car upholstery cleaning, and should always precede the application of any cleaning products. This critical step removes loose debris, crumbs, and surface dirt from car seats, carpets, and all interior surfaces. Effective vacuuming is paramount as it prevents grinding surface dirt deeper into the fabric during the cleaning process, allowing your chosen car upholstery cleaner to work more efficiently.
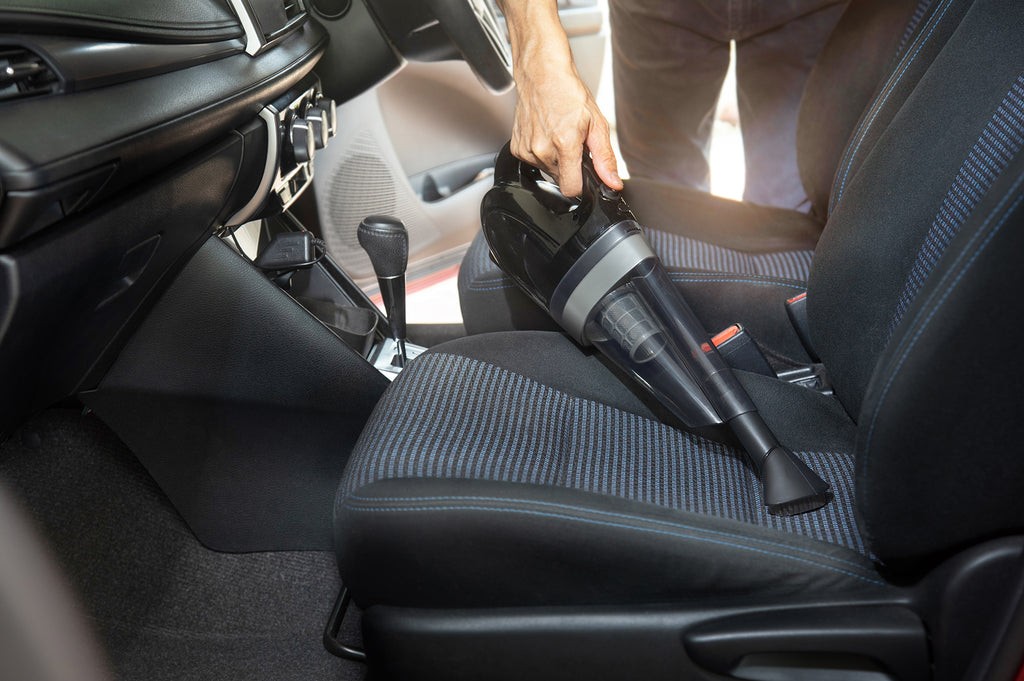 Vacuuming car interior before upholstery cleaning
Begin by removing floor mats from the car to allow for unobstructed cleaning. Shake them vigorously outside the vehicle to dislodge embedded dirt and particles. Equip your vacuum cleaner with a brush attachment, a versatile tool for reaching under seats and navigating tight corners. Pay special attention to areas where dirt accumulates most frequently, such as crevices in seats, along trim edges, and around air vents. For vehicles with cloth or vinyl seats, the brush attachment is particularly beneficial, gently agitating the fibers to lift trapped dirt. By meticulously vacuuming first, you ensure that subsequent cleaning efforts are focused on deeply embedded stains and grime, rather than surface-level dust and debris.
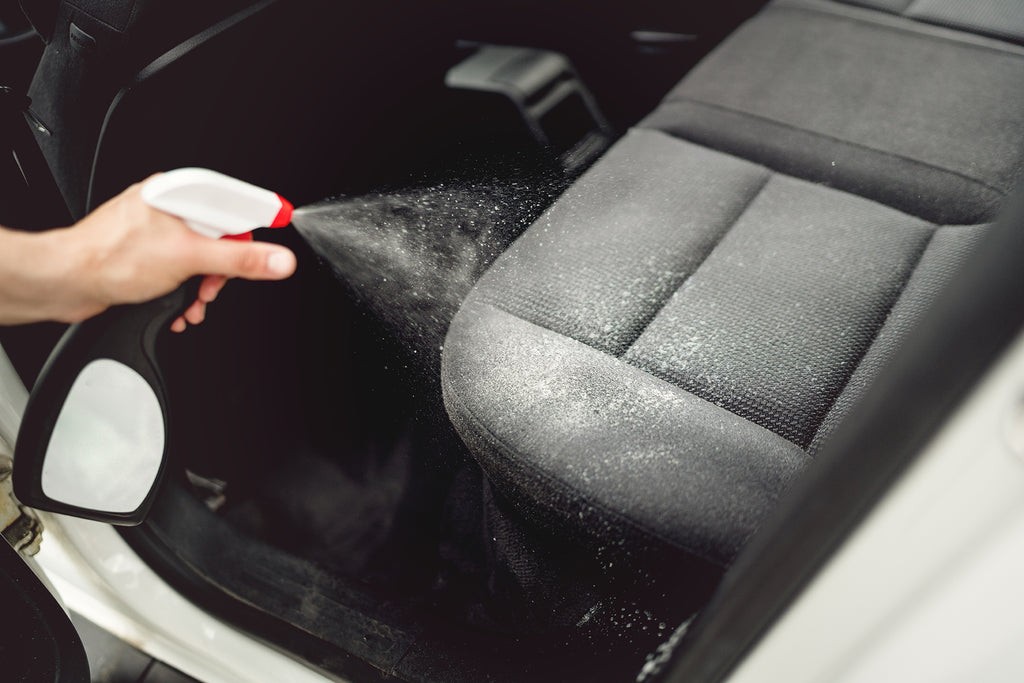
2. Pre-Treat Stubborn Stains for Optimal Cleaning
Pre-treating stains is a crucial step in professional-level car upholstery cleaning. Addressing stains before overall cleaning significantly improves the final outcome, especially when dealing with set-in marks from food, spills, or mud. Effective stain pre-treatment is key to maintaining a spotless car interior. Here’s a step-by-step approach to tackle those persistent stains on your car seats:
First, select the appropriate brush for the upholstery type. For delicate cloth seats, a soft-bristled brush is recommended to prevent fabric damage. For more resilient vinyl seats, a slightly stiffer brush can be used to effectively scrub away grime. Prepare a mild cleaning solution by mixing a gentle soap with water. A standard ratio is one teaspoon of mild dish soap per cup of water. This solution is generally safe and effective for most types of car upholstery.
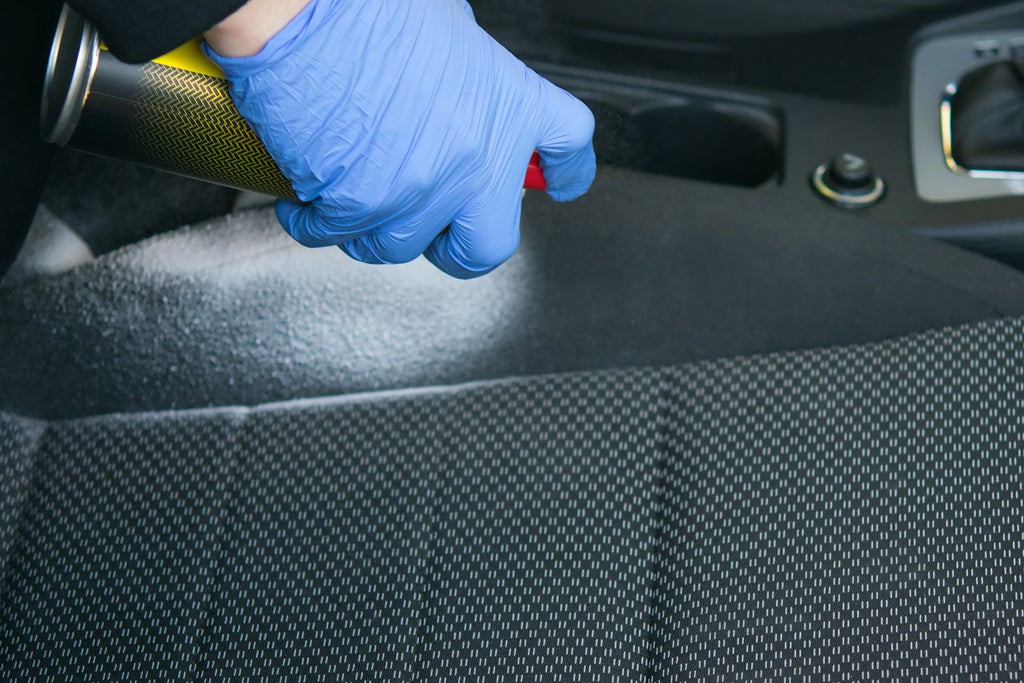 Spraying pre-treatment solution on car upholstery stain
Apply the cleaning solution directly to the stain using your chosen brush. Gently work the solution into the stain with a circular motion, ensuring thorough but careful application. Allow the solution to dwell on the stain for approximately 10 minutes. This dwell time is crucial, allowing the cleaning agents to penetrate and break down the stain molecules effectively. After the waiting period, depending on the stain and pre-treatment, you can either vacuum up any loosened residue or gently blot the area with a clean microfiber cloth. If you opt for a commercial car upholstery cleaner, always adhere to the manufacturer’s instructions provided on the product label. Typically, these cleaners are diluted with lukewarm water in a spray bottle for controlled application. Spray the solution sparingly onto the stained area to avoid oversaturation. After spraying, gently agitate the cleaner into the fabric using your brush.
 Scrubbing car seat stain with brush
Mastering stain pre-treatment techniques is essential for maintaining a pristine car interior, particularly for vehicles in regular use. Regardless of whether your seats are cloth, vinyl, or other materials, selecting the right car upholstery cleaner and pre-treatment method is paramount. Prioritize choosing high-quality upholstery cleaners that are formulated to be gentle on your specific seat material while delivering exceptional cleaning results. For vinyl seats, ensure you use a cleaner strong enough to remove stains effectively without causing damage or discoloration to the vinyl.
3. Always Test New Cleaners in an Inconspicuous Area First
Whenever introducing a new car upholstery cleaner to your car care routine, it’s imperative to conduct a patch test in an inconspicuous area before widespread application. As recommended by experts like Housewife How-tos, performing a spot test is a precautionary measure to ensure the cleaner will not cause discoloration, damage, or adverse reactions to your specific upholstery material. Given the diverse formulations of car upholstery cleaners and the variety of materials used in car interiors, a product suitable for leather might be entirely unsuitable for cloth or synthetic fabrics. Testing in a hidden area guarantees that the car upholstery cleaner will not negatively impact the overall appearance of your car’s interior.
To perform a test, select an inconspicuous area, such as underneath a seat or in a lower corner of the upholstery. Apply a small amount of the upholstery cleaner to this area, strictly following the application instructions provided on the product label. Allow the cleaner to sit for the recommended dwell time, typically around 5 to 10 minutes, which is usually sufficient to observe any immediate reactions. After the designated time, gently blot or wipe away the cleaner using a clean microfiber cloth or a damp cloth. For a more thorough test, you can also use a detail brush to lightly agitate the area. This test is crucial for assessing whether the cleaner might cause staining, bleaching, or fabric degradation.
 Applying cleaner to test patch with brush
Beyond preventing potential damage, this initial test also provides insight into the cleaner’s effectiveness. Some cleaners may prove to be less effective than anticipated or may require a more complex application process. By testing on a small, hidden area, you can evaluate if the chosen car upholstery cleaner meets your cleaning needs and is appropriate for your car’s interior before committing to a full application. This careful approach can save considerable time, effort, and potential expense, possibly eliminating the need for professional detailing services if the car upholstery cleaner performs satisfactorily during the test.
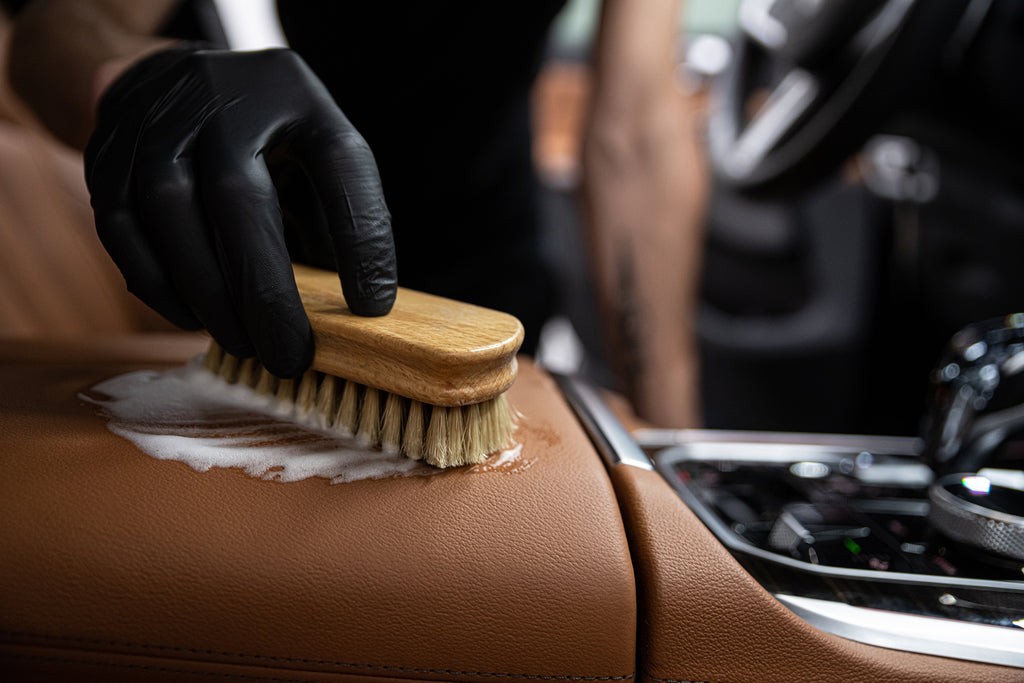
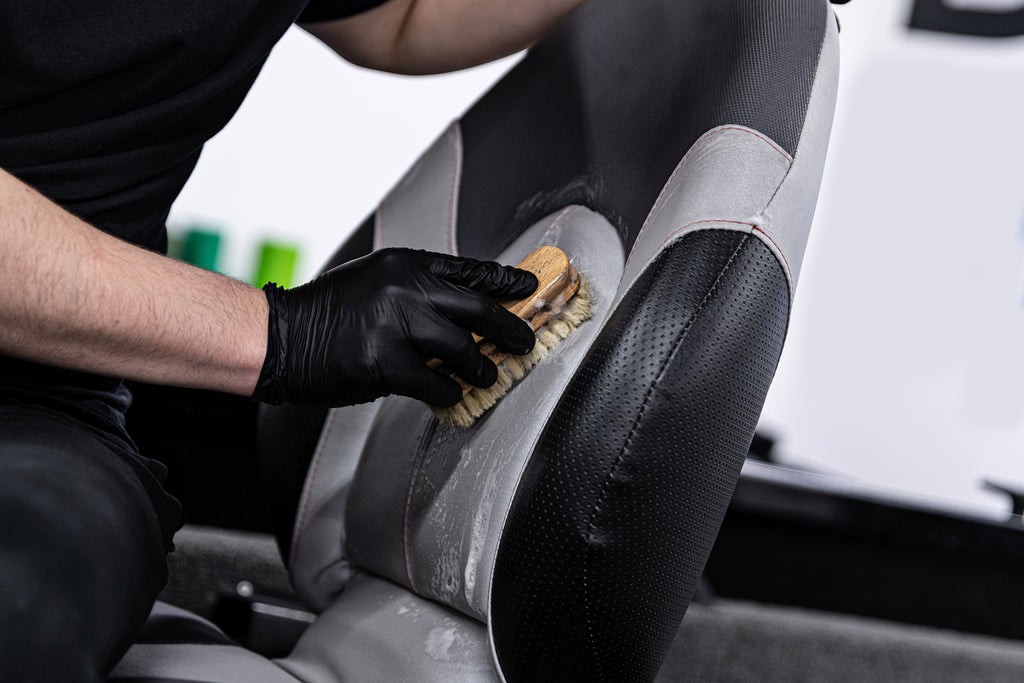
4. Utilize the Right Brush: Fabric or Bristle Brush
Selecting the correct brush is a pivotal step in effective car upholstery cleaning, particularly when addressing car seats and other fabric surfaces. A fabric or bristle brush is indispensable for cars with cloth interiors or areas with ingrained dirt and stains. These brushes are specifically designed to dislodge particles trapped within the upholstery fibers. Choosing the appropriate brush type is critical for achieving optimal cleaning results without damaging the material. For cloth upholstery, a soft-bristled brush is the ideal choice. Its gentle bristles effectively lift dirt and debris while being delicate enough to prevent damage to the fabric or carpet fibers. Conversely, for vinyl upholstery, a brush with stiffer bristles is more suitable due to the material’s durability and resistance to scratching. Stiffer bristles can more effectively scrub away tougher grime and stains from vinyl surfaces.
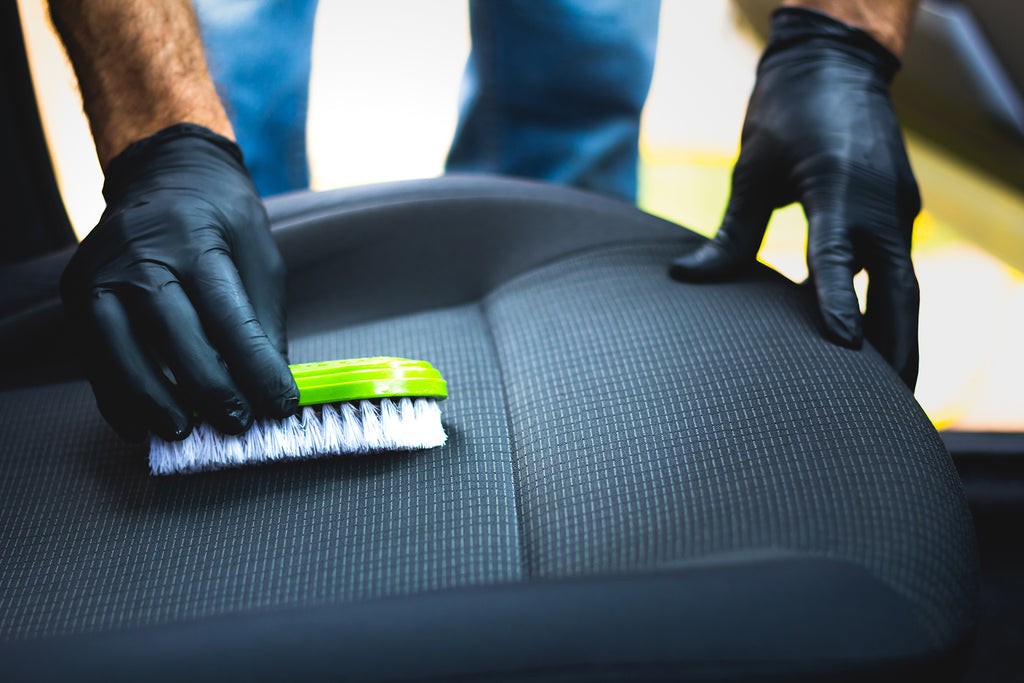 Cleaning car seats with a fabric brush
Before applying any car upholstery cleaner, begin by using a dry, soft brush to loosen surface dirt and debris. This pre-brushing step prepares the area for cleaning, making it easier for cleaners to penetrate and work effectively. Next, apply a quality car upholstery cleaner to a cotton swab or directly to the brush. Work the cleaner into the fabric using the brush with gentle, circular motions. This agitation helps the cleaner penetrate deeper into the fabric fibers, enhancing its cleaning power. After scrubbing, use a clean microfiber cloth to thoroughly remove any residual cleaner and dislodged dirt. This step is essential to prevent any sticky residue or lingering odors from the cleaner. Finally, ensure the cleaned area is completely dry to prevent moisture entrapment in the underlying foam padding, which can lead to mold or mildew growth. This comprehensive car interior cleaning process, incorporating the correct brush and techniques, will contribute significantly to keeping your car interior looking and smelling fresh.
5. Deep Clean with a Steam Cleaner for Enhanced Results
For a truly deep and revitalizing car interior cleaning, consider utilizing a steam cleaner. Steam cleaning is a highly effective method that uses hot steam to dislodge and remove dirt, grime, and odors, making it an excellent tool for comprehensive car upholstery cleaning. This method is particularly advantageous for tackling stubborn stains, deeply embedded dirt, and persistent odors that traditional cleaning methods might struggle to eliminate.
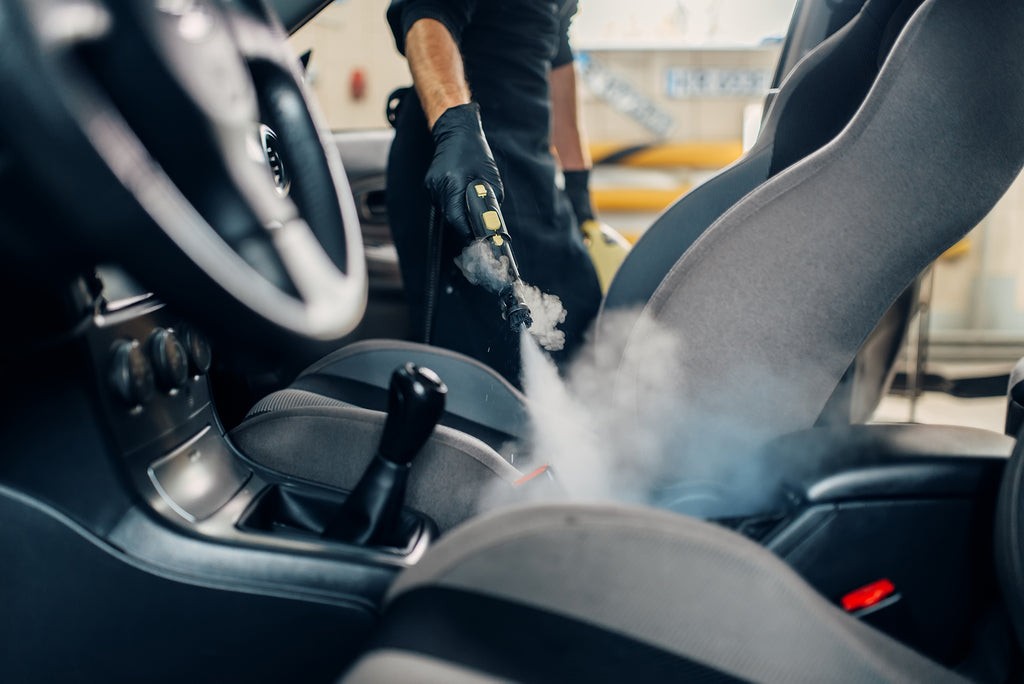 Using a steam cleaner on car upholstery
Steam cleaners excel at loosening and lifting ingrained dirt and stains from car upholstery. They are effective on a variety of materials, including both cloth and vinyl, making them a versatile option for car interior detailing. A significant benefit of steam cleaning is its safety and eco-friendliness. It eliminates the need for harsh chemicals, relying solely on the natural cleaning power of steam, making it a safer option for both your car’s interior and the environment. Furthermore, steam cleaning is highly effective at neutralizing and eliminating unpleasant odors trapped in car upholstery, such as those from food spills, pet odors, or smoke.
 Vacuuming car interior after steam cleaning
Before commencing steam cleaning, it is crucial to remove loose dirt and debris by thoroughly vacuuming the car interior. If cleaning cloth seats, use a soft brush to gently pre-agitate the surface to loosen any surface dirt. Select a car upholstery cleaner that is compatible with steam cleaners, if desired. Some prefer to use steam alone, while others may opt for a cleaning solution to enhance the steam’s cleaning power. Fill the steam cleaner with the appropriate cleaning solution and water according to the manufacturer’s instructions. Then, follow the steam cleaner’s operational guidelines to steam clean your car upholstery. Ensure you systematically cover the entire seat or area being cleaned, using overlapping strokes to ensure uniform cleaning. After steam cleaning, it is vital to allow the car’s interior to dry completely. Proper drying is essential to prevent moisture from becoming trapped in the seat padding, which can lead to mold growth and unpleasant odors.
6. Exercise Caution with Water to Prevent Upholstery Damage
When performing car upholstery cleaning, it’s crucial to manage water usage carefully to avoid oversaturation of seats and foam padding. Excessive water can lead to significant damage to your car’s interior, particularly the upholstery and underlying structures. Here’s a strategic approach to cleaning effectively while minimizing moisture:
Begin by using a minimal amount of water, ideally mixed with a reputable car upholstery cleaner. Apply this solution sparingly to the upholstery, focusing primarily on stained or soiled areas. For seats with particularly stubborn stains, consider applying the car upholstery cleaner directly to the stain for a more concentrated treatment. Then, use a brush to gently agitate and clean the stain, being mindful not to saturate the fabric excessively.
 Applying cleaner sparingly to car upholstery
Instead of soaking the entire area, employ a blotting technique using a clean, absorbent cloth. Dab the area to lift the cleaner and stain, which effectively cleans while keeping moisture to a minimum. Following cleaning, if any residual moisture remains, utilize an air compressor to blow air across the surfaces and into crevices, such as air vents and seat seams. This step is critical for ensuring thorough drying, especially in hard-to-reach areas. By adhering to these water-conscious techniques, you can effectively clean various car interior surfaces, including both cloth and vinyl upholstery, without risking water damage. This careful approach is essential for preserving the condition and longevity of your car seats and interior components.
7. Ensure Quick and Thorough Drying Post-Cleaning
Post-cleaning drying is just as crucial as the cleaning process itself in car upholstery cleaning. Failure to thoroughly dry the car interior can lead to moisture-related problems, especially in cloth seats and padding. As highlighted by Consumer Reports, avoiding over-wetting during cleaning and emphasizing proper drying are key to car interior maintenance. Here’s how to ensure effective drying:
During the cleaning phase, practice minimal liquid usage. Apply car upholstery cleaner sparingly to prevent excessive fabric saturation. It’s always better to err on the side of less moisture to begin with. After cleaning each section of upholstery, use a dry, highly absorbent microfiber cloth to blot the area immediately. Blotting helps to lift any remaining moisture and cleaner residue without rubbing dirt back into the fabric.
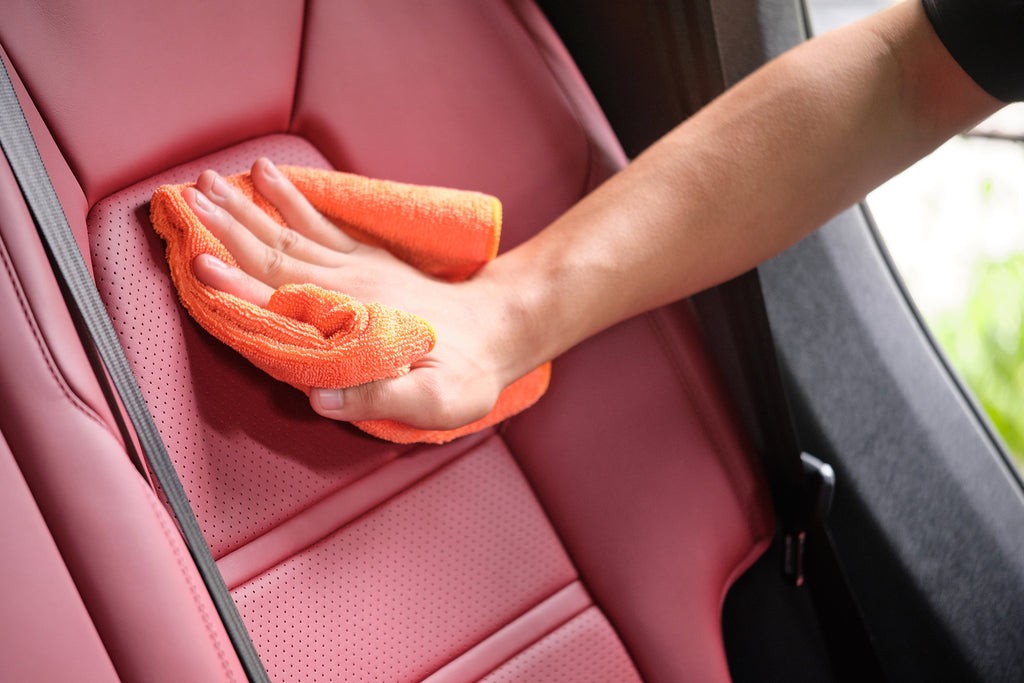 Drying car seat after cleaning
Allow the car interior to air dry completely, ideally with the car doors open and in a well-ventilated area, or using fans to circulate air. This is a critical step to ensure all moisture evaporates, especially from seat cushions and carpets. For regular car maintenance, light and consistent cleaning with an effective car upholstery cleaner is preferable. Regular, lighter cleaning prevents heavy soil buildup, which often necessitates more aggressive cleaning methods that can lead to over-wetting.
8. Protect Clean Upholstery with a Fabric Guard
After achieving a spotless car interior through meticulous car upholstery cleaning with a high-quality cleaner, it’s highly advisable to apply a fabric guard. A fabric guard acts as a protective barrier, helping to maintain the cleanliness and appearance of your car’s interior for longer. This protective layer is especially beneficial for everyday car owners, safeguarding vinyl and cloth upholstery from everyday spills, stains, and general soiling.
 Applying fabric guard to car upholstery
Here’s the correct procedure for applying a fabric guard: First, ensure that your car seats are thoroughly clean and completely dry from your car upholstery cleaning efforts. Use a reliable car upholstery cleaner to remove all existing dirt and stains. Once the seats are clean and dry, apply the fabric guard evenly across the upholstery surface, using a spray applicator. Ensure complete coverage of the seats, but avoid oversaturation; a light, even coating is sufficient for effective protection. After application, allow the fabric guard to dry completely. Refer to the product’s instructions for the recommended drying time, as this may vary between brands. Complete drying is essential for the fabric guard to properly set and provide optimal protection to your seats. Regular application of a fabric guard will keep your car interior surfaces well-protected, making routine cleaning and maintenance considerably easier. Consider pairing your fabric guard with a versatile cleaner such as Citrus Clean Multi-Purpose Cleaner for routine maintenance. This combination of a protective fabric guard and a quality car upholstery cleaner ensures that your car’s interior, particularly the seats, remains clean, fresh, and well-protected over time.
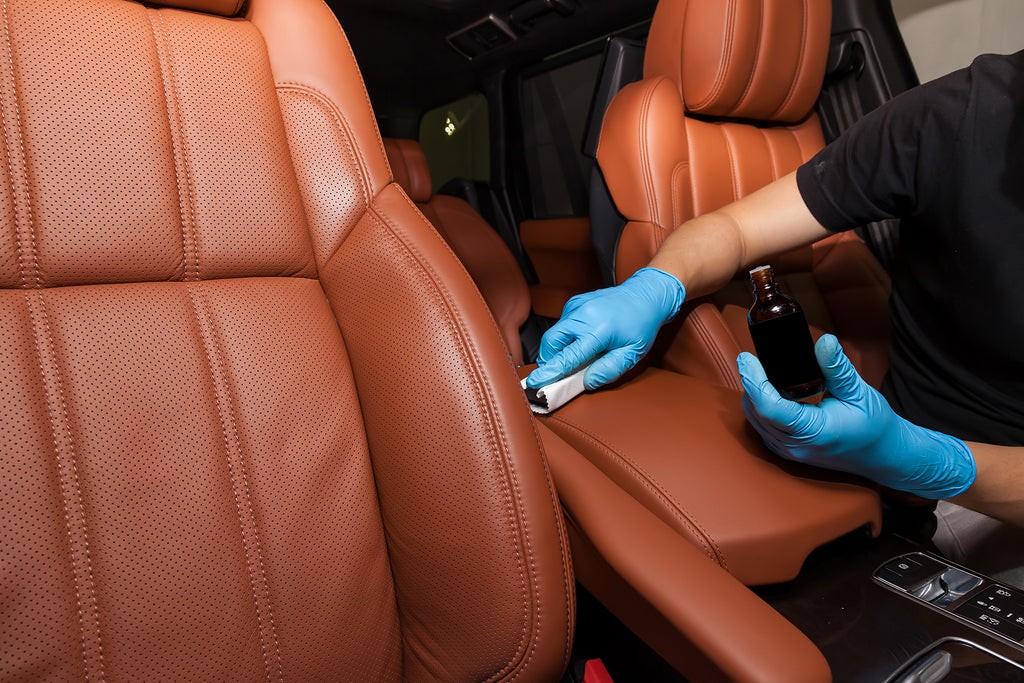
9. Specialized Care for Leather Upholstery
Leather car upholstery requires specialized care distinct from fabric or vinyl to maintain its luxurious appearance and prevent damage. Proper car upholstery cleaning for leather involves specific products and techniques. Here’s how to effectively care for leather car seats:
Always choose a car upholstery cleaner specifically formulated for leather. Avoid using generic or harsh cleaners, as these can strip leather of its natural oils, leading to cracking and premature wear. A detail brush is invaluable for applying leather car upholstery cleaner. Use gentle, circular motions to work the cleaner into the leather, avoiding heavy pressure that could scratch the surface. For stubborn marks, use a soft-bristled brush to lightly agitate the area. Apply leather car upholstery cleaner sparingly. Excess liquid can seep into the padding and damage the leather from beneath.
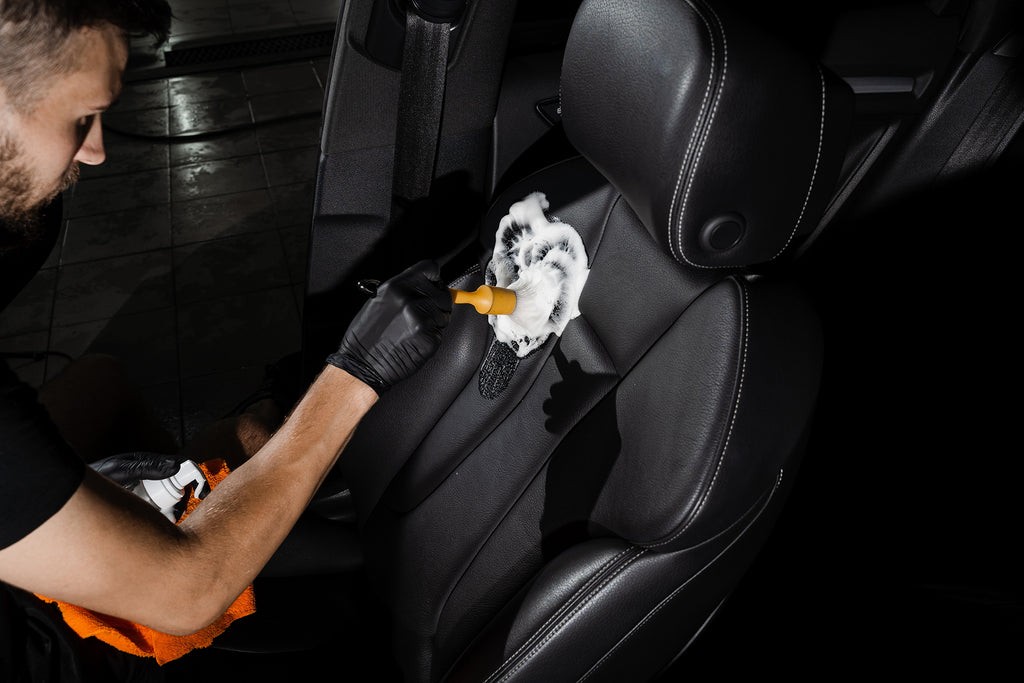
 Cleaning leather car seats with brush and leather cleaner
Regular dusting is crucial for leather maintenance. Dusting frequently prevents dirt and grit buildup, which can act as abrasives and damage the leather surface over time. A quick wipe-down with a microfiber cloth can make a significant difference. Following cleaning with a quality car upholstery cleaner, always apply a leather conditioner, such as Renew It. Leather conditioner replenishes essential oils, keeping the leather supple and preventing cracking, fading, and peeling. Consider using a fabric guard specifically designed for leather to provide an additional layer of protection against stains and wear. Minimize direct sunlight exposure to leather upholstery. Prolonged sunlight can cause leather to dry out, crack, and fade prematurely. Use car window tinting or park in shaded areas to protect your leather interior.
10. Maintain Car Upholstery with Regular Cleaning Schedules
Consistent and regular car interior maintenance is key to preserving the condition and appearance of your car’s upholstery. Car interior cleaning should not be viewed as a one-off task but as part of routine vehicle care. Regular cleaning, utilizing the best car upholstery cleaner, prevents the accumulation of dirt, stains, and allergens, thereby extending the life of your car’s interior.
 Regular car seat cleaning with brush
Frequent cleaning ensures that your car seats, carpets, and all interior surfaces remain clean, inviting, and hygienic. Consistent car interior cleaning is also essential for maintaining a healthy environment inside your vehicle. It effectively removes dust, pollen, and other allergens that can negatively impact the health of you and your passengers. Regular cleaning also helps prevent interior decontamination by removing bacteria and mold spores that can thrive in a dirty car interior.
Conclusion: Keeping Your Car Interior Consistently Fresh and Clean
Maintaining pristine car interior surfaces is an ongoing commitment, not just an occasional task. When you routinely clean your car’s interior and carpets, using a quality car upholstery cleaner ensures that you effectively remove deep-seated grime and prevent a superficial clean.
Even when faced with unexpected spills, like a pumpkin spice latte on your car seat, immediate and correct cleaning using the outlined steps for a fresh stain is crucial. Avoid guesswork and adopt a methodical approach, such as spot testing cleaners, to achieve the best possible results. With these top 10 upholstery cleaning tips, you are well-equipped to maintain a consistently fresh and clean car interior.
 Clean car seat after upholstery cleaning
Effective car interior cleaning, including carpets and upholstery, is more than just addressing visible stains and dirt; it’s about preserving the overall condition and appeal of your vehicle. Complement your upholstery care by using a quality glass cleaner for windows to enhance clarity and overall cleanliness. Whether you’re using a dedicated car upholstery cleaner for routine maintenance or carefully tackling a specific stain, these practices reflect your commitment to vehicle care and ensure both your car and your driving experience remain in top condition.