Car scratches are an unfortunate reality for vehicle owners. Whether it’s a minor brush against a bush or a more noticeable key mark, scratches can detract from your car’s appearance and value. The good news is that you don’t always need a professional detailer to restore your car’s flawless finish. This guide will walk you through proven DIY methods to get rid of scratches on your car, ranging from light surface blemishes to deeper imperfections.
Understanding Car Scratches and When to DIY
Before you grab any product, it’s crucial to understand the type of scratch you’re dealing with. Car paint typically consists of several layers: clear coat, base coat (color), primer, and the metal body. Most minor scratches only affect the clear coat, which is designed to protect the underlying paint.
Types of Car Scratches:
- Clear Coat Scratches (Light): These are superficial scratches that you can often feel with your fingernail but don’t go deep. They usually appear as hazy or swirl marks and are the easiest to fix at home.
- Base Coat Scratches (Medium): If you can feel the scratch with your fingernail and it catches, it’s likely gone through the clear coat and into the base coat. These require a bit more effort and potentially stronger products.
- Primer/Metal Scratches (Deep): These are the most severe, exposing the primer or even bare metal. Deep scratches may require professional attention, but some DIY techniques can still improve their appearance.
When to DIY:
For light to medium scratches, DIY methods are often effective and cost-saving. If you have deep scratches that expose metal or are very wide, professional repair might be necessary to prevent rust and ensure a proper finish.
DIY Methods to Remove Car Scratches
Here are several methods you can use to get rid of scratches on your car, starting from the least abrasive to more intensive techniques:
1. Washing and Inspection
The first step is always to thoroughly wash and dry your car. This removes dirt and debris that can worsen scratches during the removal process. Use a quality car wash soap and a microfiber wash mitt. Once clean and dry, inspect the scratches closely in good lighting to determine their depth.
2. Rubbing Compound for Light Scratches
For very light scratches and swirl marks in the clear coat, a rubbing compound can be your best friend. Rubbing compounds are mildly abrasive and work by gently leveling out the clear coat around the scratch, making it less visible.
Product Example: Turtle Wax Rubbing Compound
[Referencing the original article, Turtle Wax products were tested for light scratches.]
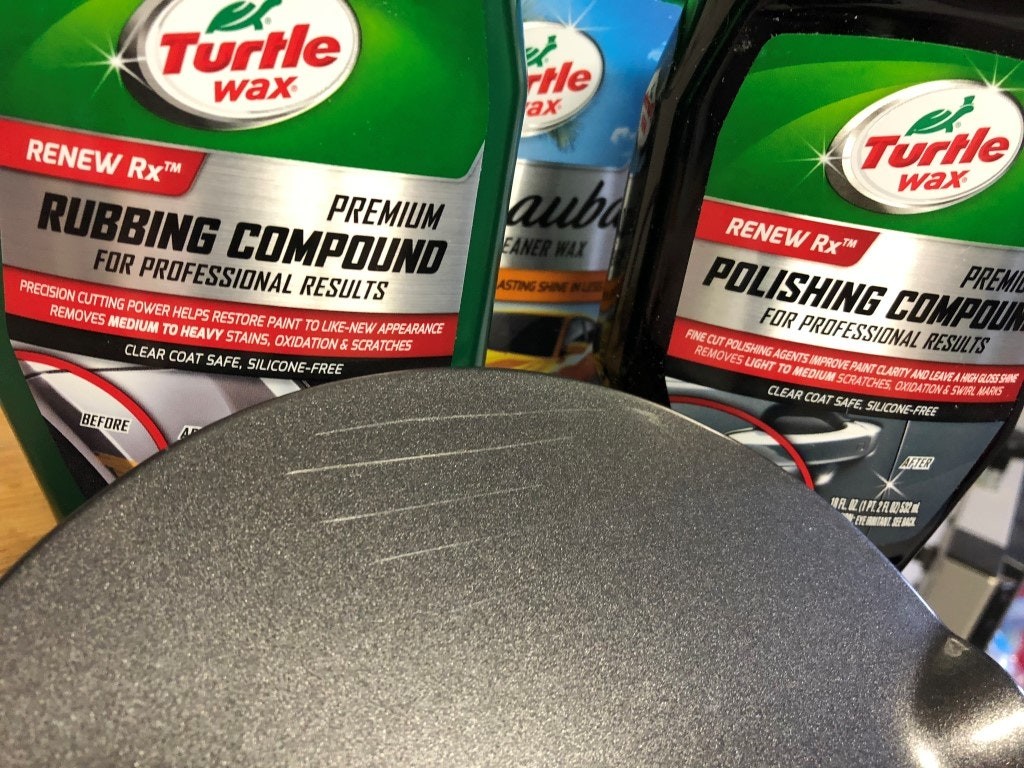 Turtle Wax products for scratch removal.
How to use rubbing compound:
- Apply a small amount of rubbing compound to a clean microfiber cloth.
- Using circular motions, gently rub the compound into the scratched area.
- Continue rubbing for a minute or two, applying light pressure.
- Wipe off the residue with a clean microfiber cloth.
- Inspect the scratch. Repeat if necessary.
- Follow up with a polishing compound and wax for best results.
Effectiveness: Rubbing compounds are most effective on very minor clear coat scratches. As the original article noted, Turtle Wax products were “a fair job at hiding the lightest of surface scratches at a distance,” but might not eliminate them entirely under close inspection.
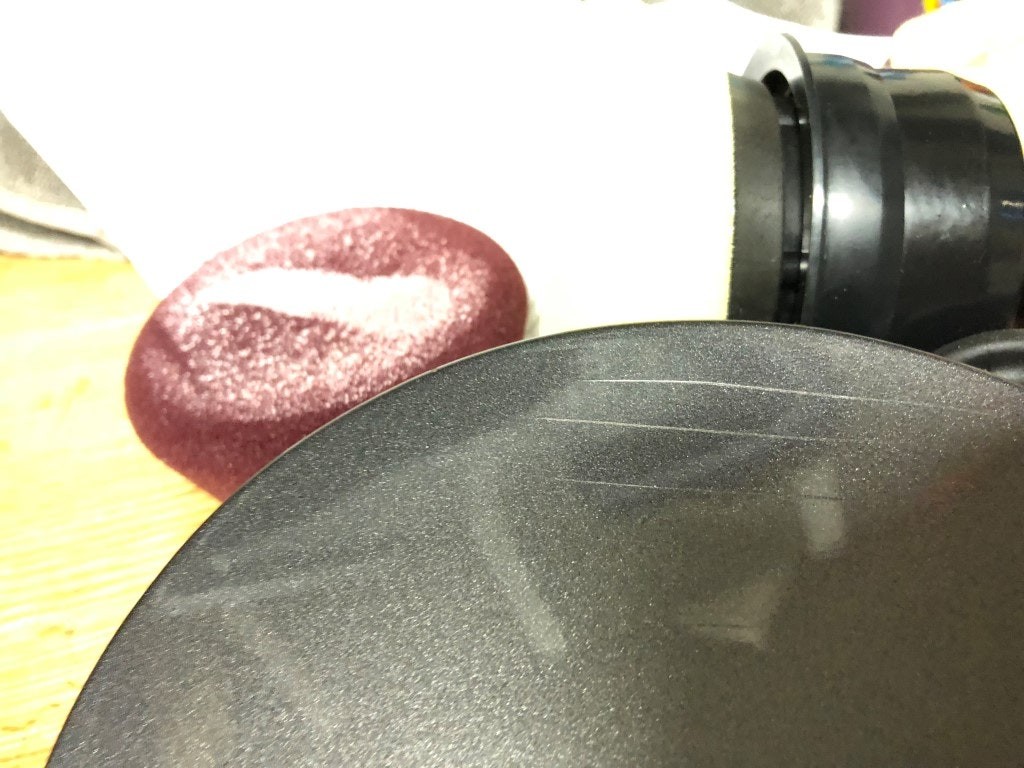
3. Polishing Compound for Light to Medium Scratches
If rubbing compound isn’t enough, a polishing compound is the next step up in abrasiveness. Polishing compounds are designed to remove slightly deeper clear coat scratches and can also enhance the shine of your car’s paint.
Product Example: Meguiar’s Ultimate Polish
[Meguiar’s products were tested and showed better results, especially with a power tool.]
How to use polishing compound:
- Apply a small amount of polishing compound to a clean microfiber cloth or a polishing pad if using a machine.
- Rub the compound into the scratch using circular motions. You can apply slightly more pressure than with rubbing compound.
- For enhanced results, consider using a dual-action (DA) polisher like the Meguiar’s DA Power System mentioned in the original article. This tool attaches to a drill and provides more consistent and effective polishing action.
 Car after polishing with Meguiar's DA Power System.
- Wipe off the residue with a clean microfiber cloth.
- Inspect and repeat if needed.
- Finish with wax to protect the paint and enhance shine.
Effectiveness: Meguiar’s Ultimate Polish, especially when used with a DA polisher, showed “markedly improved results” in the original test, making lighter scratches “virtually invisible.” It’s more effective than rubbing compound for slightly deeper clear coat imperfections.
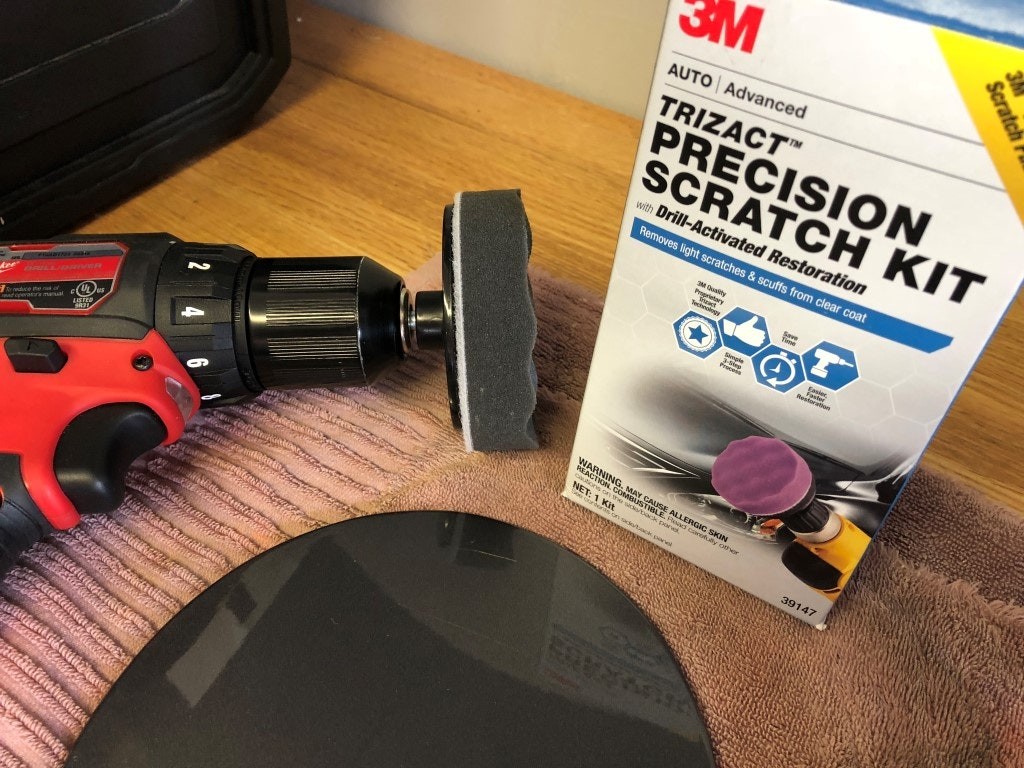
4. Scratch Repair Kits with Sandpaper for Medium Scratches
For scratches that are deeper into the clear coat or slightly into the base coat, you might need to use a scratch repair kit that includes fine-grit sandpaper. Sanding sounds intimidating, but when done correctly, it can effectively level the scratch before polishing.
Product Example: 3M Trizact Precision Scratch Kit
[The 3M kit utilizes sanding for more significant scratch removal.]
How to use a scratch repair kit with sandpaper:
- Wet Sanding: Lightly wet the included fine-grit sandpaper (often 3000 grit or higher) and the scratched area. Gently sand the scratch using straight, back-and-forth motions. The goal is to level the clear coat around the scratch, not to remove paint. As the original article notes, “some sanding was required to significantly improve most of my test scratches.”
- Rubbing Compound (with drill attachment): Apply rubbing compound using a drill attachment pad included in the kit. This step removes the sanding marks and further levels the surface.
- Polishing Compound (with drill attachment): Follow with polishing compound using another drill attachment pad to restore shine and remove any remaining imperfections.
 3M scratch repair system components and results.
- Wipe clean and inspect.
- Apply wax or sealant for protection.
Effectiveness: The 3M Trizact kit, with its sanding component, was rated “definitively improved the deepest scratches, though they were still somewhat visible” in the original article. Sanding is a more aggressive method, but effective for medium scratches when done carefully.
5. Touch-Up Paint for Deep Scratches
For deep scratches that reach the primer or bare metal, touch-up paint is necessary to fill the scratch and prevent rust. This method is more about improving the appearance than completely eliminating the scratch, especially for very deep gouges.
How to use touch-up paint:
- Clean the scratch thoroughly and ensure it’s dry.
- Apply touch-up paint carefully into the scratch using a fine brush or applicator. Apply thin coats to avoid drips and allow each coat to dry completely before applying the next.
- Let the paint dry and cure according to the manufacturer’s instructions.
- Once dry, you can lightly sand the touch-up paint with very fine-grit sandpaper (3000 grit or higher) to level it with the surrounding paint, if needed.
- Follow with polishing compound to blend the touch-up paint and restore shine.
- Apply wax to protect the area.
Effectiveness: Touch-up paint is essential for preventing rust and making deep scratches less noticeable. It may not completely erase the scratch, but it significantly improves the overall look.
Tips for Best Results
- Work in the shade: Avoid direct sunlight, as it can cause products to dry too quickly and make them harder to work with.
- Use clean microfiber cloths: Always use clean, soft microfiber cloths to prevent introducing new scratches.
- Start with the least aggressive method: Begin with rubbing compound and gradually move to more abrasive methods if needed.
- Take your time: Scratch removal is not a rushed process. Work patiently and carefully for the best results.
- Always wax after: Waxing after scratch removal protects the paint and enhances shine.
Conclusion
Getting rid of scratches on your car can be a rewarding DIY project. By understanding the type of scratch you’re dealing with and using the appropriate methods and products, you can effectively restore your car’s paint and keep it looking its best. From simple rubbing compounds to scratch repair kits with sanding, there are solutions for various levels of scratches. Remember to always start with a clean surface, work carefully, and enjoy the satisfaction of a scratch-free finish.