Scratches on your car are an unavoidable part of vehicle ownership. From minor brushes with bushes to rogue stones on the road, these blemishes can appear at any time. Fortunately, you don’t always need to rush to a body shop to restore your car’s pristine finish. There are several effective methods for car scratch removal you can try at home, alongside knowing when professional help is the best solution. This guide will walk you through various techniques on how to get scratches out of your car, using both household items and specialized products.
1) The Toothpaste Trick for Minor Car Scratches
Yes, you read that right – toothpaste can be surprisingly effective for removing light scratches from your car’s clear coat. The mild abrasives in toothpaste work to gently buff out surface imperfections, smoothing the edges of minor scratches.
Here’s how to use toothpaste for scratch removal:
- Materials: Toothpaste (non-gel, white is best), clean microfiber cloths, water.
- Process:
- Ensure the area around the scratch is clean and dry.
- Apply a small amount of toothpaste to a clean microfiber cloth.
- Using a circular motion, gently rub the toothpaste onto the scratch. Apply light pressure.
- Continue rubbing for about 30 seconds to a minute.
- Rinse the area with water to remove toothpaste residue.
- Dry the area with a clean, soft microfiber cloth.
- Inspect the scratch. You may need to repeat the process for slightly deeper scratches.
This method is best suited for very light surface scratches that haven’t penetrated the clear coat deeply.
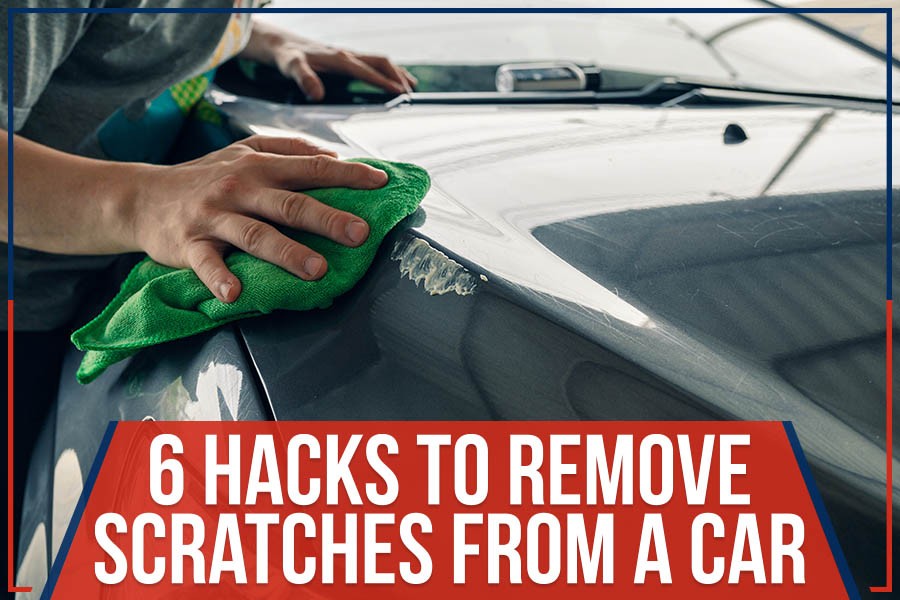 Applying toothpaste to remove car scratch
2) Clear Nail Polish for Deeper Car Scratches: A Temporary Fix
For deeper scratches that go beyond the clear coat but haven’t reached the metal, clear nail polish can act as a temporary sealant to prevent rust and make the scratch less noticeable. This is more of a cosmetic cover-up and protection method than a true removal technique.
Using clear nail polish to minimize deeper scratches:
- Materials: Clear nail polish, a fine-tipped applicator brush (optional), nail polish remover, clean cloth.
- Process:
- Clean the scratched area thoroughly and let it dry completely.
- Carefully apply a thin layer of clear nail polish into the scratch. Use a fine-tipped brush for precision if available.
- Allow the nail polish to dry completely. This may take a few hours.
- Once dry, if there is excess nail polish outside the scratch, you can gently buff it down with a very fine polishing compound or carefully use a tiny amount of nail polish remover on a cloth to level it with the surrounding paint. Be extremely cautious not to damage the surrounding paint.
Remember, this is a temporary fix. Nail polish can chip or peel over time and doesn’t permanently repair the scratch.
3) Baking Soda Paste for Light Scratch Removal
Similar to toothpaste, a paste made from baking soda and water can act as a mild abrasive to buff out minor scratches.
Creating a baking soda scratch removal paste:
- Materials: Baking soda, water, mixing bowl, clean microfiber cloths.
- Process:
- Mix baking soda and water in a bowl to create a thick paste. A 1:1 ratio is usually a good starting point.
- Clean the area around the scratch and ensure it is dry.
- Apply the baking soda paste to a clean, damp microfiber cloth.
- Gently rub the paste onto the scratch in a circular motion.
- Rinse the area thoroughly with water to remove all baking soda residue.
- Dry the area with a clean microfiber cloth and inspect the scratch. Repeat if necessary for minor improvements.
This method is best for superficial scratches and may require a bit more elbow grease compared to toothpaste.
4) Vinegar Solution: A Gentle Cleaning Approach
While vinegar isn’t abrasive, a diluted vinegar solution can help clean the scratched area and potentially reduce the appearance of very light scratches by removing dirt or grime that makes them stand out.
Using a vinegar solution for cleaning scratches:
- Materials: White vinegar, water, spray bottle or bowl, clean microfiber cloths.
- Process:
- Mix equal parts white vinegar and water in a spray bottle or bowl.
- Spray or soak a clean microfiber cloth with the vinegar solution.
- Gently rub the scratched area with the damp cloth.
- Rinse the area with clean water and dry with a separate clean microfiber cloth.
- Assess if the scratch looks any better. This method is primarily for cleaning and might offer minimal scratch reduction on its own.
5) Commercial Car Scratch Removal Products: When DIY Needs a Boost
For more noticeable scratches that DIY methods might not fully address, commercial scratch removal products are a worthwhile investment. These products are specifically formulated to remove scratches from car paint and often contain mild abrasives and fillers to level and conceal scratches.
Using commercial scratch removers:
- Materials: Commercial scratch removal product (choose a reputable brand), applicator pads or microfiber cloths (often included), water (for cleaning).
- Process:
- Clean the scratched area according to the product instructions.
- Apply a small amount of scratch remover to an applicator pad or microfiber cloth.
- Rub the product into the scratch using firm, even pressure, following the product’s directions (usually circular or back-and-forth motions).
- Buff away excess product with a clean microfiber cloth.
- Inspect the results and repeat application if needed, as per product instructions.
When choosing a commercial scratch remover, read reviews and opt for reputable brands. Avoid extremely cheap “budget kits” as they can sometimes contain harsh compounds that could further damage your car’s paint.
6) When to Seek Professional Car Scratch Repair
While DIY methods and commercial products can handle many minor to moderate scratches, some damage is best left to professionals. Consider professional scratch repair in these situations:
- Deep scratches reaching the primer or metal: If you can see bare metal or a layer of color different from your car’s paint (primer), the scratch is likely too deep for DIY fixes.
- Large or complex scratches: Extensive scratches or scratches in difficult-to-reach areas are better handled by experts.
- You want a perfect, long-lasting repair: Professionals have the tools, expertise, and color-matching capabilities to ensure a repair that is virtually undetectable and durable.
- You’re unsure or uncomfortable DIY-ing: If you’re hesitant about trying DIY methods, especially on a newer or valuable car, professional repair provides peace of mind.
Professional services offer benefits like paint color matching, expert techniques including sanding and repainting if necessary, and often warranties on their work. Investing in professional repair ensures the job is done correctly and can even help maintain your car’s resale value.
Scratches are an unfortunate reality of car ownership, but understanding how to get scratches out of your car, whether through DIY methods or professional services, empowers you to keep your vehicle looking its best. Choose the method that best suits the severity of the scratch and your comfort level to restore your car’s finish.
