Driving with properly functioning headlights is crucial for your safety and the safety of others on the road. Headlights ensure visibility at night and in adverse weather conditions. When a headlight goes out, it’s not only a safety hazard but can also lead to legal issues. Fortunately, replacing a headlight bulb is often a straightforward DIY task that most car owners can handle at home. This guide will walk you through the process of how to replace a headlight, helping you save time and money while ensuring your vehicle is safe to drive.
Before you begin, it’s important to confirm that the issue is indeed a burned-out bulb and not a more complex electrical problem. A simple initial check is to turn on your headlights and observe if only one is out. In many cases, a single non-functioning headlight indicates a bulb failure. According to Emilio Zullo, a seasoned automotive technician and owner of E & L Automotive, “If one headlight is out, 90% of the time it’s just the bulb. Replacement usually solves the problem immediately.” If you’re on the road and notice a headlight issue, a temporary diagnostic trick is to gently tap the headlight housing with your fist. Sometimes, this action can briefly restore the light.
“Tapping the light might temporarily turn it back on,” Zullo explains, “This happens because you’re momentarily reconnecting a burnt-out filament inside the bulb. If it flickers on after tapping, it’s a clear sign the filament is broken.” While this isn’t a permanent fix, it can be helpful in situations where you need to drive to a safer location or an auto parts store.
Step-by-Step Guide to Replace Your Headlight Bulb
For detailed instructions specific to your vehicle model and the correct headlight bulb type, always consult your car’s owner’s manual. However, the general steps for replacing a headlight bulb are quite similar across most vehicles.
Step 1: Ensure Vehicle is Powered Off
Safety first! Turn off your car completely and remove the keys from the ignition. This prevents any electrical accidents during the replacement process.
Step 2: Access the Headlight Housing
Open your car’s hood and locate the headlight assembly. It’s usually positioned at the front of the engine compartment, directly behind the headlight lens.
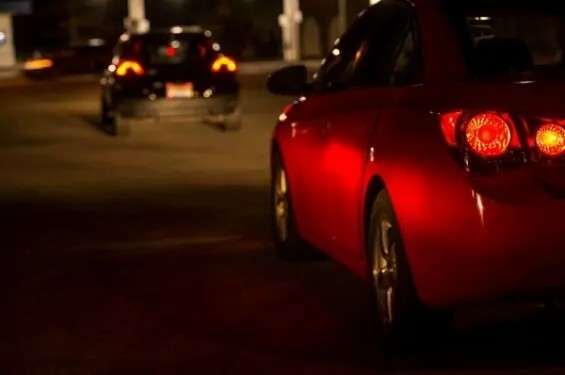
 Red brake light on a vehicle, symbolizing the importance of functional car lights, in an article about how to replace headlights.
Step 3: Disconnect the Electrical Connector
At the back of the headlight bulb, you’ll find a connector with wires attached. Typically, there are three wires connected to the bulb’s base. To disconnect this, you’ll usually need to press down on a small clip or release a cap that secures the connector. Gently pull the connector straight back to detach it from the bulb.
Step 4: Remove the Old Headlight Bulb
The method for removing the old bulb can vary depending on your car’s make and model. As Emilio Zullo points out, “Car designs differ significantly. Some vehicles offer easy access to the bulb, while others may have obstructions like the battery or air filter housing.” In some cases, you might even need to remove parts like the inner fender liner to reach the headlight from behind.
If you have direct access to the bulb, you’ll need to identify how it’s secured in place. Most headlight bulbs are held in by either a retaining clip or a twist-lock mechanism. For retaining clips, you’ll need to gently unclip them to release the bulb. For twist-lock mechanisms, rotate the bulb counterclockwise to unlock it from the housing. Exercise caution during this step to avoid damaging the clips or the bulb housing. If you encounter resistance or are unsure how to proceed, consult your owner’s manual or a repair guide specific to your vehicle.
Step 5: Install the New Headlight Bulb
Carefully insert the new headlight bulb into the socket, ensuring it’s the correct type as specified in your owner’s manual. If your car uses a clip, re-secure the retaining clip. If it’s a twist-lock type, twist the new bulb clockwise until it is firmly in place. Crucially, avoid touching the glass part of the new bulb with your bare fingers. The oils from your skin can cause the bulb to overheat and fail prematurely. Use gloves or a clean cloth to handle the bulb.
Reconnect the electrical connector to the new bulb, ensuring it clicks securely into place. Finally, close the hood of your car.
With the new bulb installed, test your headlights to ensure they are working correctly. Turn on your headlights and verify that both are illuminated and at the correct brightness.
Troubleshooting: When a New Headlight Bulb Doesn’t Work
In most cases, replacing the bulb resolves the headlight issue. However, if your new bulb doesn’t light up, there might be an underlying electrical problem.
“If a new bulb doesn’t fix the issue, you’ll need to check the fuses and wiring,” advises Zullo.
Check Fuses and Wiring: Locate the fuse box, usually found under the dashboard or in the engine compartment (refer to your owner’s manual for the exact location). Identify the fuse for the headlights and check if it’s blown. A blown fuse will have a broken wire inside. Replace it with a new fuse of the same amperage. If the fuse is not the issue, or if it blows again immediately, the problem might be with the wiring.
“If power is reaching the fuse but not the headlight, you likely have a wiring problem,” Zullo explains. “A wire could be broken, pinched, or damaged somewhere in the circuit.” Diagnosing wiring issues can be more complex and may require professional assistance.
Incorrect Bulb Type or Socket Damage: Another potential issue, especially if you recently replaced a halogen bulb, is compatibility or socket damage. Zullo cautions against using higher wattage or non-OEM replacement bulbs: “Modern halogen bulbs operate at high temperatures. Some aftermarket bulbs, marketed for increased brightness, can exceed the factory wiring and socket’s capacity.” These high-wattage bulbs can generate excessive heat, potentially melting the headlight socket and leading to poor connections or bulb failure. In such cases, you might need to replace the entire headlight socket. Always use the bulb type recommended for your vehicle.
Common Reasons for Headlight Burnout
Understanding why headlights fail can help you anticipate and prevent future issues.
-
Normal Wear and Tear (Old Age): The most frequent cause of headlight failure is simply old age. “Headlight bulbs have a limited lifespan,” says Zullo. “Often, when one headlight burns out, the other, being of similar age, will likely fail soon after.” It’s a good practice to replace both headlights at the same time to ensure consistent brightness and avoid future inconvenience.
-
Temperature Fluctuations: Extreme temperature changes, both cold and hot, can stress the delicate filament within headlight bulbs, leading to premature burnout.
-
Oxidation of Housing: In newer vehicles with plastic headlight housings, oxidation can cause the plastic to become cloudy or yellowish. “Oxidation diminishes headlight brightness significantly,” Zullo notes. “If the housing is oxidized, replacing just the bulb won’t solve the problem. You’ll need to replace the entire headlight assembly to restore proper light output.”
-
Cracked Bulb Housing: Cracks in the headlight housing allow moisture to enter, which can quickly cause halogen bulbs to fail. “Halogen bulbs are very sensitive to moisture,” explains Zullo. “Even a small crack can let in humidity, causing a newly installed bulb to burn out within days.” Additionally, touching halogen bulbs with bare hands during installation can also lead to premature failure due to oil and salt residue.
Knowing how to replace a headlight is a valuable skill for any car owner. It’s a simple maintenance task that can enhance your safety on the road and save you money on professional mechanic fees. By following these steps and understanding the common causes of headlight issues, you can keep your car properly illuminated and ensure safer driving conditions. Remember to always prioritize safety and consult your vehicle’s manual for specific instructions and bulb types.

