
Leather car seats are a mark of luxury, adding a touch of elegance and comfort to your vehicle’s interior. Their supple feel and sophisticated look enhance the driving experience. However, to maintain this luxurious appeal and ensure longevity, regular cleaning and conditioning are essential. Just like leather furniture or apparel, car leather seats require proper care to prevent wear and tear, cracking, and fading. This guide will provide you with a comprehensive understanding of Leather Car Seat Cleaners, how to use them effectively, and how to keep your leather seats looking their best for years to come.
While the idea of cleaning leather might seem daunting, especially in your car, it’s a straightforward process with the right knowledge and products. Using the wrong cleaning agents or techniques can damage the delicate leather, leading to discoloration, dryness, and premature aging. This article is your go-to resource for mastering leather car seat cleaning. We’ll cover everything from the best cleaning methods to choosing the right leather car seat cleaner, ensuring your car’s interior remains as luxurious as the day you bought it.
Why Cleaning Your Leather Car Seats Matters
Leather car seats aren’t just about aesthetics; they also contribute to the overall hygiene and value of your vehicle. Over time, leather seats accumulate dirt, dust, body oils, food crumbs, and spills. These not only detract from the appearance but can also degrade the leather over time. Regular cleaning offers several key benefits:
- Preserves Leather Quality: Dirt and grime act like abrasives, slowly wearing down the leather’s protective coating and causing it to crack and age prematurely. Consistent cleaning removes these harmful particles, extending the lifespan of your seats.
- Enhances Appearance: Clean leather seats look and feel luxurious. Removing stains and dirt restores the leather’s natural luster and rich color, making your car interior more inviting and enjoyable.
- Improves Hygiene: Car interiors can harbor bacteria and allergens. Cleaning leather seats eliminates these unwanted guests, contributing to a healthier environment inside your vehicle, especially important for families and those sensitive to allergens.
- Maintains Vehicle Value: A well-maintained car interior, including clean leather seats, significantly contributes to your vehicle’s resale value. Potential buyers appreciate a car that shows pride of ownership, and clean leather is a clear indicator of good maintenance.
 clean leather seats
Alt text: Close-up of a clean, luxurious leather car seat, highlighting the pristine condition after professional cleaning.
Essential Tools and Materials for Leather Car Seat Cleaning
Before you begin cleaning, gather the necessary tools and materials to ensure a smooth and effective process. Having everything at hand will make the job easier and prevent interruptions. Here’s what you’ll need:
- Vacuum Cleaner with Soft Brush Attachment: Start by vacuuming your seats to remove loose dirt, crumbs, and debris. A soft brush attachment will prevent scratching the leather surface.
- Microfiber Towels: These are essential for wiping down surfaces, applying cleaner and conditioner, and buffing the leather. Microfiber is soft, absorbent, and won’t scratch the leather. Keep several clean microfiber towels ready.
- Detailing Brush (Soft Bristle): A soft-bristled detailing brush helps to gently agitate dirt and grime from the leather pores without damaging the surface.
- Leather Car Seat Cleaner: Choose a cleaner specifically formulated for car leather. We’ll discuss different types and recommendations in detail later.
- Leather Conditioner: After cleaning, conditioning is crucial to replenish the leather’s natural oils and prevent drying and cracking. Select a quality leather conditioner.
- Spray Bottles (Optional): For applying cleaner and conditioner, spray bottles can provide even distribution and prevent over-saturation.
- Warm Water (in a bucket): For diluting cleaners (if necessary) and rinsing brushes or cloths.
Step-by-Step Guide to Cleaning Your Leather Car Seats
Now that you have your tools and materials, let’s walk through the step-by-step process of cleaning your leather car seats. Follow these steps for a thorough and safe cleaning experience:
1. Vacuum the Seats Thoroughly
Begin by vacuuming the entire surface of your leather seats. Pay close attention to seams, crevices, and areas where dirt and debris tend to accumulate. Use a soft brush attachment to loosen any embedded dirt and prevent scratching. This initial step removes loose particles and prepares the surface for cleaning.
2. Apply Leather Car Seat Cleaner
Choose your preferred leather car seat cleaner. For store-bought cleaners, follow the manufacturer’s instructions. Typically, you’ll spray a small amount of cleaner onto a microfiber towel or directly onto the seat in a small section. Avoid oversaturating the leather. For DIY solutions, apply sparingly and test in an inconspicuous area first.
When cleaning leather dashboards and door panels, it’s best to apply the cleaner onto a microfiber towel first to control the application and avoid overspray on windows or other surfaces.
3. Gently Scrub with a Detailing Brush
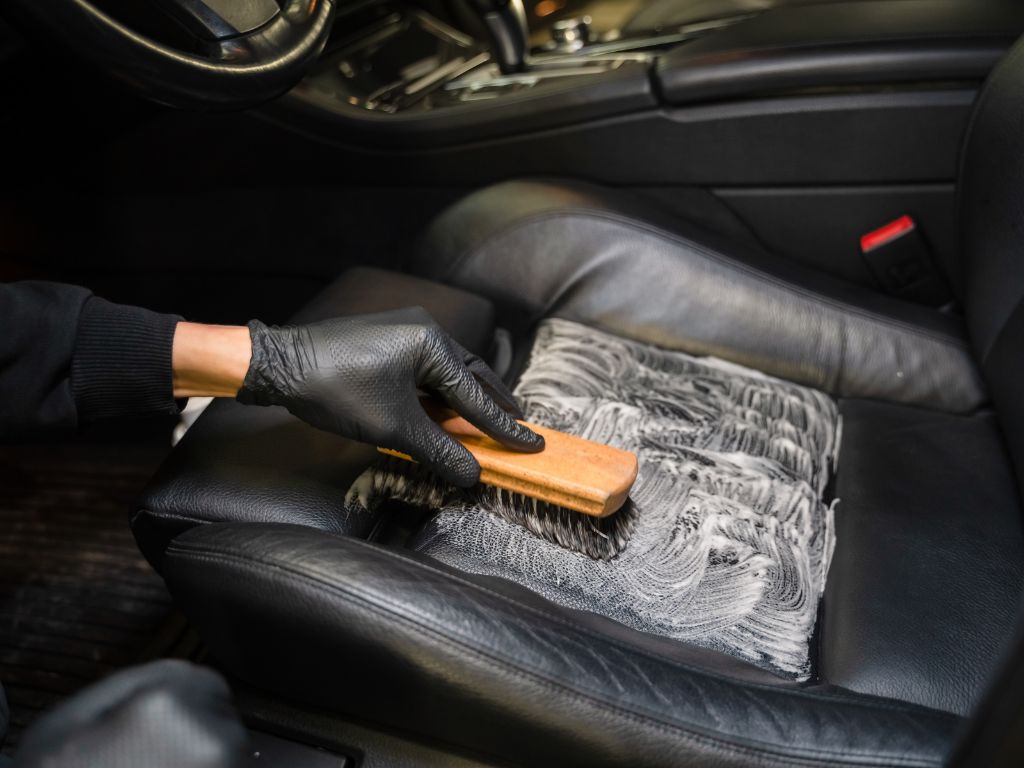 scrub with a detailing brush until foamy
Alt text: A soft detailing brush gently scrubbing a leather car seat, creating a light foam from the leather cleaner.
Using a soft detailing brush, gently scrub the area where you applied the cleaner. Work in circular motions to lift dirt and grime from the leather pores. You should see the cleaner start to foam or emulsify as it lifts the dirt. Avoid applying excessive pressure, let the cleaner and brush do the work.
For heavily soiled areas or stubborn stains, you may need to repeat this step or allow the cleaner to dwell for a short period (as per product instructions).
4. Wipe Clean with a Microfiber Towel
Immediately after scrubbing, use a clean, damp microfiber towel to wipe away the cleaner and lifted dirt. Wipe in the same direction as the leather grain, if visible. Rinse your microfiber towel frequently in clean water and wring it out well to avoid re-depositing dirt back onto the leather. Continue wiping until no more dirt or cleaner residue is visible.
5. Allow to Dry Completely
Let the leather seats air dry completely before applying conditioner. This may take 20-30 minutes depending on humidity and temperature. Avoid direct sunlight or heat, which can dry out the leather too quickly. Ensure the seats are fully dry to the touch before proceeding to the next step.
6. Apply Leather Conditioner
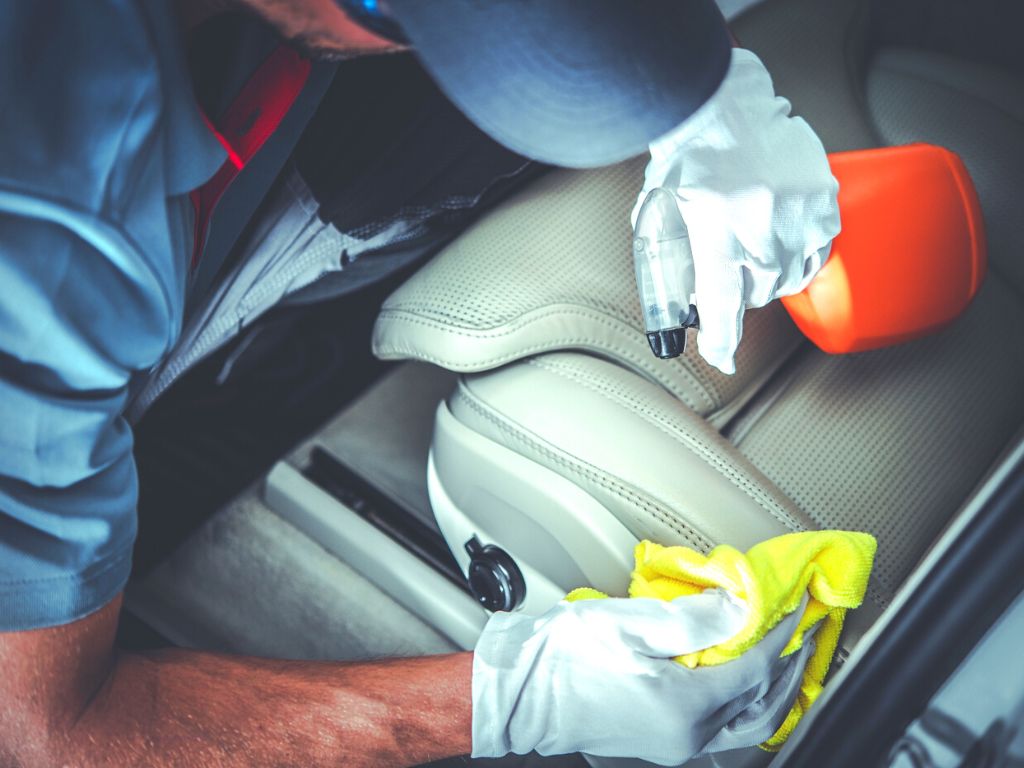 condition leather seats
Alt text: Applying leather conditioner to a car seat with a microfiber applicator pad, showcasing the moisturizing process.
Once the seats are dry, apply a leather conditioner to nourish and protect the leather. Apply a small amount of conditioner to a clean microfiber applicator pad or towel and gently massage it into the leather in circular motions. Ensure even coverage across the entire seat surface.
7. Buff off Excess Conditioner
Allow the conditioner to absorb into the leather for a few minutes (check product instructions for recommended time). Then, use a clean, dry microfiber towel to buff off any excess conditioner. Buffing helps to create a non-greasy finish and enhances the leather’s natural shine. Your leather seats should now feel supple, soft, and rejuvenated.
Choosing the Right Leather Car Seat Cleaner: Store-Bought vs. DIY
When it comes to choosing a leather car seat cleaner, you have two main options: store-bought products and DIY solutions. Both have their advantages and disadvantages.
Store-Bought Leather Cleaners: Pros and Cons
Pros:
- Specifically Formulated: Designed specifically for leather, ensuring effective cleaning without damage.
- Convenience: Ready to use, no mixing or preparation required.
- Added Benefits: Many store-bought cleaners also contain conditioning agents or UV protectants.
- Variety of Options: Wide range of brands and types to choose from, catering to different needs and budgets.
Cons:
- Cost: Can be more expensive than DIY options.
- Chemical Content: Some may contain harsh chemicals that could be harmful or have strong odors.
- Potential for Residue: Some cleaners may leave residue if not used correctly.
Examples of Store-Bought Leather Cleaners:
- Leather Honey Leather Cleaner: Known for its thick, honey-like texture, effective for restoration and gentle on leather.
- Chemical Guys Sprayable Leather Cleaner and Conditioner: A popular 2-in-1 option, pH-balanced to clean and condition simultaneously.
- Carfidant Ultimate Leather Cleaner: A milder cleaner, dye-free and scent-free, suitable for sensitive individuals.
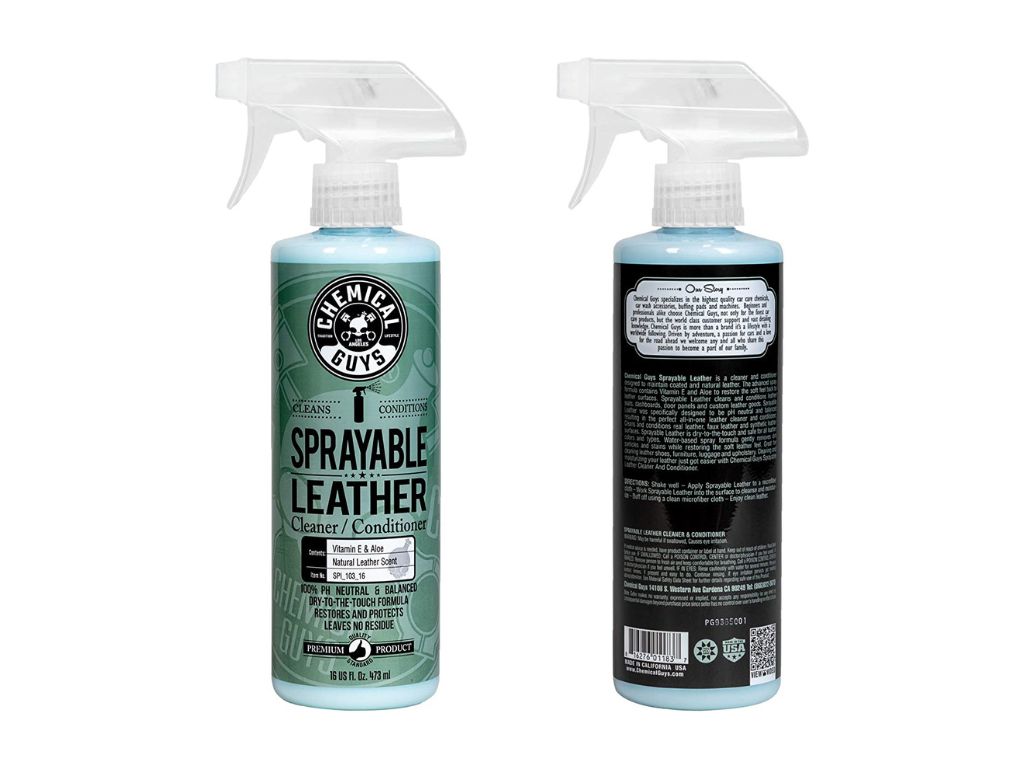 chemical guys sprayable leather cleaner
Alt text: Chemical Guys Sprayable Leather Cleaner and Conditioner bottle, showcasing a popular store-bought leather cleaning product.
DIY Leather Cleaners: Pros and Cons
Pros:
- Cost-Effective: Uses common household ingredients, making them very budget-friendly.
- Natural Options: Often use natural ingredients like vinegar or baking soda, appealing to those seeking eco-friendly solutions.
- Control over Ingredients: You know exactly what’s going into your cleaner, avoiding harsh chemicals.
Cons:
- Less Effective for Heavy Stains: May not be as powerful as store-bought cleaners for tough stains or heavily soiled leather.
- Requires Mixing: Involves mixing ingredients, which can be less convenient.
- Potential for Damage if Incorrectly Mixed: Incorrect ratios or ingredients can potentially damage leather.
Examples of DIY Leather Cleaners:
- Vinegar and Water Solution: A mild solution of equal parts white vinegar and water can be effective for light cleaning.
- Baking Soda Paste: A paste of baking soda and water can help absorb odors and lift some stains (conditioner is essential afterward).
- Rubbing Alcohol (for Stain Spot Treatment): Use sparingly on a cotton ball to blot out ink or dye stains, followed by a mild soap and water solution and conditioning.
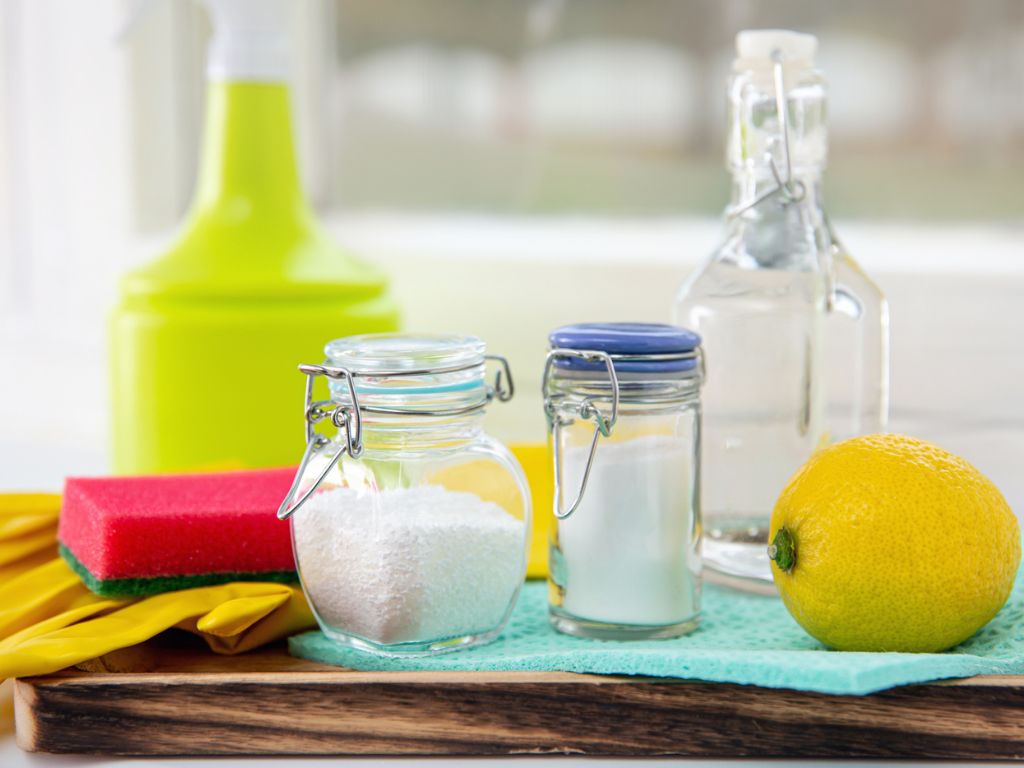 diy leather cleaners
Alt text: Common household items used for DIY leather cleaning, including vinegar, baking soda, and microfiber cloths.
Important Note: Always test any cleaner, whether store-bought or DIY, in an inconspicuous area of your leather seat first to check for colorfastness or any adverse reactions.
Maintaining Your Leather Car Seats: Conditioning and Preventative Care
Cleaning is only half the battle. To truly keep your leather car seats in top condition, regular conditioning and preventative care are just as important.
Leather Conditioning: Why It’s Crucial
Leather conditioner replenishes the natural oils in leather that are lost over time due to cleaning, sun exposure, and daily use. Conditioning:
- Prevents Drying and Cracking: Keeps leather supple and flexible, preventing cracks and wrinkles.
- Protects from Wear and Tear: Creates a protective barrier against friction and everyday wear.
- Enhances Softness and Feel: Restores the luxurious feel of leather.
- Prolongs Leather Lifespan: Extends the life of your leather seats by keeping them healthy and resilient.
Examples of Store-Bought Leather Conditioners:
- Obenauf’s Heavy Duty LP: An all-natural conditioner with oils to protect against cracks and tears, ideal for heavy-duty protection.
- Bick 4 Leather Conditioner: A popular choice that doesn’t darken leather and is wax-free, maintaining the original color and breathability.
- Meguiar’s G18616 Gold Class Leather Conditioner: Combines moisturizing oils and aloe with UV protection to prevent aging and fading.
 bick 4 leather conditioner
Alt text: Bick 4 Leather Conditioner bottle, highlighting its feature of not darkening leather and being wax-free.
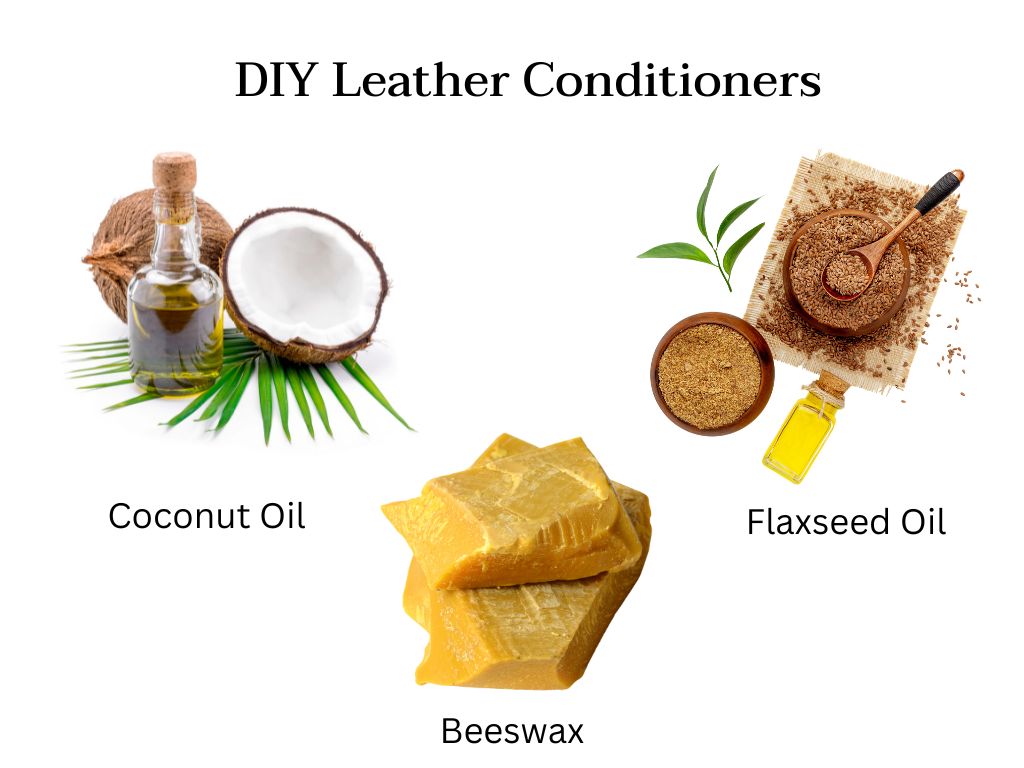
DIY Leather Conditioners:
- Coconut Oil: A natural moisturizer that can penetrate leather and restore its suppleness (use sparingly to avoid greasiness).
- Beeswax Leather Conditioner: Provides antifungal protection and water resistance (often combined with oils like coconut or linseed oil).
- Flaxseed Oil: Absorbs well and provides a shine, offering humidity protection.
 diy leather conditioners
Alt text: Natural DIY leather conditioners, including coconut oil and beeswax, representing eco-friendly leather care options.
Preventative Care Tips:
- Regular Cleaning Schedule: Aim to clean and condition your leather seats every 2-3 months, or more frequently if you have light-colored leather or heavy use.
- Park in Shade: Whenever possible, park your car in shaded areas or use a sunshade to minimize UV exposure, which can dry out and fade leather.
- Avoid Sharp Objects: Be mindful of sharp objects that could scratch or puncture the leather.
- Promptly Clean Spills: Address spills immediately to prevent staining. Blot spills gently, don’t rub.
Conclusion: Love Your Leather Seats
Maintaining your leather car seats doesn’t have to be a chore. By following these steps and incorporating regular cleaning and conditioning into your car care routine, you can keep your leather seats looking and feeling luxurious for years to come. Remember, consistent care is key to preserving the beauty and value of your car’s interior.
If you prefer professional care or have heavily soiled leather seats, consider seeking professional car detailing services. Professionals have the expertise and specialized products to handle even the toughest leather cleaning challenges.
Key Takeaways for Leather Car Seat Cleaning:
- Regular Vacuuming: Start with vacuuming to remove loose dirt.
- Gentle Cleaning: Use a dedicated leather car seat cleaner and a soft brush.
- Thorough Wiping: Wipe away cleaner and dirt with a damp microfiber towel.
- Conditioning is Essential: Always follow cleaning with a leather conditioner.
- Preventative Care: Regular cleaning, conditioning, and protection from sun and damage will prolong the life of your leather seats.
FAQs About Leather Car Seat Cleaners
What Should You NOT Use to Clean Leather Car Seats?
Avoid harsh chemicals like bleach, ammonia, dish soap (unless heavily diluted and followed by conditioning), and abrasive cleaners. These can strip the leather’s natural oils, causing damage and discoloration. Also, avoid excessive water, which can soak into the leather and cause damage.
Can You Use Car Wax on Leather Seats?
No, car wax is not designed for leather and should not be used on leather seats. Car wax can clog the leather pores, preventing it from breathing and leading to dryness and cracking. Use a dedicated leather conditioner instead.
How Often Should You Clean Leather Seats?
For dark-colored leather, cleaning every 3-4 months is generally sufficient. Light-colored leather may require more frequent cleaning, perhaps once a month, due to showing dirt more easily. Adjust frequency based on usage and environmental conditions.
How Do I Prevent Leather Seats from Cracking?
Regular conditioning is the most effective way to prevent leather seats from cracking. Conditioner keeps the leather moisturized and supple. Additionally, protect your car interior from excessive sun exposure and avoid extreme temperature fluctuations.