The Toyota 4Runner, especially the 5th generation, is a fantastic SUV known for its off-road capabilities and ruggedness. However, one common complaint among owners is the dim, amber-colored factory interior lighting. If you find the stock interior lights of your 4Runner lacking in brightness, especially at night, upgrading to LED interior lights can make a significant difference. This guide will walk you through replacing your 4Runner’s interior bulbs with much brighter and energy-efficient LEDs.
A simple LED swap can transform the entire feel of your Toyota 4runner Interior, making it more modern and functional. This upgrade is a straightforward DIY project that most owners can tackle with basic tools and a little patience. We’ll cover replacing the door lights, rear dome lights, the main dome light, and the map lights, providing step-by-step instructions and images to guide you through each process.
Tools and Parts You’ll Need
Before you begin, gather these essential tools and parts:
- LED Interior Light Kit: Purchase a set specifically designed for the 5th Gen Toyota 4Runner. Kits are readily available online and typically include all the necessary LED bulbs for the doors, dome, and map lights. A popular and reliable source mentioned by 4Runner enthusiasts is member csjumper2003 on tacomaworld.
- Interior Pry Tool or Small Screwdriver: A plastic pry tool is ideal to avoid scratching interior trim, but a small standard screwdriver can also work carefully.
- Patience: Take your time, especially when working with delicate plastic clips and connectors.
Replacing the 4Runner Door Lights with LEDs
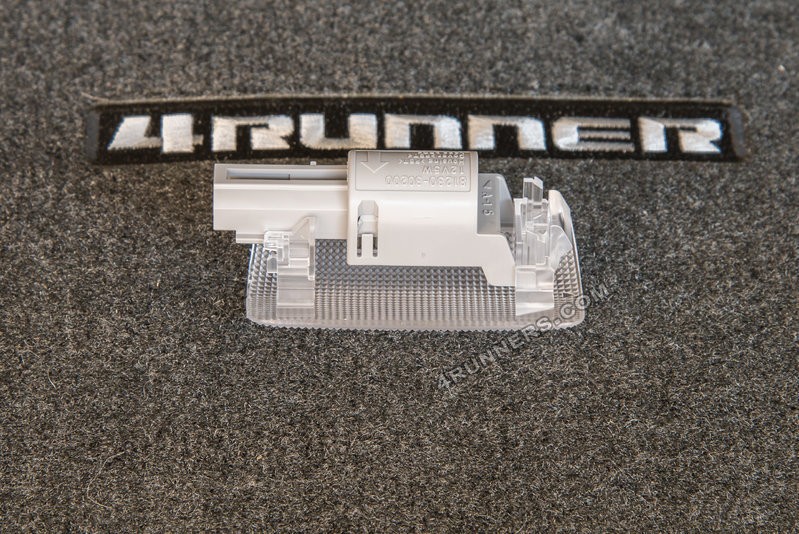
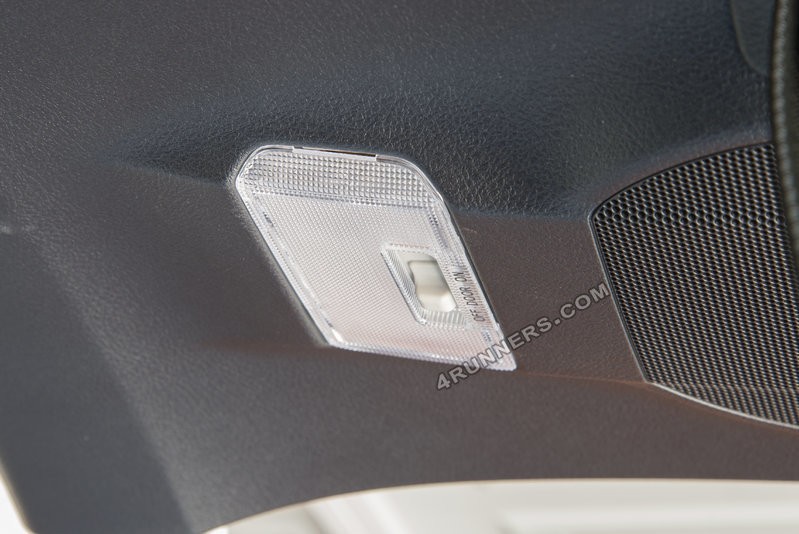
The factory door lights in the 4Runner are notoriously dim. Upgrading these to LEDs dramatically increases visibility when entering and exiting your vehicle at night.
-
Prying Open the Light Assembly: Begin by using your pry tool or screwdriver to gently pry open the light assembly. Focus on the mid-part of the light, on the side edge.
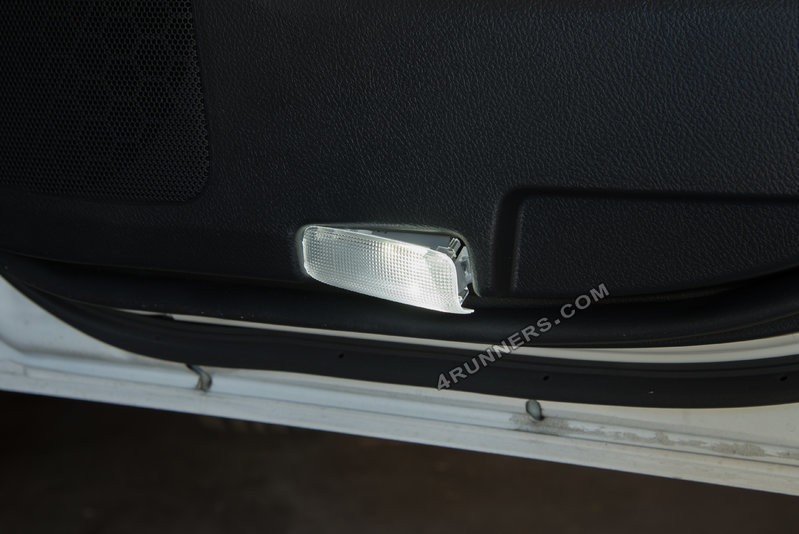 Prying open the Toyota 4Runner door light assembly to access the bulb for LED replacement.
 -
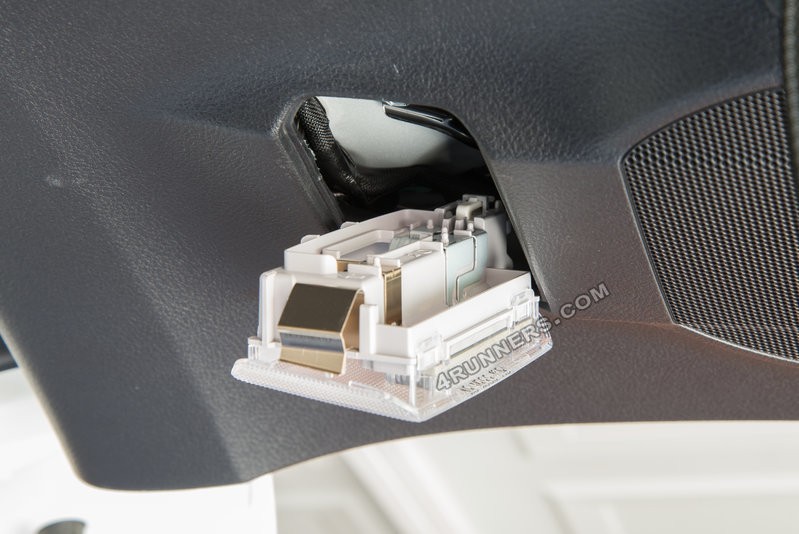
Popping Loose the Assembly: Once you pry in the right spot, the entire light assembly will pop loose from the door panel.
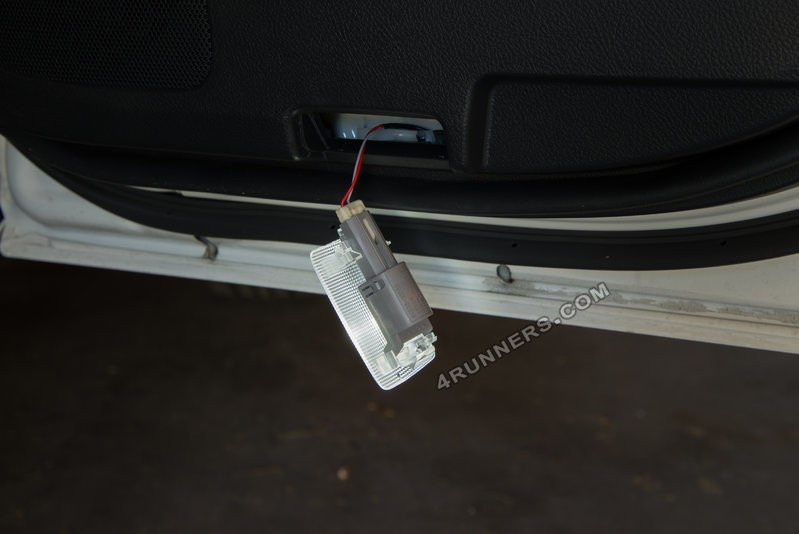 Toyota 4Runner door light assembly popped loose from the door panel after prying with a tool.
 -
Disconnecting the Power Clip: Carefully disconnect the power clip from the back of the light assembly.
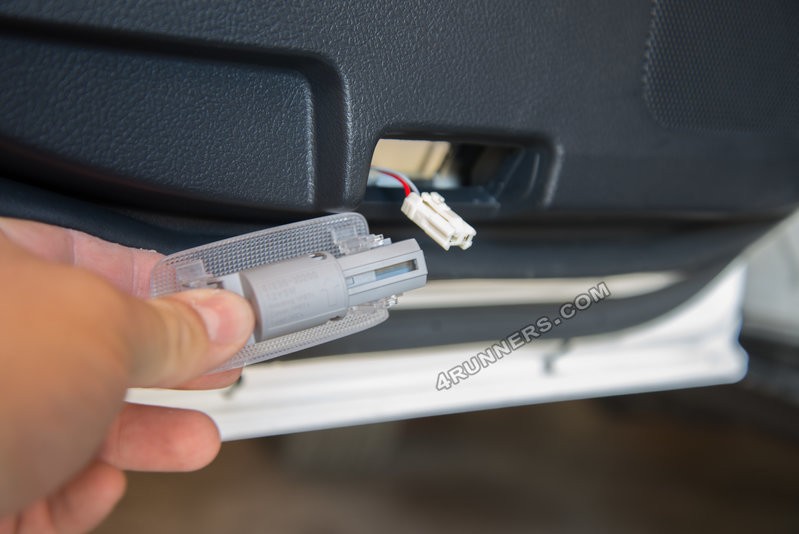 Disconnecting the power connector from the Toyota 4Runner door light assembly before bulb removal.
 -
Separating the Housing and Cover: Locate a small tab on the side of the light assembly. Pry up this tab to slide and separate the grey part of the housing from the clear cover.
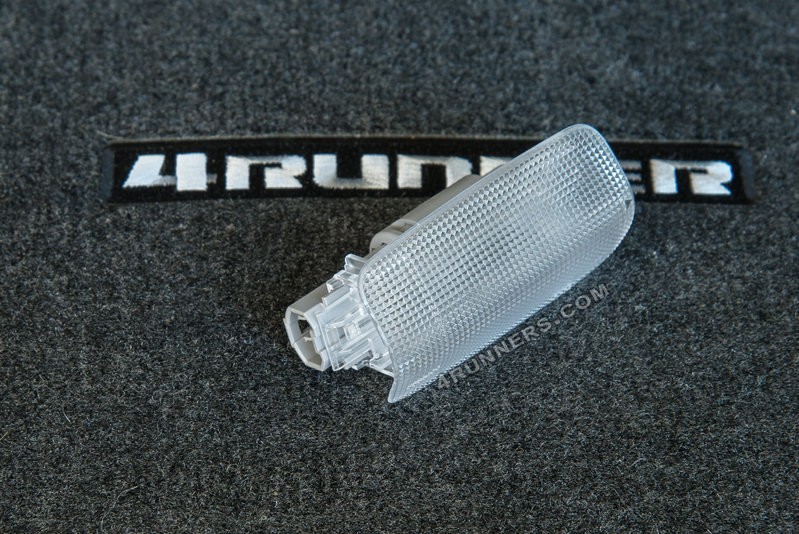 Prying the tab to separate the grey housing from the clear cover of the Toyota 4Runner door light.
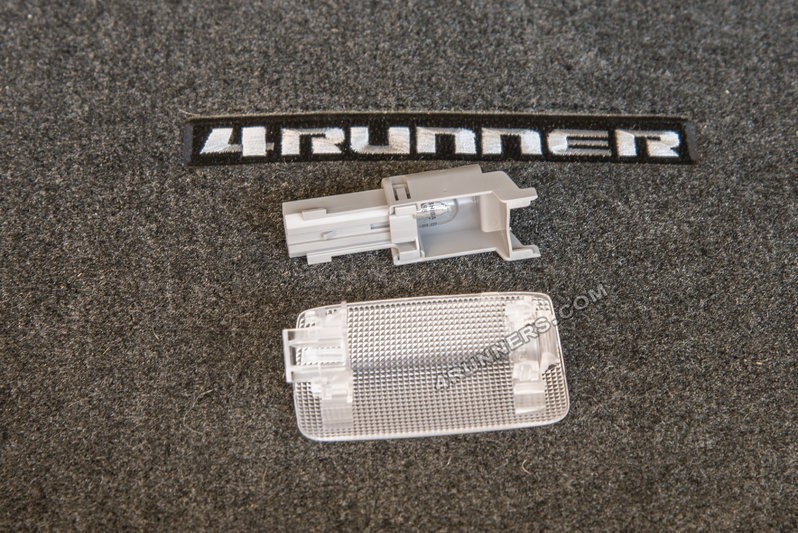 Sliding the grey housing and clear cover apart after releasing the tab on the 4Runner door light.
 -
Accessing the Stock Bulb: Gently pop off the grey hood to finally gain access to the factory bulb.
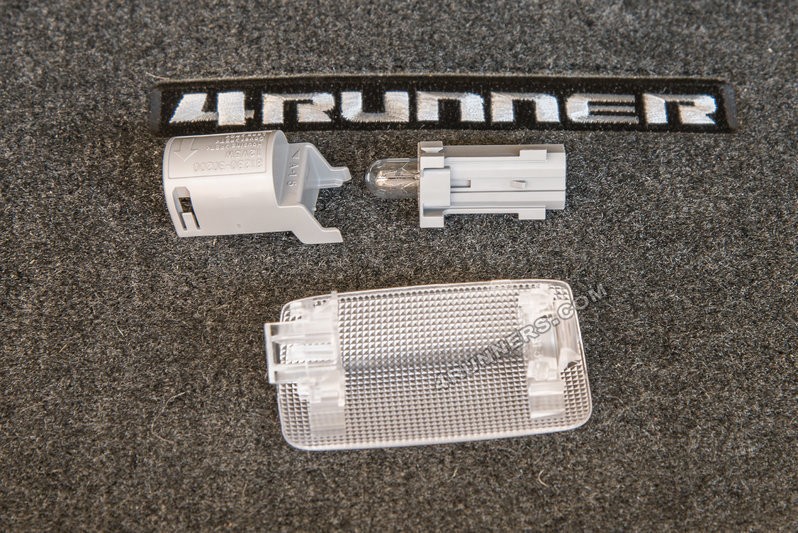 Accessing the stock bulb inside the Toyota 4Runner door light assembly after removing the cover.
 -
Removing the Stock Bulb and Inserting the LED: Pull out the old, stock bulb and replace it with the new LED bulb.
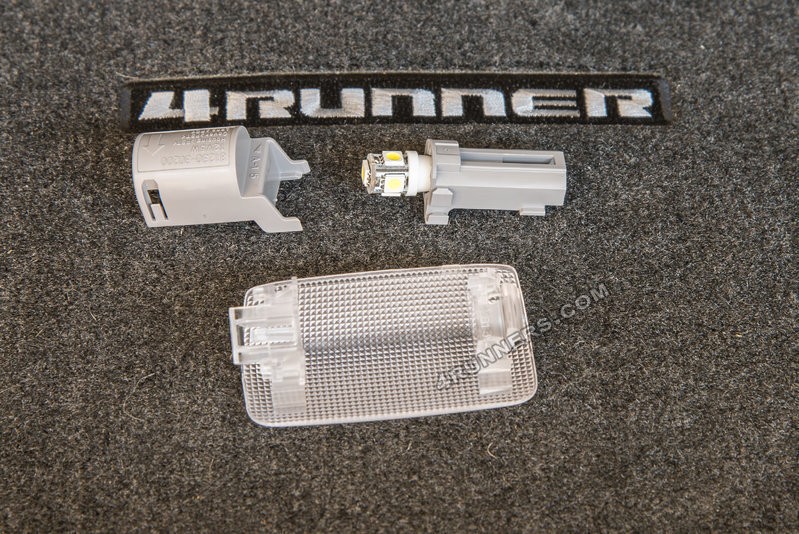 Replacing the stock bulb with a new LED bulb in the Toyota 4Runner door light assembly.
 -
Testing the LED: Before reassembling, reconnect the power clip and test the LED to ensure it lights up. LEDs are polarity sensitive, meaning they only work in one direction. If it doesn’t light, remove the LED, rotate it 180 degrees, and reinsert it. Test again. This step is crucial to avoid redoing the installation later.
-
Reassembling the Light: If the LED works, pop the grey hood back onto the assembly.
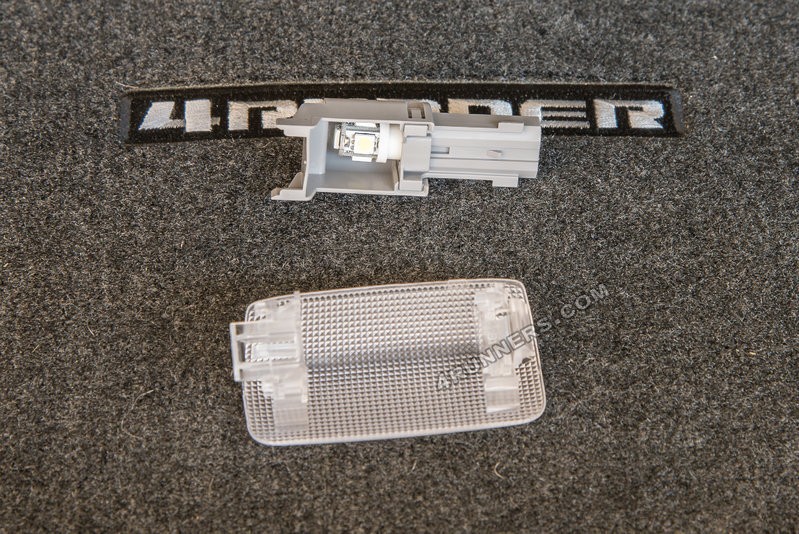 Reattaching the grey hood to the Toyota 4Runner door light assembly after LED bulb installation.
 -
Reattaching the Cover: Reattach the clear cover to the assembly, ensuring it clicks securely into place.
 Reattaching the clear cover to the Toyota 4Runner door light assembly, completing the bulb replacement.
 -
Reconnecting and Reinstalling: Reconnect the power cable and reinstall the light assembly back into the door panel. Insert the left side first, then push the right side until it pops back into place. Repeat this process for the remaining three doors. Once you’ve done one, the others will be much quicker.
Upgrading the Rear Door Dome Lights to LED
Next, we’ll tackle the rear door dome lights, which are equally simple to replace.
-
Prying the Rear Dome Light Assembly: For the rear door dome lights, use your pry tool or screwdriver to push upwards on the driver’s side edge of the light assembly. This action will push back a metal clip that secures the light.
 Prying the edge of the Toyota 4Runner rear door dome light to release the metal clip.
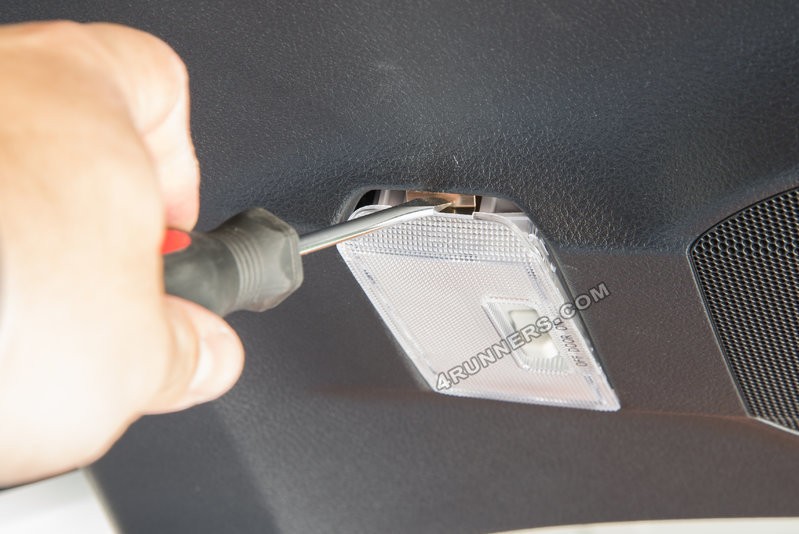 Close-up showing the pry tool pushing the metal clip to release the Toyota 4Runner rear dome light.
 -
Sliding Out the Assembly: Once the clip is released, the light assembly will slide out, hanging by its power cable.
 Toyota 4Runner rear door dome light assembly sliding out after clip release, hanging by power cable.
 -
Removing the Cover: Pop off the clear cover of the dome light assembly. There are typically four tabs around the edge holding it in place. Be careful as these tabs can be somewhat fragile.
-
Accessing and Replacing the Bulb: Inside, you’ll see the bulb held in place by two points. One of these points is flexible. Push down on the flexible tab to release the bulb. In this case, it’s usually the tab on the bottom.
 Accessing the bulb in the Toyota 4Runner rear door dome light by pushing the flexible tab.
 -
Inserting the LED and Testing: Insert the LED bulb, making sure the LEDs are facing outwards for optimal light distribution. Test the light by flipping the switch to the “on” position. If it doesn’t light, reverse the LED’s polarity.
-
Reassembling and Reinstalling: Once tested, reattach the clear cover and reinstall the assembly. Insert the power cable side first, then press the side with the metal clip back into place until it pops in. Repeat for the other rear door dome light.
Replacing the Interior Dome Light with LED
The main interior dome light is also straightforward to upgrade.
-
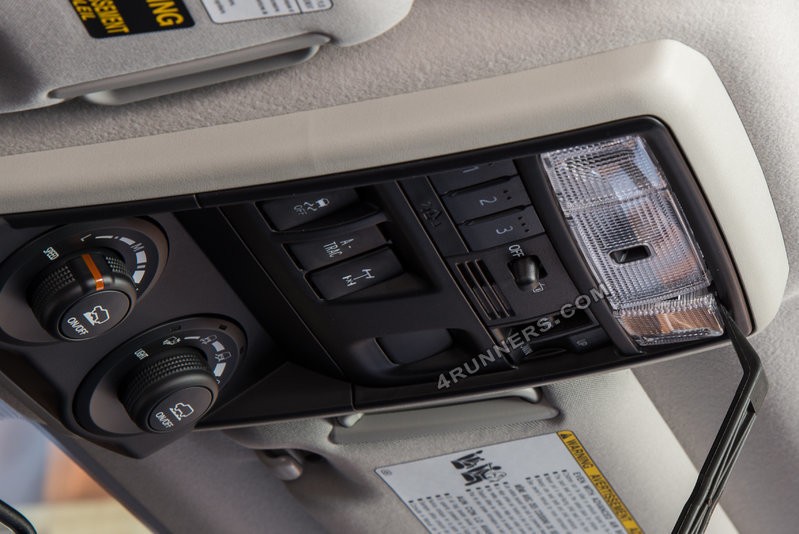
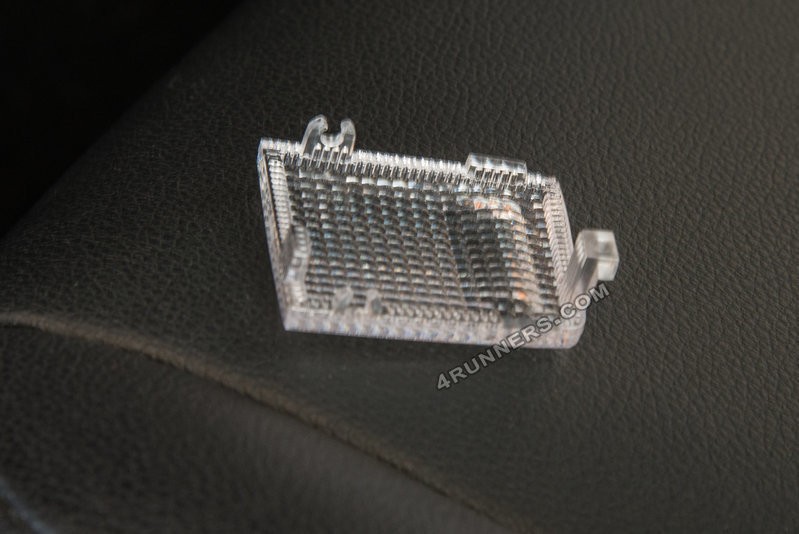
Removing the Cover: For the interior dome light, only the cover needs to be removed. Locate the two spots on the side of the cover facing the front of the 4Runner, near the switch. Use your pry tool or screwdriver in these spots to pop the cover off. The light assembly itself stays mounted to the ceiling.
 Prying the cover of the Toyota 4Runner interior dome light near the switch to remove it.
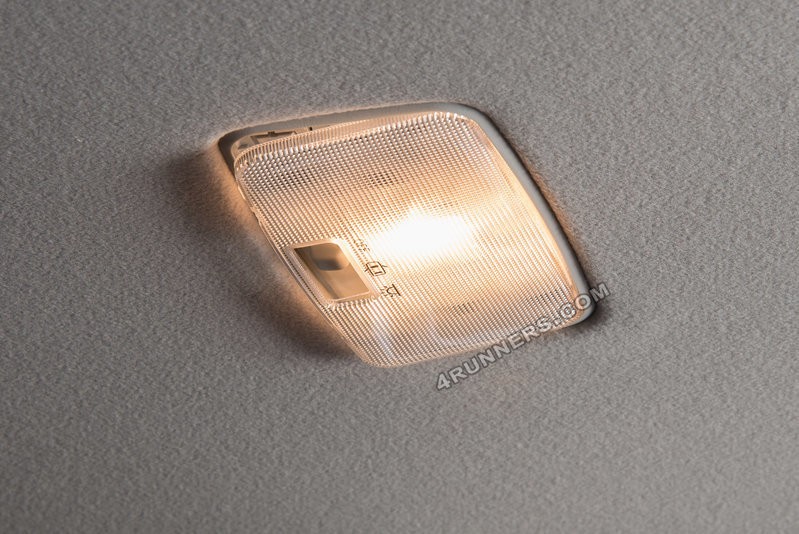 Close-up of prying point on the Toyota 4Runner interior dome light cover for removal.
 -
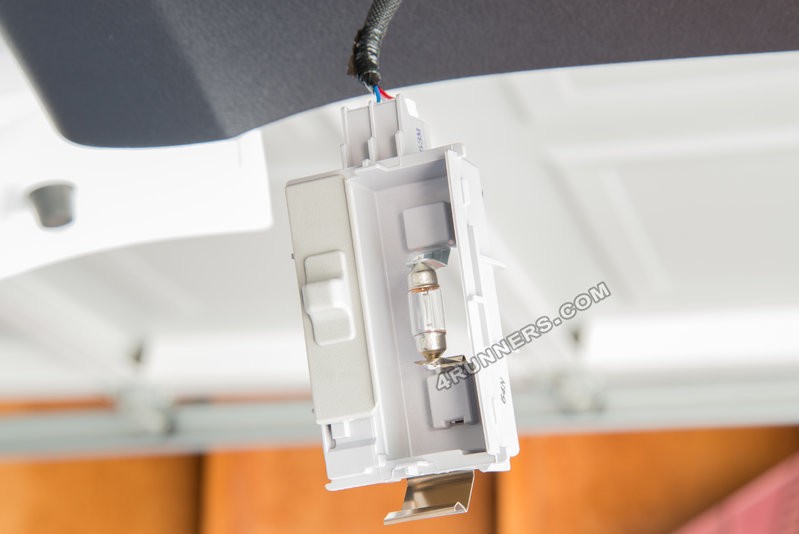
Accessing and Replacing the Bulb: Similar to the rear dome lights, the bulb is held by a flexible metal tab inside. It can be a tight space, especially for larger hands. Carefully remove the stock bulb and insert the LED replacement.
-
Testing and Reassembling: Test the LED by turning the dome light switch on. If it works, simply pop the cover back into place.
 Reattaching the cover of the Toyota 4Runner interior dome light after LED bulb replacement.
Upgrading the Map Lights to LED
The map lights are a bit trickier but still manageable with a little extra effort.
-
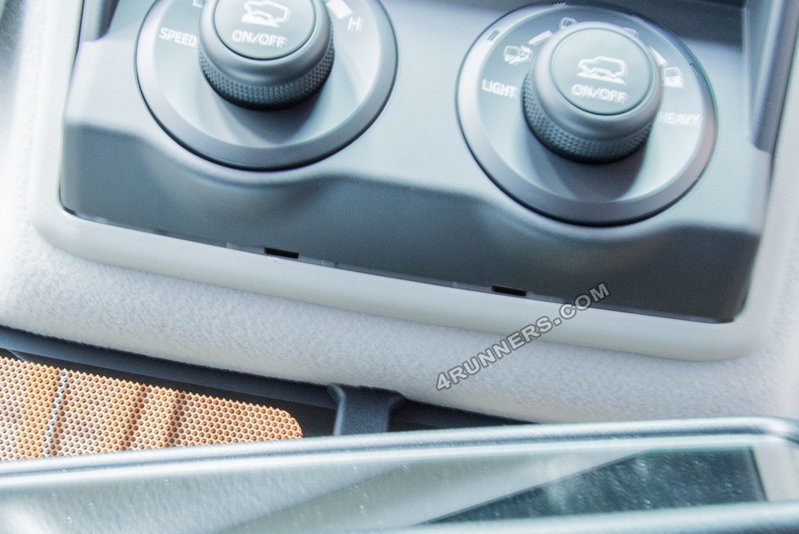
Prying the Map Light Console: Start by using your pry tool or screwdriver on the side of the map light console closest to you (towards the rear of the vehicle).
 Prying the map light console of the Toyota 4Runner from the side closest to the user.
 -
Removing the Console Section: This action will remove a small section of the console.
 Removed section of the Toyota 4Runner map light console, revealing access to bulbs.
 -
Accessing the Bulbs (Optional Method – Difficult): Ideally, you could reach up into the console and pull the bulbs out directly. However, space is very limited. Tools like needle-nose pliers (wrapped in electrical tape to protect the bulbs) or sticky tape can be attempted, but often prove difficult.
-
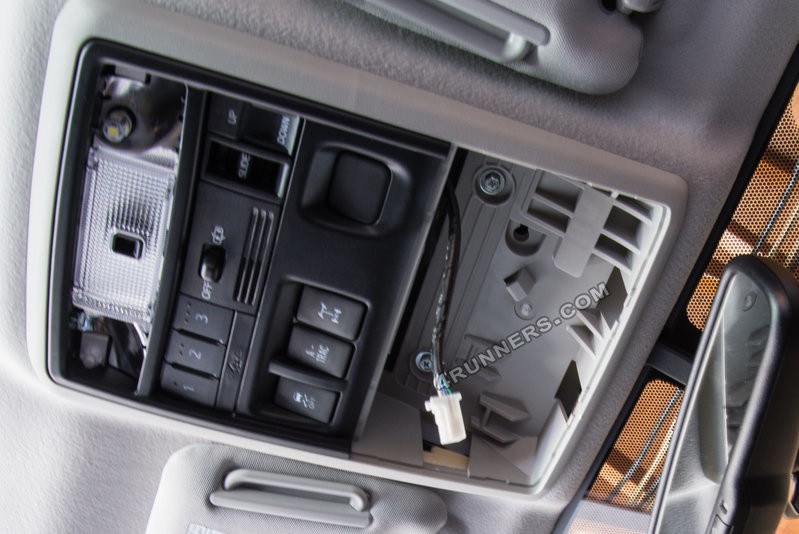
Removing the Upper Console (Recommended Method): For easier access, it’s recommended to remove the upper console. Start on the windshield side of the crawl control box. There are two openings where you can pry downwards.
 Prying down on the openings near the windshield side of the crawl control box in Toyota 4Runner.
 -
Lowering the Crawl Control Box: The crawl control box will come down. Disconnect it and set it aside temporarily.
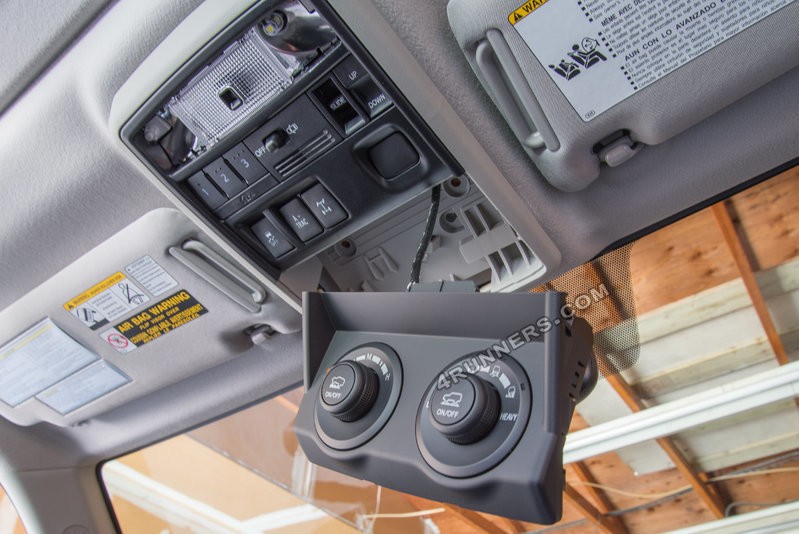 Lowered crawl control box in Toyota 4Runner, disconnected and set aside for console removal.
 -
Removing Bolts: You’ll find two bolts (likely 8mm) in the openings where the crawl control box was located. Undo these bolts.
 Removing bolts in the opening where the crawl control box was, to detach the Toyota 4Runner console.
 -
Pulling Down the Console: Now, gently pull down the console. It’s held in place by two connectors. Don’t pull too forcefully as there’s a cable still attached. You should now have enough space to access the map lights.
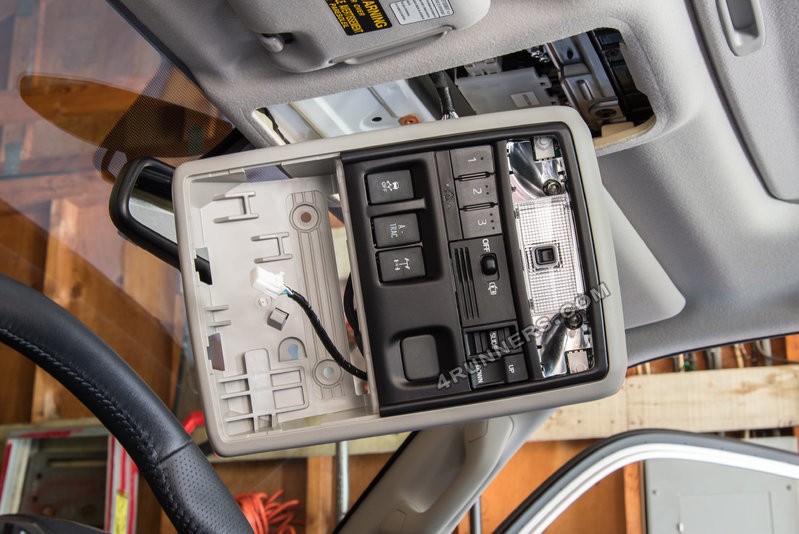 Loosened upper console in Toyota 4Runner, providing access to map lights for bulb replacement.
 -
Replacing the Map Light Bulbs: On the backside of the console, locate the black connectors for the map lights. Turn them about a half turn to remove them along with the installed bulbs.
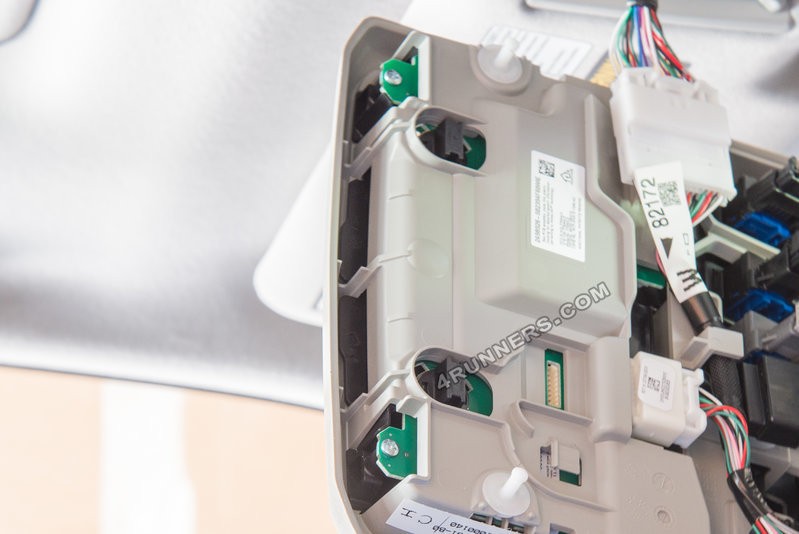 Removing black connectors to access map light bulbs from the backside of Toyota 4Runner console.
 -
Inserting LEDs and Testing: Insert the LED bulbs into the connectors. Critically, test them before reassembling everything to avoid extra work.
-
Reinstalling the Console: If the LEDs work, reinstall the upper console in reverse order of removal.
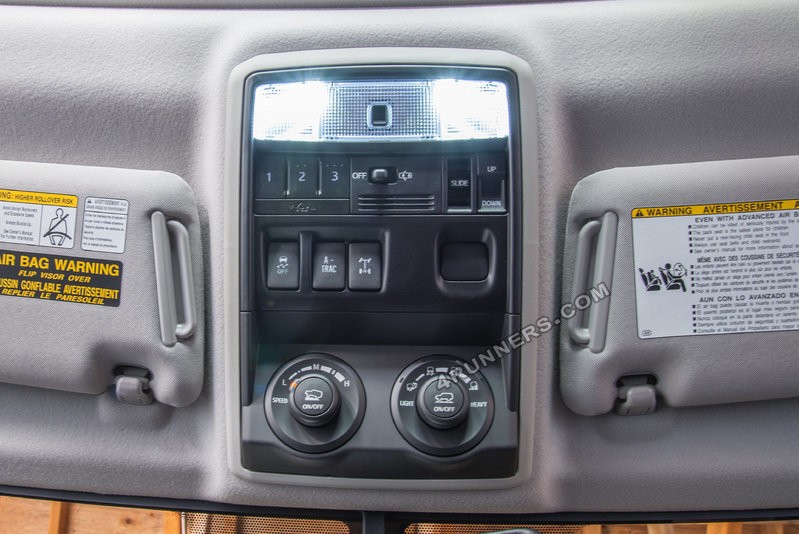 Reinstalling the upper console in Toyota 4Runner after replacing map light bulbs with LEDs.
Enjoy Your Brighter Toyota 4Runner Interior
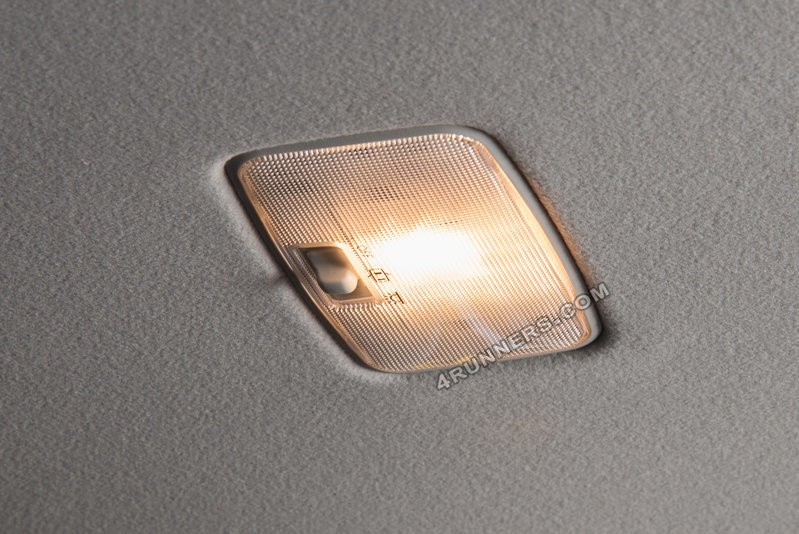
After completing these steps, you’ll immediately notice a significant improvement in your Toyota 4Runner interior lighting. The brighter LED lights provide better visibility and a more modern look.
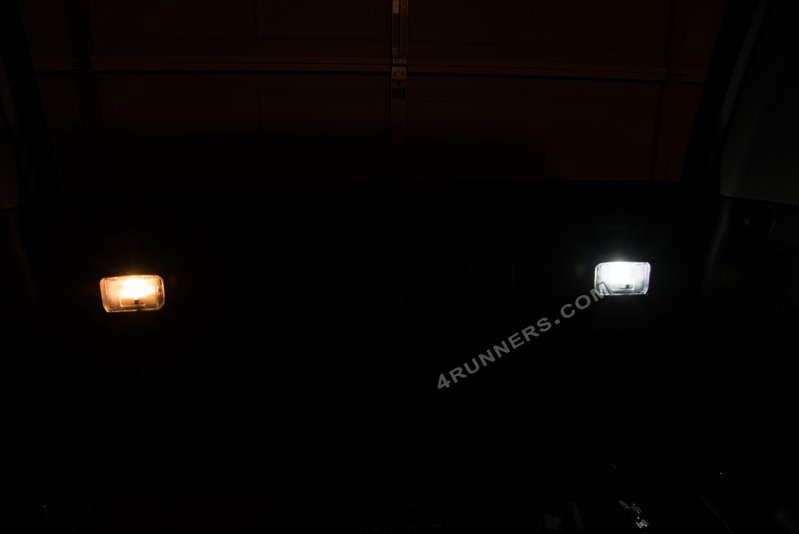 Comparison of stock amber interior light and upgraded bright white LED interior light in Toyota 4Runner.
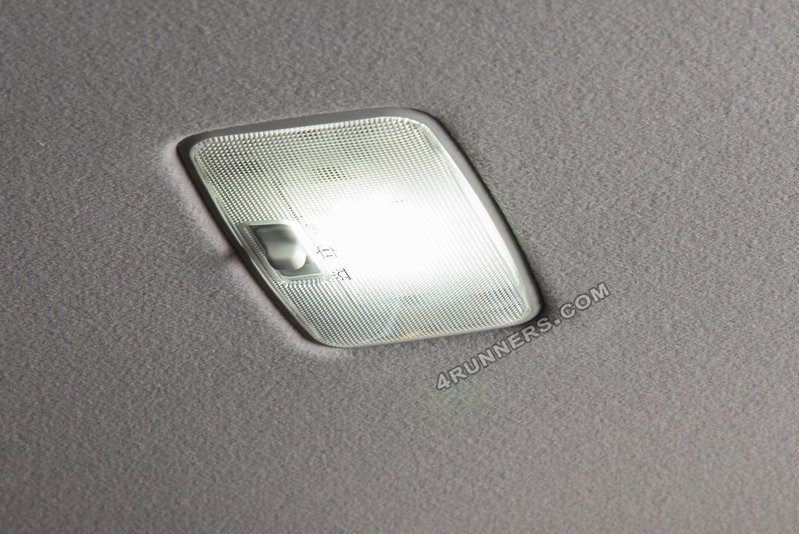
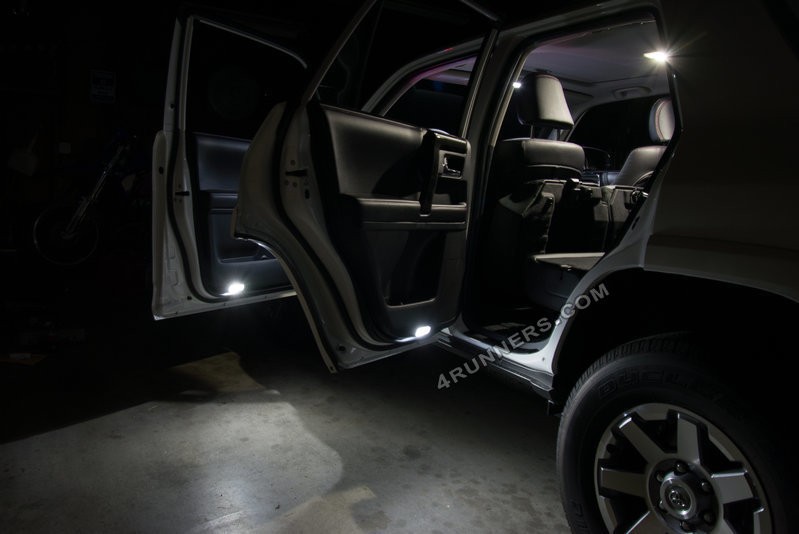 Close-up of upgraded bright white LED interior lights in Toyota 4Runner, showcasing improved illumination.
 Front interior view of Toyota 4Runner with upgraded bright white LED lights, enhancing overall cabin ambiance.
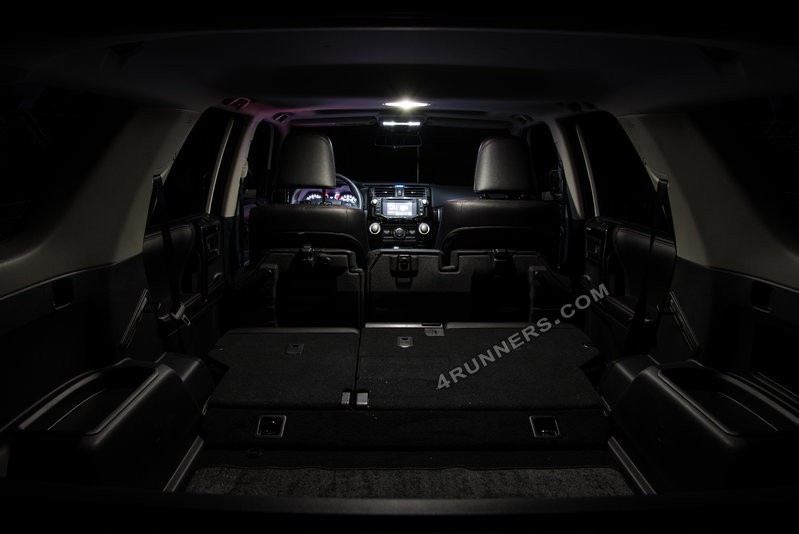 Rear interior view of Toyota 4Runner showcasing the difference after LED interior light upgrade, brighter and more modern.
Upgrading your Toyota 4Runner interior lights to LED is a worthwhile and relatively easy modification that enhances both the functionality and aesthetics of your vehicle’s interior. Enjoy the brighter, more inviting cabin!