As a car owner, understanding your vehicle’s health is becoming increasingly accessible, thanks to On-Board Diagnostics II (OBD2) scanners. These handy devices empower you to read trouble codes, understand check engine lights, and gain insights into your car’s systems. But before you can unlock this diagnostic power, you need to know the crucial first step: where to plug in your OBD2 scanner.
Fortunately, locating the OBD2 port in your car is usually straightforward. For almost all passenger vehicles manufactured since 1996, the OBD2 port is standardized for easy access. This article will guide you to find this port and confidently connect your OBD2 scanner, setting you on the path to understanding your vehicle better.
Locating Your OBD2 Port: Common Locations and Helpful Tips
The most common location for the OBD2 port is under the driver’s side dashboard. Specifically, it’s typically situated within a few inches of the steering column, making it easily accessible from the driver’s seat. You’ll be looking for a 16-pin, trapezoid-shaped female connector.
 OBD2 port location under dashboard
Alt text: Locating the OBD2 port under the driver’s side dashboard, a trapezoidal 16-pin connector for automotive diagnostics.
To pinpoint it:
- Look Under the Dash: Get down at eye level with the pedals and look upwards under the dashboard on the driver’s side.
- Near the Steering Column: The port is usually in the vicinity of the steering column.
- Trapezoid Shape: Identify the distinctive trapezoidal shape of the 16-pin connector. It’s designed to only allow the OBD2 scanner to plug in one way.
While the driver’s side under the dashboard is the most common placement, there are a few other potential locations to check if you don’t find it immediately:
- Center Console: In some vehicle models, particularly those with more sporty or compact designs, the OBD2 port might be located in the center console. Check inside storage compartments or on the lower part of the console facing the seats.
- Passenger Side Dashboard: Less frequently, but still possible, the OBD2 port could be found under the passenger side dashboard. Mirror your search on the passenger side if you can’t locate it on the driver’s side.
- Behind a Panel: In rare cases, the OBD2 port might be hidden behind a small, easily removable panel. Check for a subtly outlined square or rectangular section of plastic paneling under the dash that could be concealing the port.
- Consult Your Owner’s Manual: If you’re having trouble locating the port, your vehicle’s owner’s manual is your best resource. It will usually specify the exact location of the OBD2 diagnostic port.
Helpful Tip: Use a flashlight to illuminate the area under the dashboard. This can be especially helpful in dimly lit garages or in the evening.
Step-by-Step Guide: Plugging In Your OBD2 Scanner
Once you’ve located the OBD2 port, connecting your scanner is a simple process:
-
Turn Off the Ignition: Ensure your vehicle’s ignition is completely turned off before plugging in the scanner. This is a standard safety precaution for most electronic devices.
-
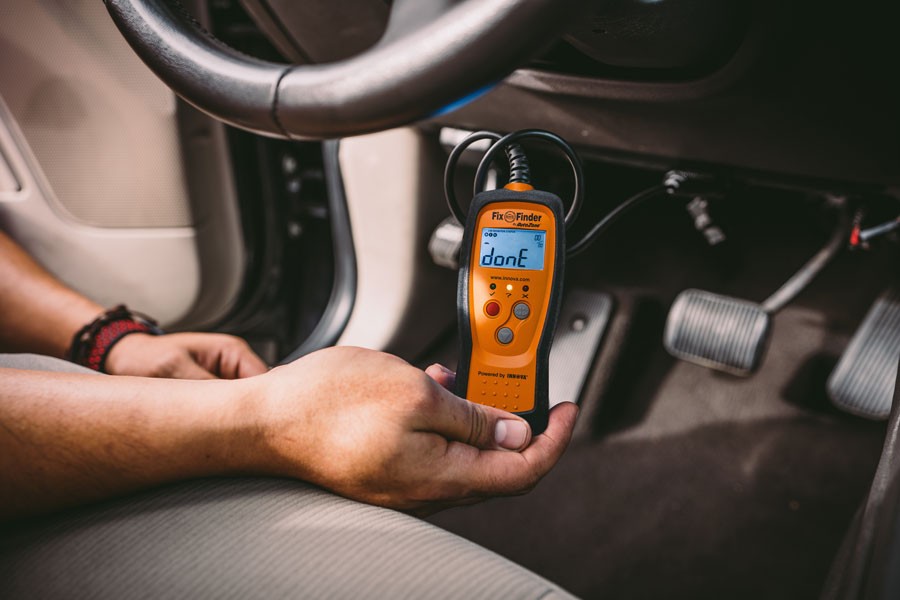
Connect the OBD2 Scanner: Take the male connector of your OBD2 scanner and carefully align it with the trapezoidal shape of the OBD2 port in your car. Gently but firmly push the two connectors together. You might feel a slight resistance and a soft click when they are properly seated. Avoid forcing it; if it doesn’t connect easily, double-check the alignment.
-
Turn the Ignition to the “ON” Position (Engine Off): Turn your key in the ignition or press the start button to the “ON” position. This will power up your car’s electronics without starting the engine.
-
Wait for the Scanner to Power On: In most cases, the OBD2 port provides power to your scan tool. Wait a few moments for your scanner to boot up and initialize. If your scanner has its own power source (like batteries), ensure it is turned on.
-
Follow Scanner Instructions: Your OBD2 scanner will guide you through any further steps. This might include selecting your vehicle’s make and model, entering the VIN (Vehicle Identification Number), or choosing the diagnostic function you want to perform.
OBD2 port location under dashboard
Alt text: Connecting a handheld OBD2 scanner to the diagnostic port in a car, initiating vehicle system analysis.
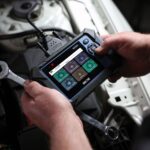
Understanding Your OBD2 Scanner Menu Options
After successfully connecting your OBD2 scanner and it has booted up, you’ll be presented with a menu on its screen. The options available will vary depending on the type of scanner you have – from basic code readers to advanced professional-grade tools. However, common menu options you’ll likely encounter include:
-
Read Codes: This is the primary function for diagnosing problems. Selecting “Read Codes” will instruct the scanner to retrieve Diagnostic Trouble Codes (DTCs) stored in your car’s computer system. These codes are alphanumeric (e.g., P0123) and point to specific areas of malfunction. The scanner may also provide a brief description of the fault associated with each code.
-
Erase Codes: Once you have addressed the issue causing a trouble code and repaired it, you can use the “Erase Codes” function to clear the DTCs from your car’s computer memory. Be cautious when using this function; only erase codes after you are confident the underlying problem has been resolved. Note that some issues may cause the codes to reappear if not properly fixed.
-
Live Data (or Data Stream): A very valuable feature, “Live Data” allows you to view real-time sensor readings from various systems in your vehicle. This data stream can include engine temperature, RPM, oxygen sensor readings, and much more. Analyzing live data can help you pinpoint intermittent problems or monitor sensor performance.
-
Freeze Frame Data: When a DTC is set, the vehicle’s computer often stores a “snapshot” of sensor readings and operating conditions at the moment the fault occurred. This “Freeze Frame” data can provide valuable context and clues to help diagnose the problem.
-
Vehicle Information (or VIN): This option typically displays basic information about your vehicle, often retrieved automatically from the car’s computer. This can include the VIN, vehicle calibration ID, and other identifying details.
-
I/M Readiness (Inspection/Maintenance Readiness): This function is particularly useful before vehicle emissions testing or smog checks. It allows you to check the status of various emissions-related systems and confirm if your vehicle is ready for testing. If any systems show as “Not Ready,” it could indicate a problem that needs to be addressed before testing.
Navigating these menus is usually done using arrow buttons and an “Enter” or “OK” button on the scanner. Many scanners also have a “Back” or “Escape” button to return to the previous menu.
Decoding OBD2 Trouble Codes: Understanding the Language of Your Car
When you use the “Read Codes” function, your OBD2 scanner will display a series of trouble codes. These codes follow a standardized format, making it possible to understand the general area of the problem. A typical OBD2 code consists of five characters: a letter followed by four numbers (e.g., P0301).
-
The First Letter: Indicates the primary system affected:
- P: Powertrain (engine, transmission, fuel system, emissions)
- B: Body (body control systems, interior, airbags)
- C: Chassis (braking system, suspension, steering)
- U: Network or Communication (communication issues between vehicle modules)
-
The Second Character (Number): Indicates whether the code is generic or manufacturer-specific:
- 0: Generic code (SAE standard), common across all manufacturers.
- 1: Manufacturer-specific code (enhanced code), unique to a particular car brand.
-
The Third Character (Number): Specifies the subsystem within the primary system indicated by the first letter. For Powertrain (P) codes:
- 1: Fuel and Air Metering
- 2: Fuel and Air Metering (Injector Circuit)
- 3: Ignition System or Misfire
- 4: Auxiliary Emission Controls
- 5: Vehicle Speed Control and Idle Control System
- 7, 8, 9: Transmission
-
The Last Two Characters (Numbers): Provide further detail about the specific fault within the identified system and subsystem. These numbers are highly specific, and you’ll need to consult a reliable OBD2 code database or repair manual to fully understand their meaning.
Example: Let’s break down the code P0301.
- P: Powertrain (engine or transmission related)
- 0: Generic code (common to all manufacturers)
- 3: Ignition System or Misfire
- 01: Specifically Cylinder 1 Misfire
Therefore, P0301 indicates a generic powertrain code related to a misfire detected in cylinder number 1.
Benefits of Knowing Where to Plug In Your OBD2 Scanner
Knowing where to plug in your OBD2 scanner and how to use it offers several advantages for car owners:
- Early Problem Detection: Regularly scanning your vehicle can help you identify potential issues early on, even before warning lights illuminate. This proactive approach can prevent minor problems from escalating into costly repairs.
- Check Engine Light Diagnosis: When the check engine light comes on, an OBD2 scanner is invaluable for quickly reading the trouble codes and understanding the potential cause of the warning.
- DIY Car Repair Savings: By diagnosing problems yourself, you can save money on diagnostic fees at a mechanic. For simpler issues, you may even be able to perform the repair yourself, saving significantly on labor costs.
- Smog Check Readiness: The I/M Readiness function helps you ensure your vehicle is likely to pass emissions testing, preventing unexpected failures and re-test fees.
- Informed Mechanic Visits: Even if you prefer professional repairs, knowing the OBD2 codes beforehand allows you to have a more informed conversation with your mechanic, understand the diagnosis, and potentially avoid unnecessary work.
By understanding where to plug in your OBD2 scanner and how to interpret the basic information it provides, you take a significant step towards becoming a more informed and proactive car owner, capable of maintaining your vehicle’s health and saving money on repairs.
FAQ/People Also Ask
How do you use OBD II scanner?
Plug the scan tool connector into the OBD2 port under your dash, turn the ignition to the “ON” position (engine off), and follow the on-screen instructions to read codes, view live data, or perform other diagnostic functions.
Does the car have to be running to use an OBD2 scanner?
No, in most cases, you can read trouble codes and access most functions with the ignition in the “ON” position but the engine off. Live data monitoring may require the engine to be running in some situations.
How do I read my OBD scanner results?
Select “Read Codes” on your scanner’s menu. The scanner will display Diagnostic Trouble Codes (DTCs). Note down these codes and use a code database or repair manual to understand their meaning. Pay attention to the code structure (letter and numbers) to identify the affected system and the nature of the problem.
Can you plug in an OBD scanner while the car is running?
While technically possible in many cases, it’s generally not recommended to plug in or unplug an OBD2 scanner while the engine is running. It’s best practice to turn the ignition to the “OFF” position before connecting or disconnecting the scanner to avoid potential electrical glitches or damage.